
My newest hobby has me delving into the art of paper cutting. These are hand-cut with a craft knife and the delicate finished pieces cast intriguing shadows. They can be cut from a single sheet of paper, or layered to create a dimensional diorama.
Tips:
1
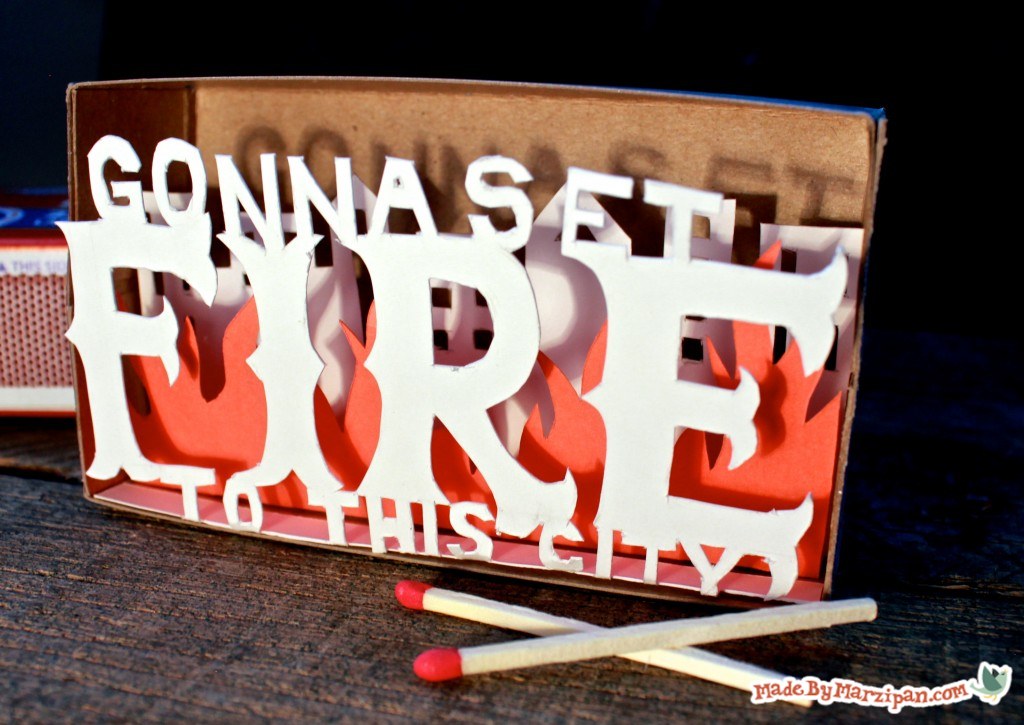
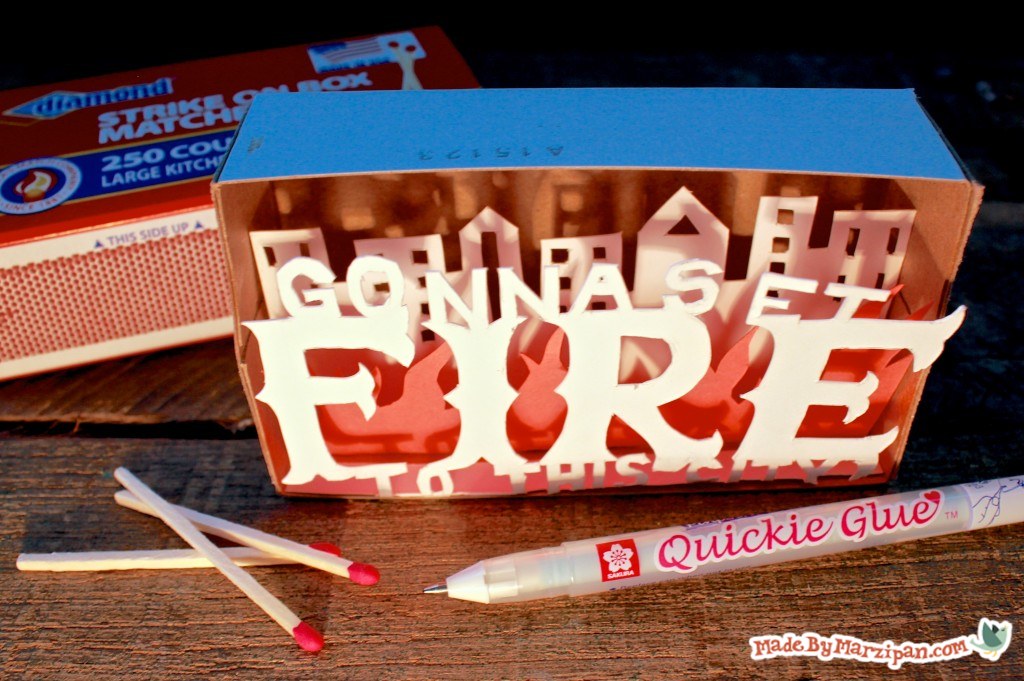
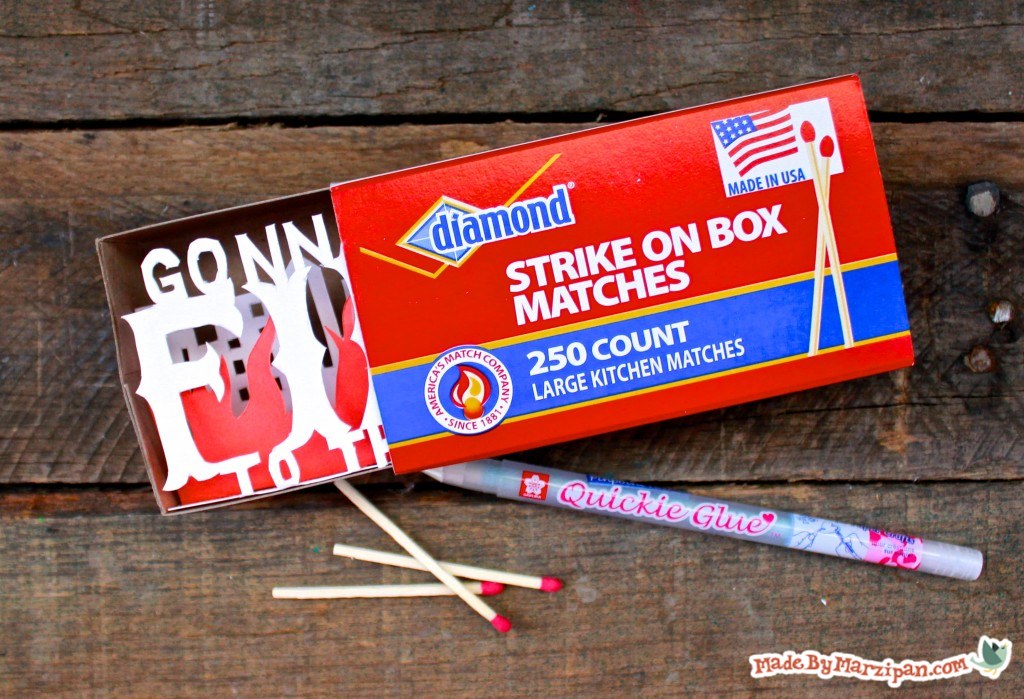
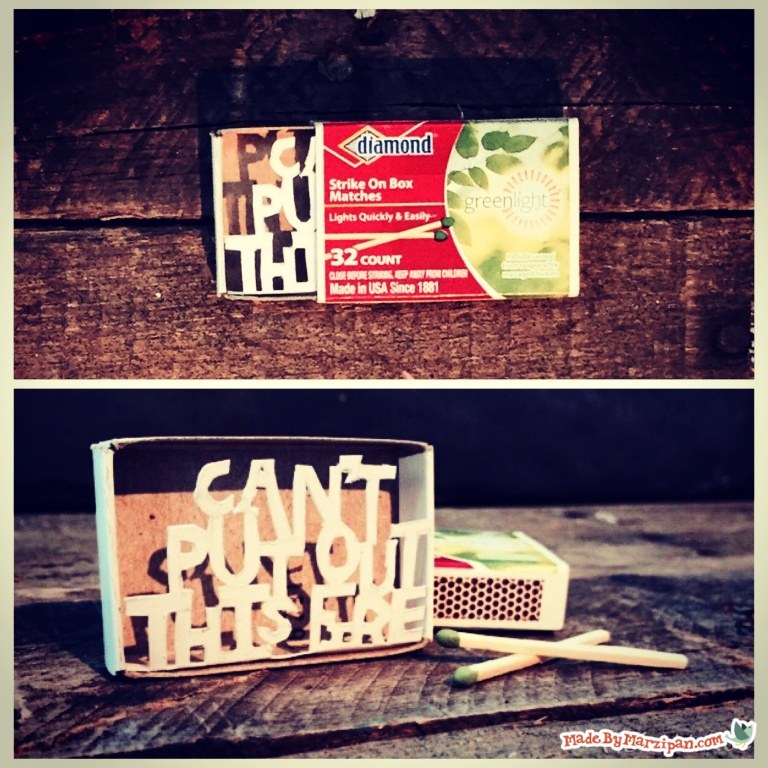
I’m using a large matchbox, mainly because the bottom of the box is smooth and makes a good background. I also like that I can slide on the cover to protect it if I want. (If you use a matchbox, please be certain to store the matches in a safe place away from children.)
2
You’ll need a transparent ruler… this one is from the dollar store.
3
You’ll need some heavy weight paper, like cardstock. I prefer this smooth Bristol paper over standard cardstock. Stiffer paper is slightly more difficult to cut, but holds up much better when erasing, so opt for a heavier paper.
4
You’ll need a pencil. My go-to pencil for lettering is Sakura’s Sumo Grip®, because I don’t need to stop to sharpen it, and it has a great extendable eraser.
5
You’ll need a craft knife. An X-acto knife works fine, or you can check your hardware store for a blade like this. They’re typically less expensive at hardware stores than craft stores.
6
Finally, you’ll need a Quickie Glue™ pen, which is really the best adhesive I’ve found for these delicate pieces. It allows for precise application with zero mess.
How to:
made with
1
Start by measuring your box to determine what size to draw your canvas. Mark this on your sheet of cardstock.
2
Make a quick thumbnail sketch of your idea. It can be an illustrated scene, hand-drawn lettering, or both. Play around with rough designs until you have a good idea of what you want your finished project to look like.
3
Sketch out your design within the canvas you drew on cardstock. If you’re doing a layered scene, first draw the layer that will be furthest toward the back of the box. Mine will be a city skyline. I’d adding rectangle tabs at the bottom. These will get folded backwards and adhered to the box, allowing the paper to stand upright.
4
Carefully put a fresh blade in your craft knife. (Please remember that these are razor-sharp, and use extreme caution at all times. Never let a child handle a craft knife.)
5
Start by cutting the interior spaces, like the windows. Always cut away from your body. I find it’s easiest to make all the cuts in one direction, then turn the paper to make all the cuts in the next direction, and so on. Some of the inserts you cut may pop out, but don’t purposely remove them yet. It’s easier to erase when they’re intact.
6
Gently erase the pencil marks.
7
Use the tip of the craft knife to lift out the inserts. Don’t ever force the paper, if it seems to be sticking, cut that area again to release it.
8
Crease the tabs behind the cut-out. Add Quickie Glue™ to the front side of each of the tabs. This goes on light blue, but dries perfectly clear. Press to the bottom of the box. I love this glue because the adhesive ends up only where you want it!
9
Now I’m ready for my second layer. I’ve decided to use some orange cardstock to cut some flames, as they’ll go along with the song lyrics I’ve chosen. I’m drawing the flames within the canvas I drew. I made this canvas ¼ inch smaller than the first, so the first will be able to peek out behind it. Add Quickie Glue to the tabs and adhere to the box.
Paper Cutting Letters
10
Drawing letters is slightly trickier. The thing you need to remember is that all of the letters need to be attached; that is, you don’t want to accidentally cut one away from the group. I’ve found it’s easiest to start at the bottom, because all the letters at the bottom will already be attached to the tab.
11
You can guesstimate where to start by writing out the text and finding the center point. Start writing the letters at the center and work out from either side.
12
Now the next row of letters has to attach to this bottom row. The letters on the end can attach to adjacent letters within the same row, as long as the two rows are connected at some point.
13
Repeat for the top row, making sure all of the letters are attached at some point. It’s a good idea to erase the points where the letters attach so you don’t accidentally cut them.
14
Again, start by slicing the interior spaces. Then cut the main areas. Erase gently, then remove the paper in the negative spaces. Add Quickie Glue™ to the tabs and press in the box.
Made By Marzipan may have received product or payment for this post. Posts may contain affiliate links. Disclosed in accordance with the Federal Trade Commission's 16 CFR, Part 255.

 Finished?
Show it off!

Hi, I like your work, very helpful tutorial, What size of blade should be used? I searched online, there are different sizes, so what size do u suggest?