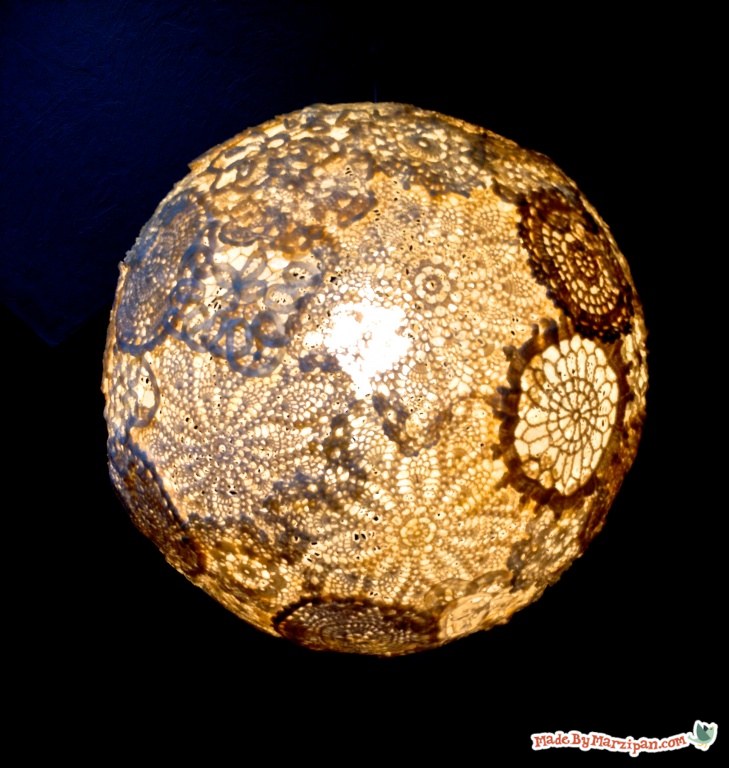
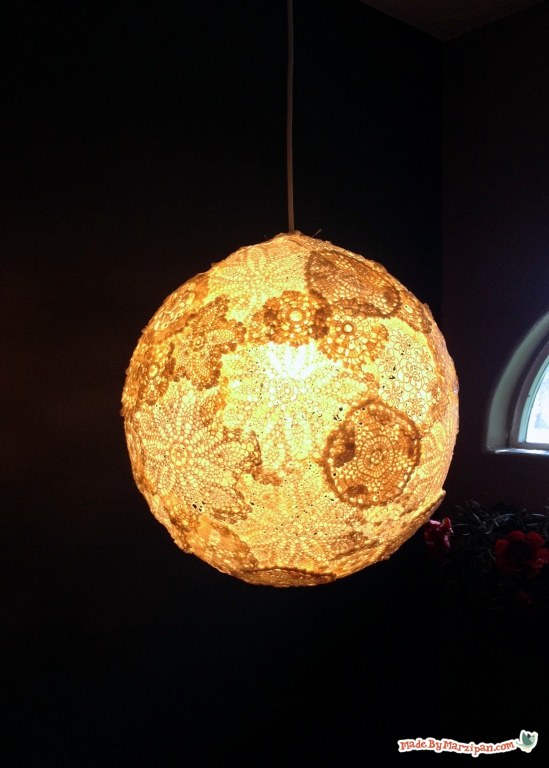
Make a gorgeous hanging globe light fixture using crocheted doilies.
Tips:
1
This tutorial was inspired by Isabelle’s original Lace Light Fixture post at dosfamily.com. So creative! I’ve tweaked Isabelle’s project to make my own version, and included some tips for avoiding potential problems.
2
I’m using the largest play ball I could find. The original tutorial recommended using a balloon, but some people had their balloon accidentally pop while they were working. Others had issues with shreds of balloon getting stuck to the doilies once the balloon was popped. A ball like this is a good choice because it’s thicker, and perfectly round.
3
Also, the original tutorial suggested hanging the balloon while the doilies were added. I found it was simpler to use a bowl as a stand to hold the ball while I worked.
4
I’m using pre mixed wallpaper paste as my adhesive. I had a lot left over from my beadboard wallpaper project. I bought this container at Lowe’s. (You can also use Elmer’s white glue, but you’ll need quite a bit.)
5
You’ll need enough cotton doilies to cover your ball. I bought some of mine used, and ordered the rest from an Etsy shop.
6
You must use an LED light, because they don’t get as hot. If you want to be extra cautious, you could also apply a fire retardant spray for fabrics.
Put on a pair of gloves to protect your skin, then drench a doily in the glue. Squeeze to remove the excess, then smooth onto the ball. Overlap the doilies so they will hold together. You can rotate the ball on top of the bowl as you work.
2
I’m leaving an empty space on top of the ball so I can easily add the light fixture. I’m covering the last doily with glue and leaving it to dry on top of an inverted bowl. Let all the doilies dry completely (this will take about a day).
3
Pop the ball using a pair of scissors. Gently slide your hand between the dollies and ball to loosen, then remove through the hole.
4
If you find you have any areas that aren’t as stiff as you’d like, you can fix them with a spray starch. Slide the doily fixture onto your ironing board through the hole. Spray and iron. Alternately, you can spray and blow dry.
5
I’m using an Ikea light cord for this. The lightbulb you choose is very important. A standard light bulb would be a fire hazard. You must use an LED light, because they don’t get as hot. Also, using an energy efficient bulb is smart because we’re sewing the doilies closed, and you don’t want to have to re-do that every few months. If you want to be extra cautious, you could also apply a fire retardant spray for fabrics.
6
Add the light fixture, with the cord extending through an opening in a doily. Hand sew the final stiffened doily in place. Hang your new doily light fixture and enjoy!
Update: Alternate Adhesives
After I made this light fixture, I was curious about the results I would get using different adhesives. Here’s how they compare…
Wallpaper Paste: I used this for the video tutorial. It was fairly thick so there wasn’t any running, and there was minimal mess. It had no effect on the coloring of the white doilies. The finished result was doilies that seemed very starched, although there were areas that were softer and had to be hardened afterward with spray starch.
Mod Podge: This was a disaster. It went on nicely, but when it dried, the doilies were rubbery. Because it was applied so thickly, the Mod Podge dried white in between all the crevices and holes in the doilies, filling them in. The finished doilies were too flexible to hold. Don’t use Mod Podge!
Wood Glue: After the Mod Podge, I decided to try an adhesive that would dry very hard. I found it was best to coat an area of the ball with wood glue, as well as working it into the doily. It didn’t initially adhere as well as the wallpaper paste, so I had to do one half of the ball and let that dry, then flip it and do the underside, or else the doilies on the bottom would fall off. I couldn’t find any wood glue that said it would dry white or clear, they all said “natural,” which turned my doilies into an ecru color. If you don’t mind your doilies looking aged / vintaged, I would recommend wood glue, because it dried rock-hard without any soft areas. It took 2.5 bottles of Gorilla Glue wood glue.
Have you tried this project? Which adhesive did you use, and how did it work for you?
Made By Marzipan may have received product or payment for this post. Posts may contain affiliate links. Disclosed in accordance with the Federal Trade Commission's 16 CFR, Part 255.
great idea! in going to try this with layered lace for a cheaper option as doilies in England are expensive and hard to source.
thank you for posting x

 Finished?
Awesome post.
wow awesome pretty :)
Love this…. How dainty. dee
great idea! in going to try this with layered lace for a cheaper option as doilies in England are expensive and hard to source.
thank you for posting x
I wonder if you can do this with an exercise ball… XD I don’t plan to, but just a thought.
Thanks for the video. What a lovely idea.
My husbear loves this! I’m going to have to make it. Thank you Marzipan
Ah, i see. Well tha’ts not too tricky at all!”