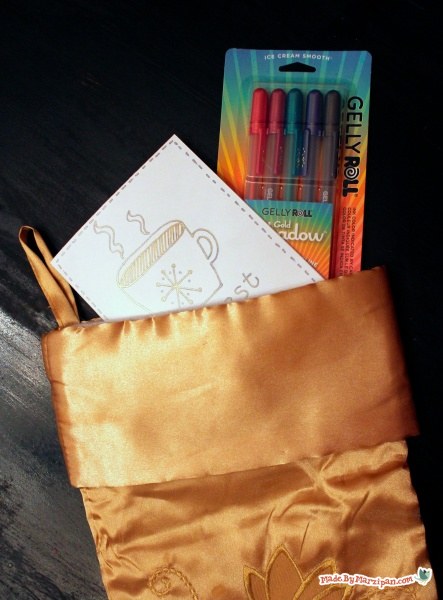
Gelly Roll Gold Shadow pens are perfect for making quick holiday cards.
How to:
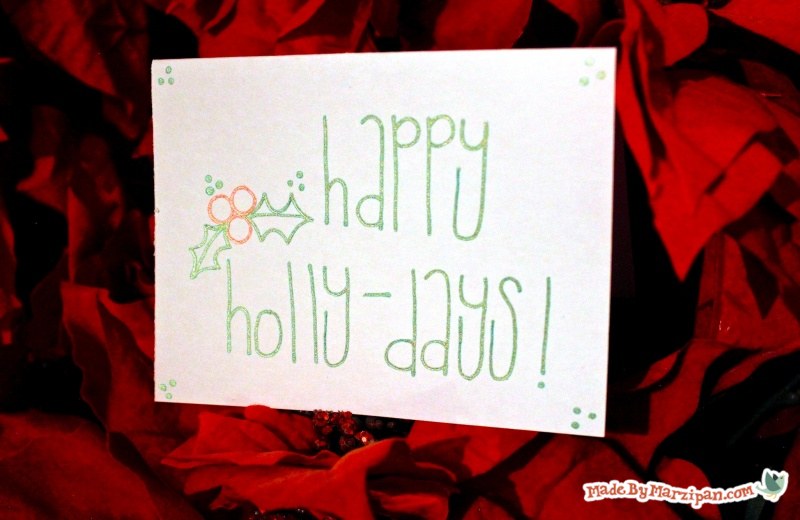
Happy Holly-Days
1
Begin by cutting white 8.5 x 11 card stock in half, at the 5.5 inch mark. Fold the cut paper in half to make two blank cards.
2
I’m drawing holly on this first card. Draw a cluster of three circles that are approximately the same size, using the red Gold Shadow™ pen.
When you draw with Gelly Roll® Gold Shadow™ pens, the gold ink stays in the center of the line, while the colored portion of the ink spreads outward, creating an outline around the gold stroke.
3
Now we’ll use the green pen to draw two holly leaves between the berries. These leaves are drawn like waves: make two curves with points on top, and matching curves below. Join them with a pointed tip at the end of the leaf. Draw a line down the center of the leaf.
4
I hand-wrote “Happy Holly-Days” with the green pen. Try making your letters extra-tall for a touch of holiday whimsy. You do need to be somewhat careful; the ink in these pens is very wet and will smudge if you place your hand over an area you just drew on.
5
You can add a few dot clusters as accents, in each of the corners and around the leaves.
Warmest Wishes
1
This next card will have a simple sketch of a mug of hot cocoa. Position the card vertically, and draw a flattened oval about a third of the way from the top of the card.
2
Draw a slightly curved line downward from the left end of the oval. Draw a straight horizontal line to form the bottom of the mug.
3
Begin to make a similar downward curve on the right, then draw a half circle to form the mug’s handle. Finish the line by connecting it to the horizontal line at the mug’s bottom. Make an outline of the handle curve in the center of the half-circle to complete the handle.
4
Draw a snowflake in the center of the mug by drawing a cross, then making an X through it. Add dots to the tip of the snowflake. You can draw dots between the points as well.
5
Make steam by drawing a squiggly line, then drawing an identical squiggly line right next to it, connecting the two lines at top and bottom. Add two or three of these shapes.
6
Use the plain gold pen to sketch in lines for the cocoa.
7
Write “Warmest Wishes” at the bottom of the card.
8
Add a border by drawing dotted lines around the edge of card.
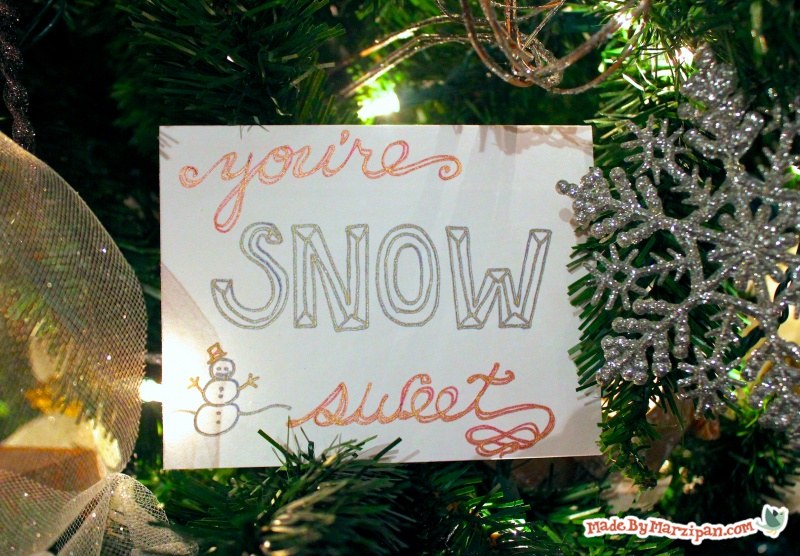
You’re Snow Sweet
1
The hand-lettering on this last card will take center stage. Write the word “you’re” at the top of the card in cursive. Space the letters pretty widely, as we will be outlining them in a moment.
2
Now we’re going to re-trace the word, but when you reach a curve, pull the line outward a bit, leaving white space between the original line and the one you’re drawing.
3
Next we’ll write the word “SNOW” in large block letters.
4
Draw a triangle on the end caps of each letter. Then connect the triangles with straight lines in the center of the letters, giving your word a dimensional appearance.
5
Write the word “sweet” at the bottom in the same style you wrote the word “you’re.”
6
You can add a flourish to the end of the word by overlapping sideways figure 8 loops.
7
Doodle a little snowman in the corner to finish this card.
Click here to find more handmade card inspiration!
Made By Marzipan may have received product or payment for this post. Posts may contain affiliate links. Disclosed in accordance with the Federal Trade Commission's 16 CFR, Part 255.

 Finished?
Show it off!
