Tips:
If you’re a beginning sewer, you may be nervous about sewing with knits. Maybe you think you need fancy equipment. While it’s true that items like a serger, or a walking foot make it easier, you can manage just fine without them. Here are a few tips for sewing knits with a standard sewing machine:
- You will want to use a ball point or stretch needle. These aren’t as sharp as regular needles, so they won’t snag on your fabric. Remove your machine’s needle, paying attention to how it’s inserted. Then replace it with a ball point needle.
- You should use a polyester or poly-blend thread. This type of thread will stretch more than cotton.
- You’ll need to change your stitch settings. A zig-zag stitch with a narrow width will allow the thread to stretch without breaking. Some machines also come with a stretch stitch. It’s perfect for sewing knits.
- Be aware that your knit fabric will stretch more in one direction. Take note of this, and cut the hat so that it stretches from one end of the brim to the other, not up and down.
- Pre-wash and machine dry your fabric before cutting. This will prevent shrinkage later.
How to:
1
Print out the PDF pattern.
2
You’ll need to place the cap pattern piece on the fold. I recommend cutting the two pieces for the cap separately, because if you try to cut through four layers of knit at once, it tends to stretch and your edges will look sloppy. You’ll be using the same fabric to cut out the two cap pieces and four large ear pieces.
3
You’re going to use the other, contrasting fabric to make the brim. Cut the brim piece to 4 1/2 inches tall. The small size should be 12 1/2 inches wide (this is the stretchiest direction!) and the large should be 13 inches.
4
Cut the ear inserts out of the same fabric as the brim. Layer the ear inserts on top of the large ear pieces and pin in place. Topstitch the pieces together using the narrow zig zag stitch. You want the zig zag’s points to be on both fabrics to minimize fraying.
5
Now place the other ear pieces on top of the sewn ones, right sides together. You’re going to sew with a quarter-inch seam around the curve. Leave the bottom side open. Remember to use either a narrow zig zag or a stretch stitch. Once it’s sewn, remove the pins and turn right side out.
6
Up to this point, the instructions have been the same for both hat variations. First, we’ll do the bear ears, then I’ll explain the rabbit ears.
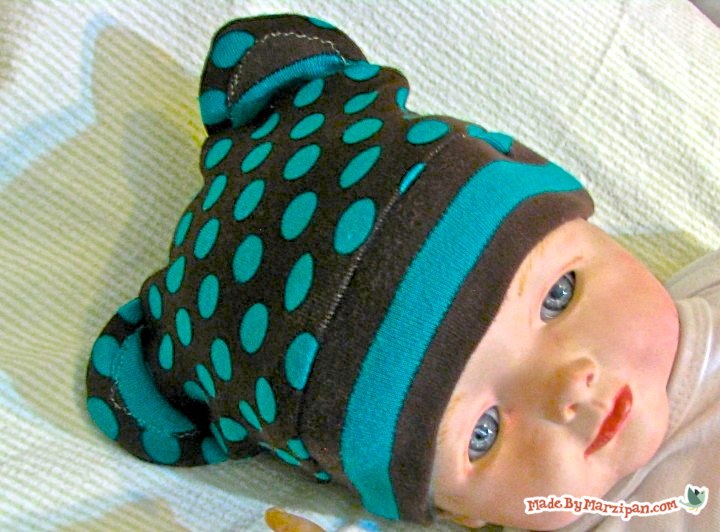
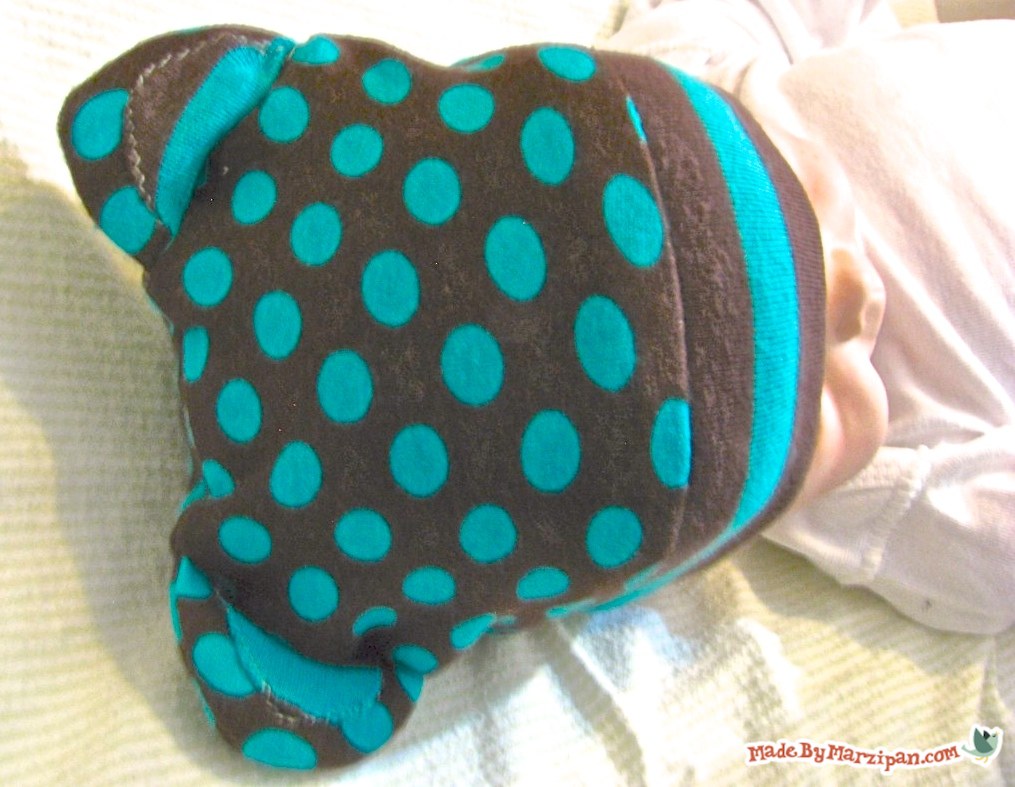
BEAR
1
Place the bear ears at the top of the cap in a position you like. Then, fold them downward.
2
Pin the unsewn bottom of the ear to the edge of the cap.
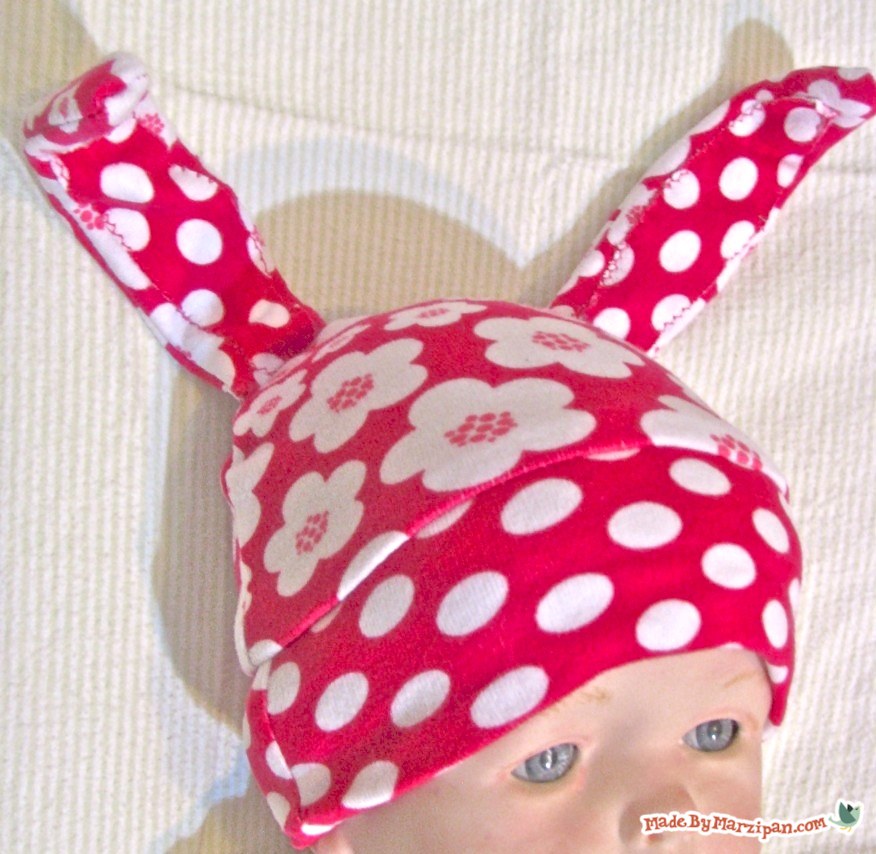
BUNNY
1
you should have your ears sewn and turned right side out. Now we’re going to add clever pipe cleaner inserts so that the bunny ears will be posable.
2
Take a pipe cleaner and bend it in an oval that mimics the shape of the sewn ear. Snip it to the same length as your ear and twist the ends together. We’re going to sew right over it; the wire inside is no thicker than a pin and it will be encased in our stitches. Slide the pipe cleaners inside the ears.
3
Place the ears at the top of the cap where you’d like them to be, then fold downward and pin.
BOTH
1
From here on out, the steps are the same for both caps. The cap piece with the pinned ears should be face up. Lay the other cap piece on top, right sides together. Pin in place. Sew around the curved edges, but don’t sew the bottom shut. Remove the pins and turn right side out.
2
Now on to the brim. Fold the brim piece in half so the two short edges meet. Sew them together with a quarter inch seam to form a tube. Now fold the bottom edge upward and in half. You should have a fold along the bottom, and the raw edges at the top. Make sure the raw edges are lined up evenly all the way around.
3
Position the tube so that the raw edges are at the bottom. Then insert the cap into the tube. Line up the bottom edge of the cap with the raw edges of the tube. Pin the top layer of the tube to the front of the hat, and the bottom layer of the tube to the back of the hat. In other words, you’ll need to be able to insert your hand between the layers, so don’t pin all of them together.
4
Then insert the cap onto the arm of your sewing machine. It should be wrapped around the machine, so that you are only sewing through one pinned layer at a time. Sew along the bottom edge with a half inch seam.
5
Remove all of the pins, and fold the brim down. Put on baby’s head and ooo and ahhh over your adorable woodland creature!
Click to check out Made By Marzipan’s other sewing projects for baby.
Made By Marzipan may have received product or payment for this post. Posts may contain affiliate links. Disclosed in accordance with the Federal Trade Commission's 16 CFR, Part 255.

 Finished?
Notices no pattern piece for the band – Anyone know dimentions to create pattern piece?
*to self* Hello – read all the way through directions – Doh.
Love this site. Love the surf & Turf hat. I have a Grandson but it seems the normal pattern makers only do patterns for girls. Thanks Marzipan :-)
Just whipped one up! It looks pretty small so I’m hoping it actually fits a real baby. Lol. I found some Fruit of the Loom boys t-shirts for $1 on clearance so I used that. It has SOME stretch, but not much. I hope it can be used for at least a little while! Super easy pattern and construction. I love that there was an accompanying video on the page along with written directions. I only used one color and didn’t add any ears since it’s going along with some “zebras of a different color” XL receiving blankets. Thanks for the super simple pattern!