1
We’ll start by sewing the wrappers together to make the front and back of the pouch. Place two wrappers right sides together, so the front side of the wrappers are touching.
Sew along the edge with a ¼ inch seam. It’s a good idea to lengthen your stitches a bit, as short stitches have a tendency to perforate or tear the wrappers. A sharp Microtex needle works best.
2
For this pouch, I’m sewing two strips with two wrappers in each. To sew the strips, place one on top of the other, right sides together, and sew down the long edge with a ¼ inch seam. You’ll need to sew an identical one for the back of the pouch.
3
This next step is important. If you skip it, your wrappers will probably tear at the seams when you turn the pouch right-side out later.
Lay down a piece of clear contact paper, and smooth the sewn wrapper sheets on top of it. Repeat for the back side of the wrapper sheets. This strengthens the wrappers so they won’t rip. Trim around the edges of the wrapper sheets.
4
Next cut two fabric pieces that are the same size as your wrapper sheets. My daughter asked for fleece so it will provide extra protection for her Nintendo DS.
5
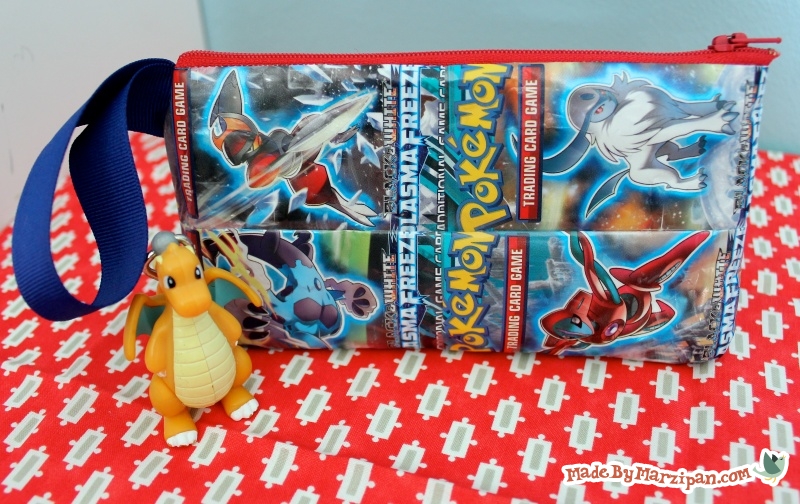
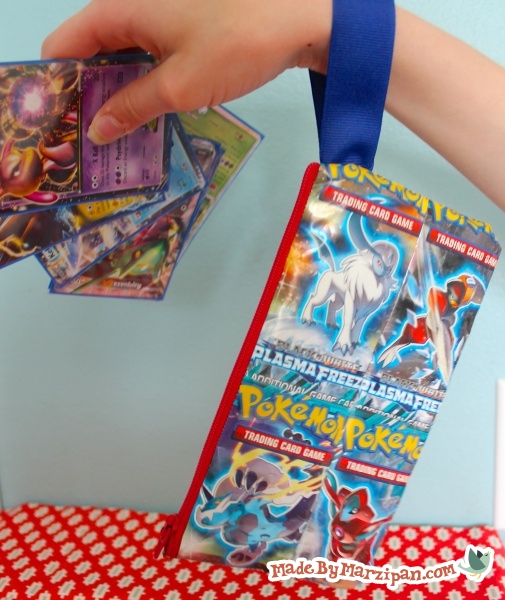
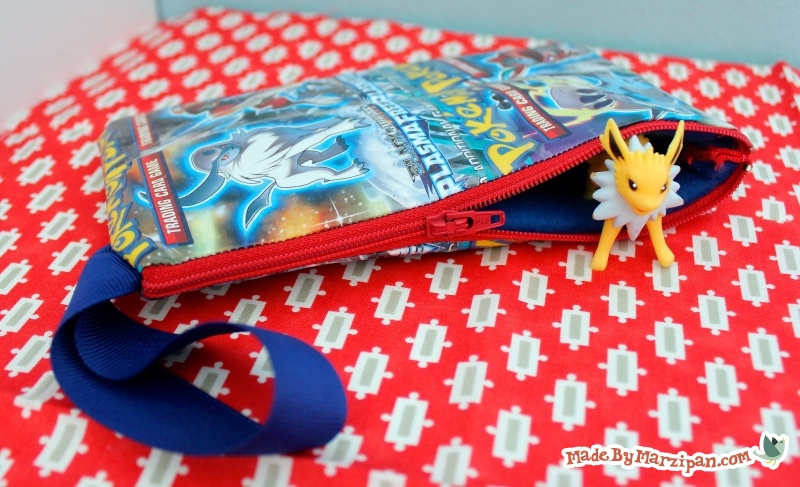
Now I’m going to add a ribbon loop to the zipper so that the pouch can be worn as a wristlet (or, as my daughter said, “like a Wii remote!) You can shorten the ribbon if you just want it to serve as a zipper tab. Or, you can skip the ribbon altogether.
To add the ribbon, fold it in half around the bottom end of the zipper. Sew to the zipper tape with a square shape.
6
Now we can start assembling the pouch. Lay a piece of fabric right side up.
Lay the zipper on top of it, aligning the edge of the zipper tape with the top edge of the fabric. The zipper pull should be face up.
Lay the laminated wrapper sheet face down on top, sandwiching the zipper between the layers. Pin together along the top edge.
7
Next you’ll need to change to your sewing machine’s zipper foot. It’s the one that looks like a ski. If it has a bar on both the left and right sides, attach it to the left side.
8
Line up the edge of the zipper foot with the edge of the fabric. This is a ¼ inch seam, and it will guide the needle right along the edge of the zipper.
9
The zipper will protrude from between the layers. Fold the fabric over so that the fabric is beneath the wrapper sheet.
10
Lay the remaining wrapper sheet face up. Place the sewn piece face down on top of it, aligning the top edges.
Lay the remaining fabric piece face down on top of the stack. Pin along the top edge. Sew together using your zipper foot.
11
Unzip the zipper halfway. If you forget to do this, you won’t be able to turn your pouch right side out!
12
Fold the pouch so the fabric is on the outside and the zipper teeth are inside. Also tuck the ribbon between the two layers of wrapper. Pin together the three sides without the zipper.
13
Switch back to the standard sewing machine foot. Sew around the 3 sides without the zipper, using a ½ inch seam.
14
Trim the two bottom corners at an angle, being careful not to snip your stitches. Gently turn the pouch right side out.
You can make this pouch in any size, just by sewing more wrappers together and using a longer zipper.
Click to find more free sewing patterns for bags!


 Finished?
I loves bags and this one is very cool. I like the re-purposing /recycle materials.
Hi there there! Great post! Please keep us updated!