Tips:
1
When sign painting, enamel paint is recommended. It has a thicker consistency so it won’t spread when you lay it down. It’s also extremely durable.
How to:
1
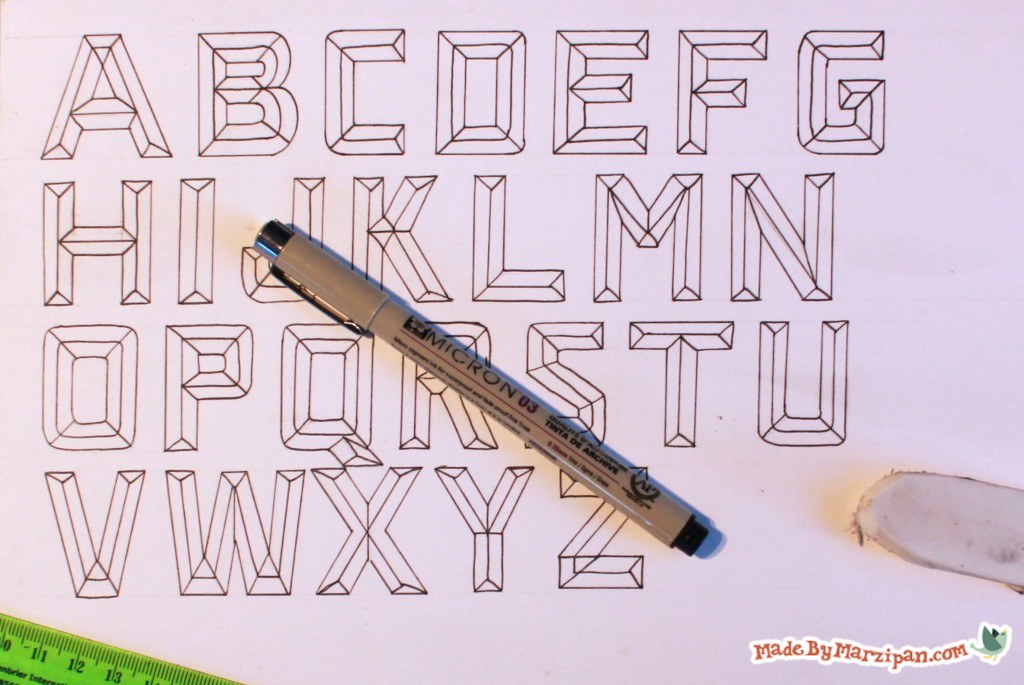
The basis of this lettering style is a standard sans serif block alphabet. I’m keeping a pretty square shape on these, rounding off the corners slightly on curved letters like C and O.
2
Now draw the letter inline. That is, draw the lines of the letter in the center of the block letter you drew.
3
Crossbars will meet the center line at a diagonal.
4
Each stem will be finished with an inline triangle, with the point meeting at the center line you drew.
5
Outer corners will also be attached to inner corners with a diagonal line. (All of this can be confusing to explain verbally, which is why I’ve made a free printable reference sheet to help you figure out line placement. Click here to download!)
6
Whether or not you want to outline these letters with a black marker is up to you. I did on my paper, but not on my board.
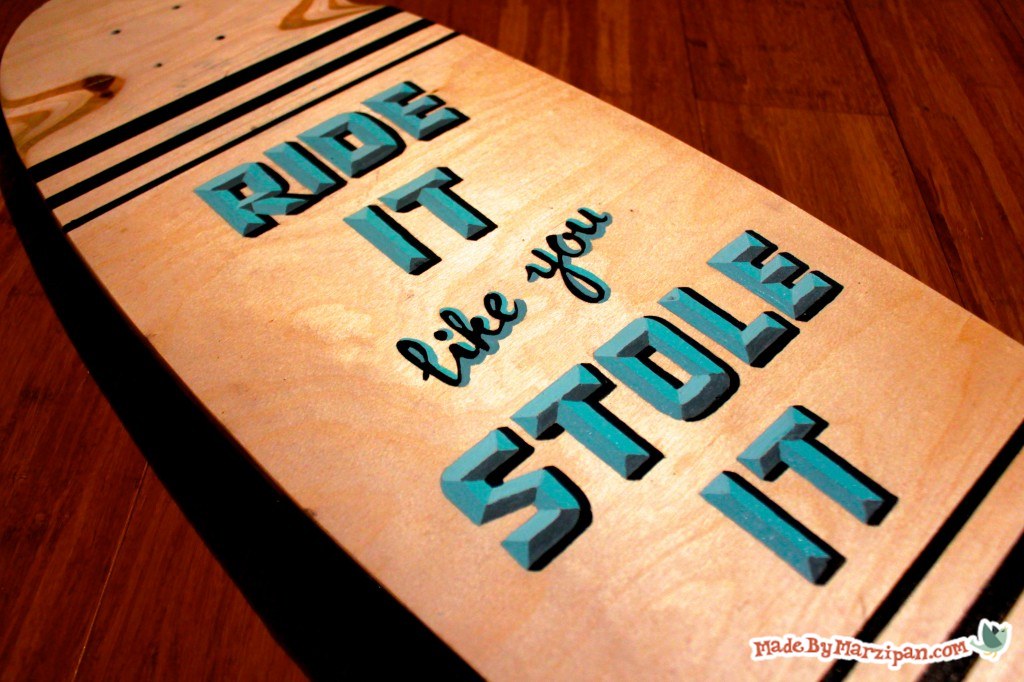
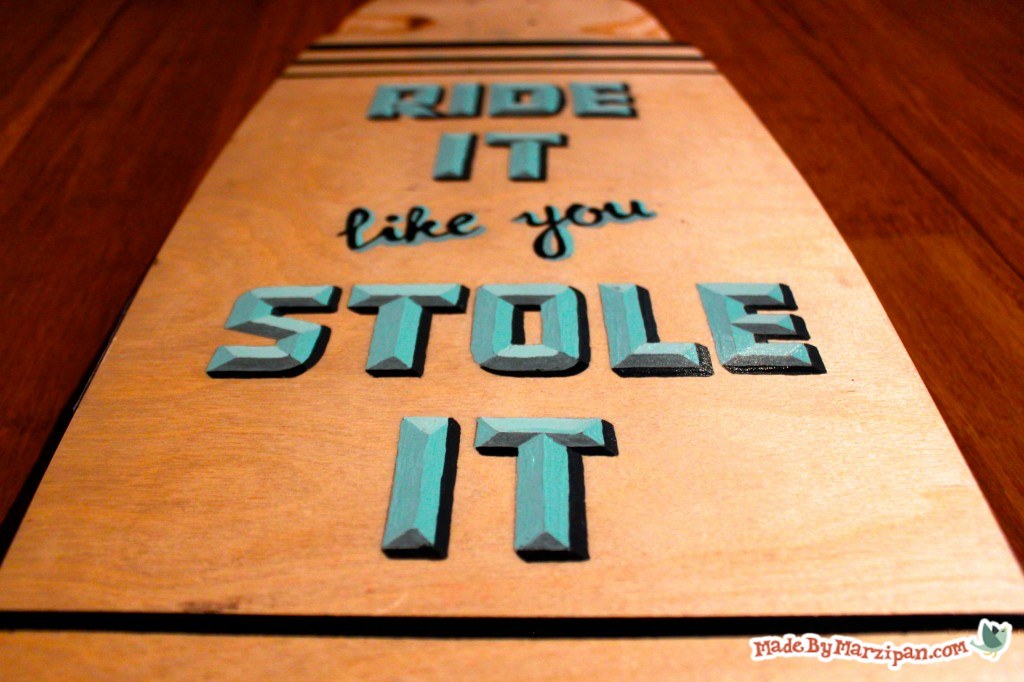
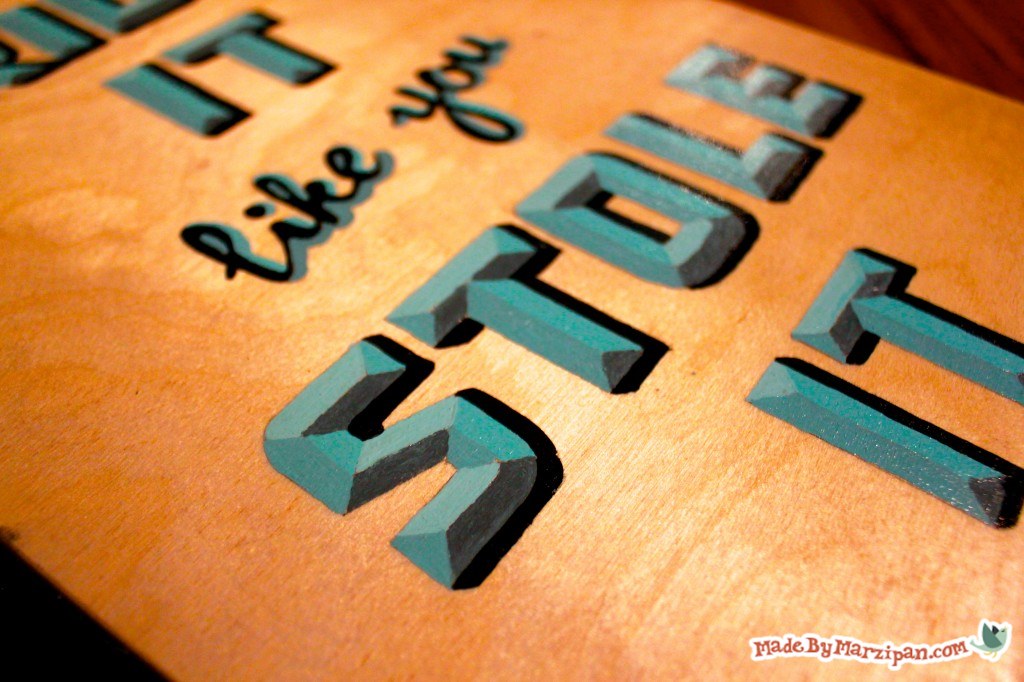
The real magic of prism lettering comes when you add color. We’ll be using four different shades of the same color.
1
First I’m sketching out my letters with a pencil and a ruler. Try to keep your pencil lines light.

2
Now I’m painting the prism facets on the right. This is the “Bright” color, or my original paint color straight from the can. (By the way, I’m using enamel paint, which is preferred for sign painting. It covers well without streaking, and is very durable.)

3
Next I decided to do the top prisms. This is the “Light” color, and is the paint color mixed with a good amount of white. (If you’re having trouble keeping your hand steady while you paint, it can be helpful to support it by holding your wrist with your opposite hand.)
4
I’m applying the third paint color now, which is the “Medium” shade that has a touch of black mixed into the original color. This will fill in all the prisms on the left.
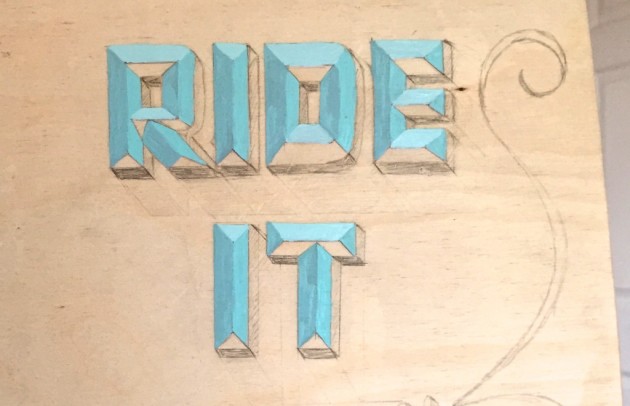
5
My final color is the “Dark” shade, which has a good amount of black mixed in. Fill in the bottom prisms with this color.

6
I also chose to add a shadow to my lettering, using black paint along the bottom and dark gray on the right. Check back soon for a tutorial on shadow type!
Prism lettering has a cool 3-D style, and the finished effect is well worth all the time it takes! Tried it? Share your project photos here!
Made By Marzipan may have received product or payment for this post. Posts may contain affiliate links. Disclosed in accordance with the Federal Trade Commission's 16 CFR, Part 255.

 Finished?
Very cool! This would be fun to try!
Seems great to me… looks super fun too!