Tips:
1
You’ll want to choose a fabric that’s durable. My SumoLounge beanbag chair has a removable, machine washable cover, so I want to pick a fabric that will wash equally well. Select either a home decor weight fabric or an upholstery fabric.
2
You can use this method to make a pocket in any size. Since my Sultan bean bag chair is about the size of a loveseat, I’m going to make a pretty big pocket. However, you can adapt the size of your fabric pieces as needed.
How to:
made with
1
I’m cutting the large backing piece to be 26 inches square.
2
The front pocket piece should be the same length, and half the width of the first piece. So I’m cutting that piece to 26 in L x 13 in W.
3
Begin by folding the backing piece in half, right sides together, so that it is 26 L x 13 W. The pattern should be on the inside. Press.
4
Then fold the pocket piece wrong sides together, so it’s 26 inches long by 6.5 inches wide. Press.
5
Open the backing piece and position the folded pocket piece with the raw edge against the center fold. Fold the backing piece in half again, enclosing the pocket piece. Pin together.
6
We’re going to sew all the way around, but leave a 6-inch gap along the top edge for turning right side out. Mark this gap with pins so you won’t forget. Sew with a ½ inch seam.
7
Trim the excess fabric at the corners to reduce bulk, being careful not to snip your stitches. Turn right side out, poking out the corners.
8
Press the pocket. Fold in the raw edges of the opening and press. Pin together. Sew all the way around the edges of the fabric, with a ⅛ inch seam.
9
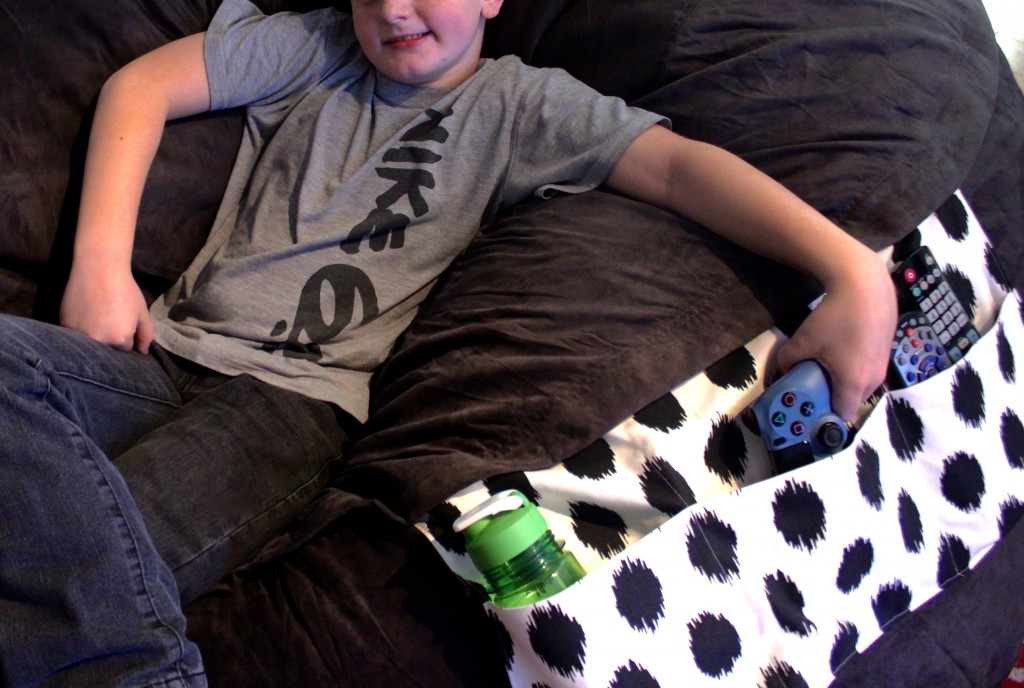
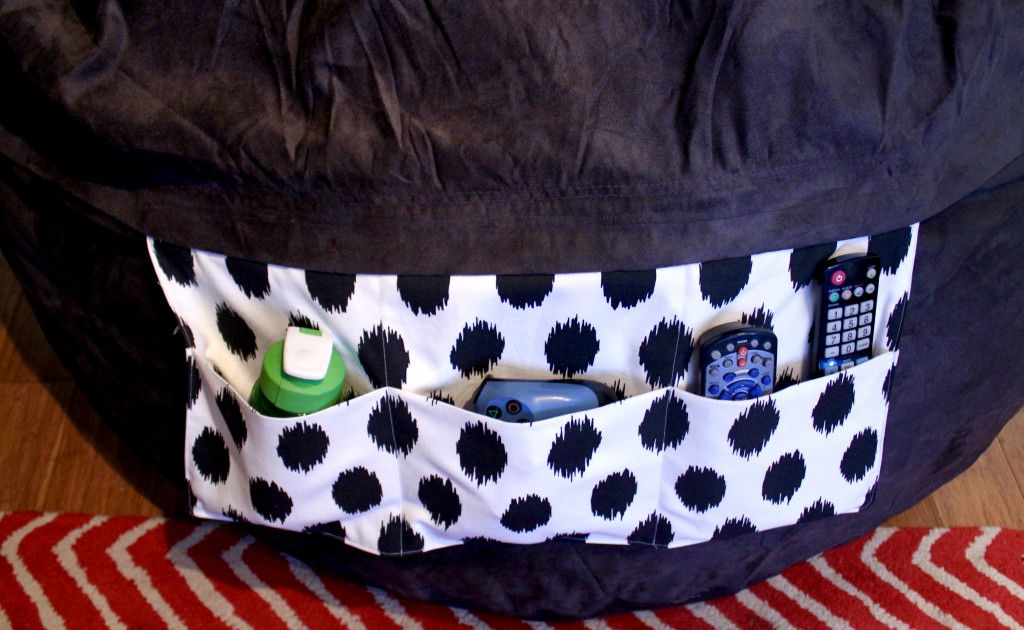
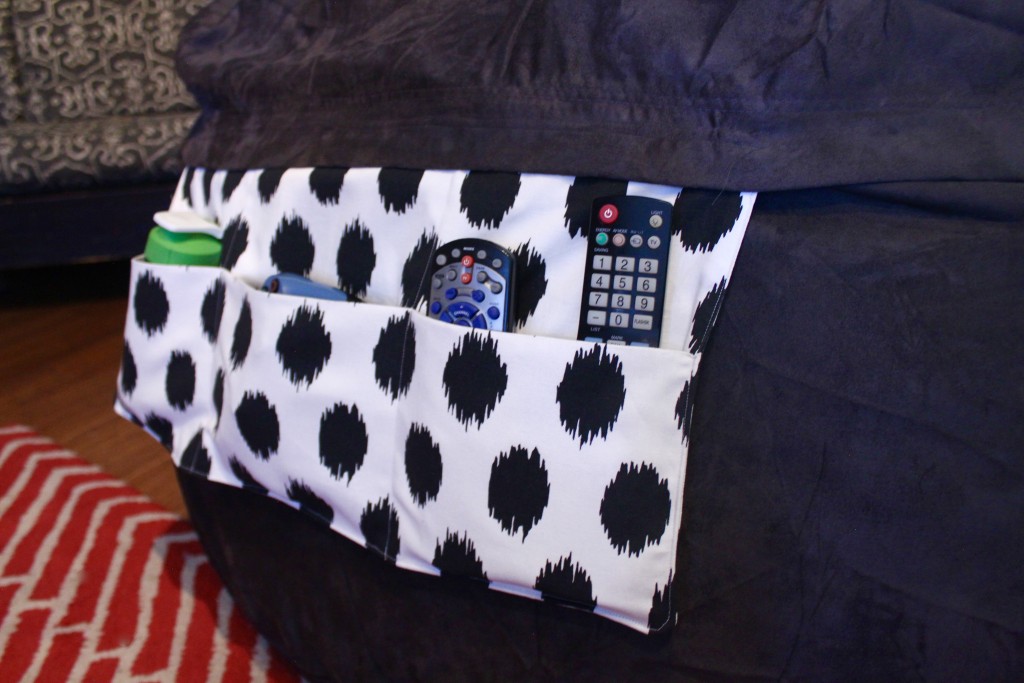
Now we are going to divide this large pocket panel into several pockets by sewing vertically down the front of the pockets. I’m choosing to divide it into thirds to make three pockets. You can change the number of pockets; just make sure they’re large enough to hold the items you plan to put in them.
10
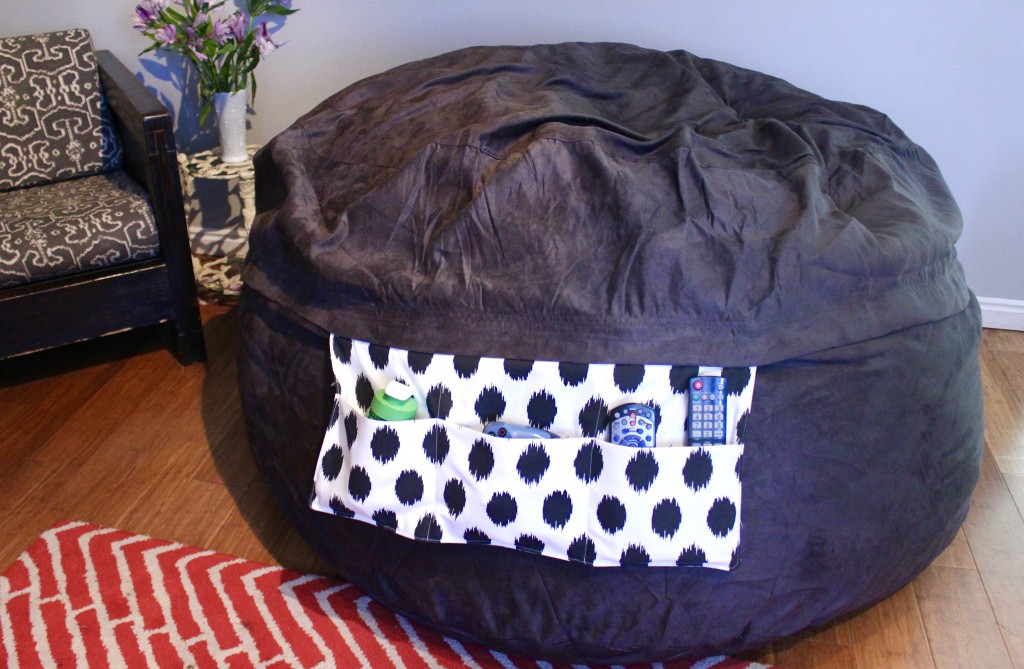
Next we need to attach the pocket to the bean bag. SumoLounge bean bags have a nicely covered zipper, which means we can conveniently sew it to the underside of that flap. However, if your bean bag doesn’t have a covered zipper, you can also sew it directly to the side of the bean bag.
Luckily, this Sultan bean bag has a second bag within the cover, so I don’t have to deal with pouring out the foam pieces. If your bean bag doesn’t have a lining, I recommend removing the contents in the bath tub with the shower curtain drawn. This will minimize the mess.
11
Pin the pocket in place. On my bean bag, I’m pinning to the underside of the flap, out of the way of the zipper. Since the flap has nice double stitching, I’m going to do the same for my pocket and add a durable double row of stitches, with a thread that matches the bean bag chair fabric.
If you’re sewing directly to the side of your bean bag, I recommend using a zig-zag stitch so the stitches won’t pop when someone flops on the chair. Use thread that’s the same color as the pocket.
Your pocket is finished, and now your bean bag chair is as functional as it is comfortable. To learn more about my big Sultan bean bag chair, visit my sponsor, SumoLounge.com.
Made By Marzipan may have received product or payment for this post. Posts may contain affiliate links. Disclosed in accordance with the Federal Trade Commission's 16 CFR, Part 255.

 Finished?