1
Before we get started, here’s a word on purchasing feathers. If you’re purchasing them from a craft store, you’re probably paying too much. And I’ve found that feathers bought from the craft department aren’t usually color-safe– that is, the dye runs when it gets wet. Not something you’d want in your hair on a rainy day!
My advice is to visit a store that sells materials for fly-tying, such as Sportsman’s Warehouse. They have a huge selection of feathers, in every style and color you can imagine. These products are intended for use in water, and I’ve found the dyes to be of a higher quality. At around $1.50 a bag, they’re a great value.
2
And here’s a tip about hairclips: You might have noticed that plain hairclips seem over priced. I’ve found them to be much cheaper at a salon goods store, like Sally’s. Or, try checking in the sewing notions section of a big store like Wal-Mart. They sell Quilting Binding Clips, which look and function just like hair clips, but for a lower price.
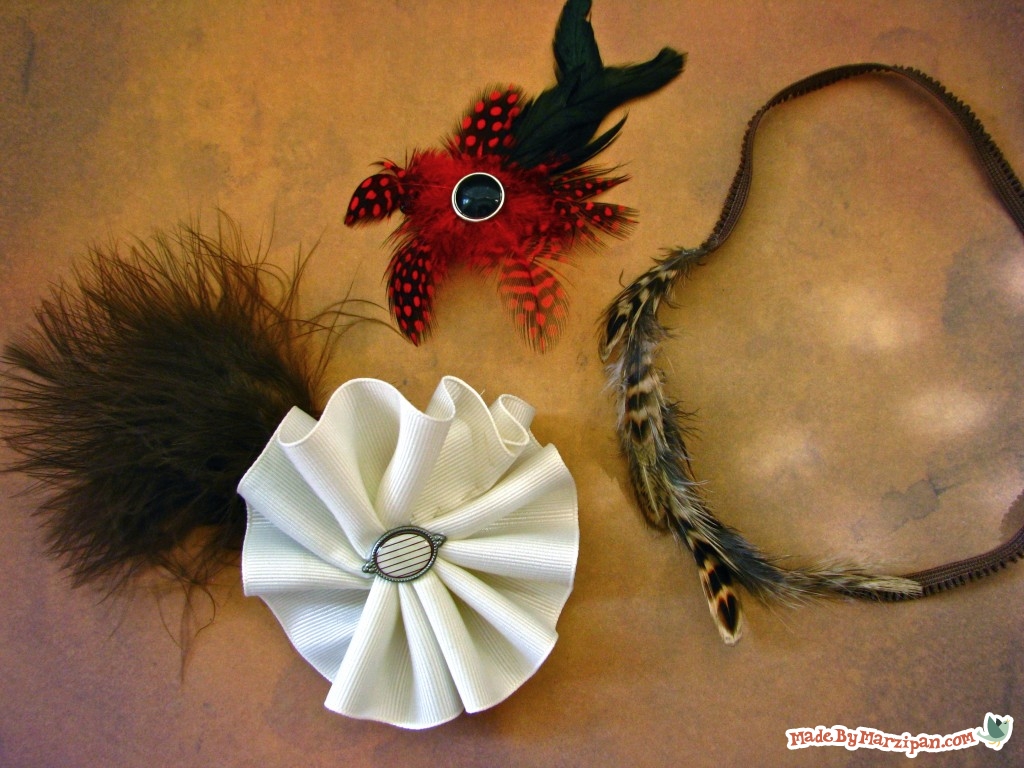
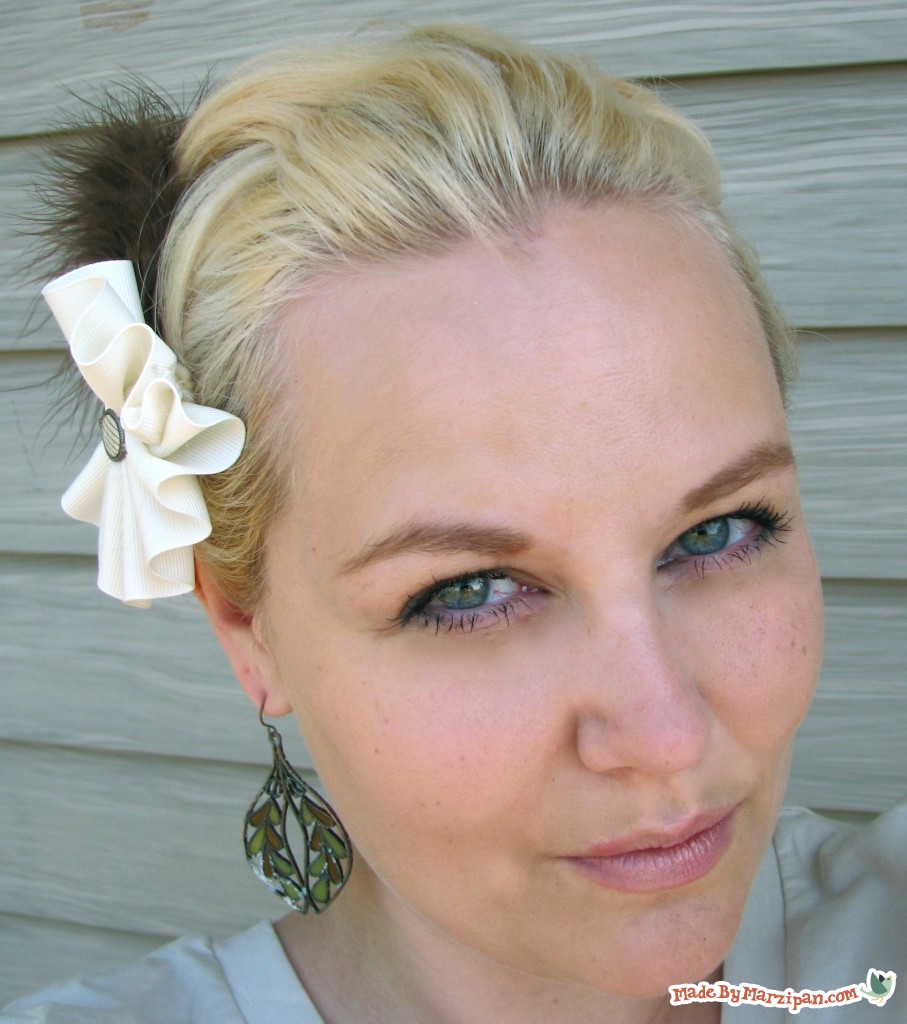
Plumed Ribbon Flower
1
The first one I’m going to show you is a Plumed Ribbon Flower. You’ll need some ribbon and a needle and thread. You could also use your sewing machine, but it really isn’t worth pulling it out for this simple project. Thread your needle and leave it attached to the spool. Sew a running basting stitch close to one edge of the ribbon. (If you’re unfamiliar with sewing, this is simply weaving your needle in and out, with long stitches that are far apart.)
2
The flower I’m making has just one layer, and uses about 2 1/2 feet of ribbon. If you were to keep going and use a longer length of ribbon, you could coil the ribbon around itself to make a big, spiraled flower.
Leave the needle attached to the thread, and cut the end of the thread attached to the spool. Tie a triple knot in the end of the thread. Cut the ribbon a bit above your last stitch. Then gently tug with the threaded needle so the ribbon bunches up.
3
Your ribbon should be in a circular shape. Fold the raw end of the ribbon under itself to prevent fraying. Then stitch the two ends of the ribbons together. Start stitching from underneath so the knot won’t show. Make sure your last stitch is on the back as well.
4
You can put either a brad or a button in the center of your flower. Apply a generous amount of hot glue on the back, and press it to the middle. Make sure the pleated edges of your flower are caught beneath the brad. Then flip the flower over and fold out the prongs of the brad.
5
I’m using three brown marabou feathers for this hairclip. Arrange the feathers with the tallest one in the center. Hot glue the feathers in place.
6
Next I’m going to add a scrap of felt to the back of my flower. This helps hold it all together. Then I’m going to add a hair clip to the back. Finally, I’m going to add a strip of felt across the inside of my clip. This helps the clip stay put, and it keeps your hair from snagging in the clip.
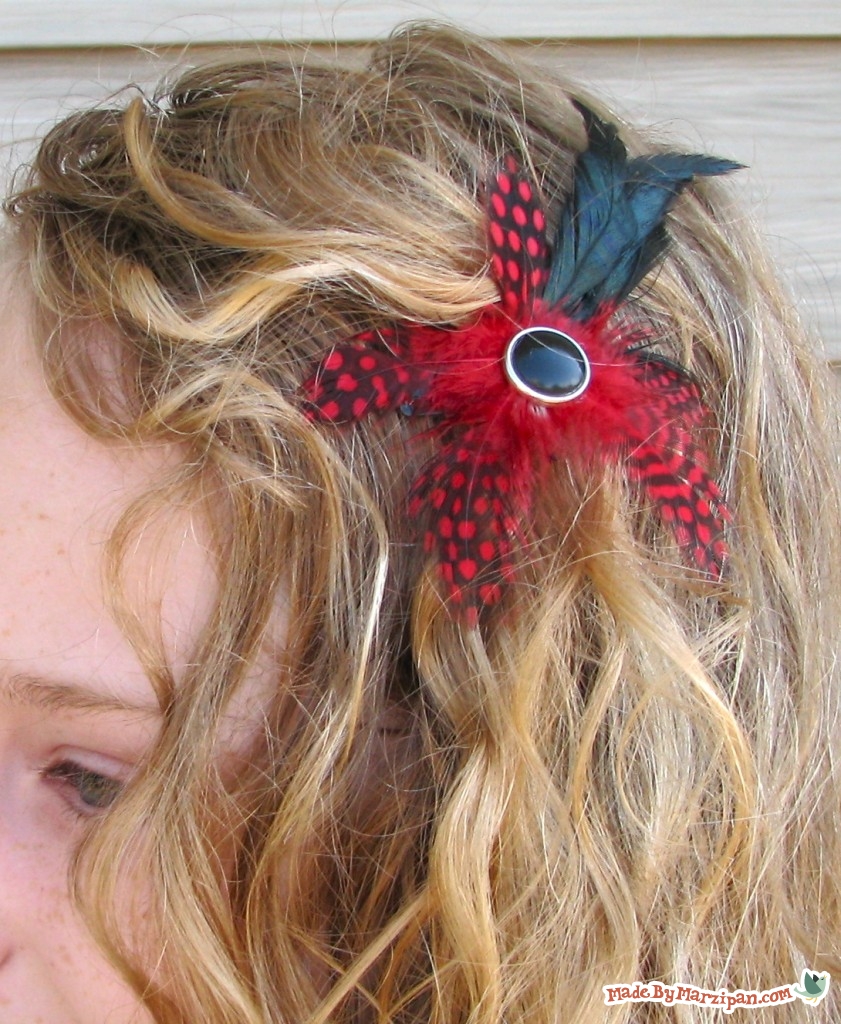
Feathered Blossom
1
Next I’ll show you how to make a feathered blossom. The petals are made out of feathers, creating a delicate accessory with natural charm. I’m using small partridge feathers for this project. Select five feathers that are the same size.
2
Lay the straightest one down and add a bit of hot glue to the quill portion. Adhere another feather to it, pointing sideways. Continue to add the other feathers in a star shape. I decided to also glue a couple of black feathers to the back for added dimension.
3
You can add a button or brad to the middle. If you’re using a brad, first cut off the prongs. Then hot glue to the center. Finally, add a clip.
Feathered Headband
1
This last project is really fast and easy. You’ll need some colored elastic. You can purchase it from any store that sells fabric. The kind I’m using is intended for use on lingerie and has a bit of a ruffled edge. Cut enough elastic to stretch comfortably around your head, plus a half inch extra for gluing.
2
Put a bit of hot glue on one end of the elastic, then fold the other end over and press on top. Make sure your elastic isn’t twisted.
3
I’m going to use tiger striped brown feathers on my headband. Add a bit of hot glue to the elastic then press the quill of the feather into the glue. You don’t want to get glue on the feathery end, because that will make it look matted.
4
Add glue to the top of the quill, then press another feather onto it. You want the feathers to overlap, with each feather covering the quill of the one before it. You’ll notice that the feathers have a natural curve to them. Make sure the feather curls downward and not upward; you want the feathers to follow the curve of your head.
5
Cover about 1/3 of the elastic in feathers. For the last feather, tug out the downy portion, and trim the quill short. Add with a dab of hot glue.


 Finished?