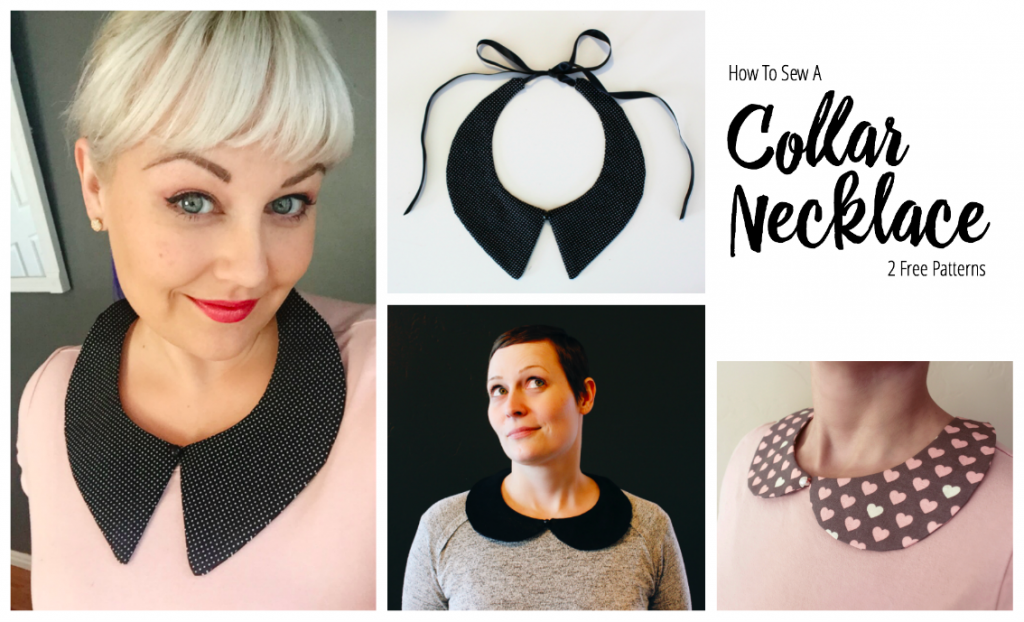


Sew an adorable collar necklace with this free pattern! Includes both pointed and rounded collars. It’s an easy way to dress up a plain tee!
How to:
1
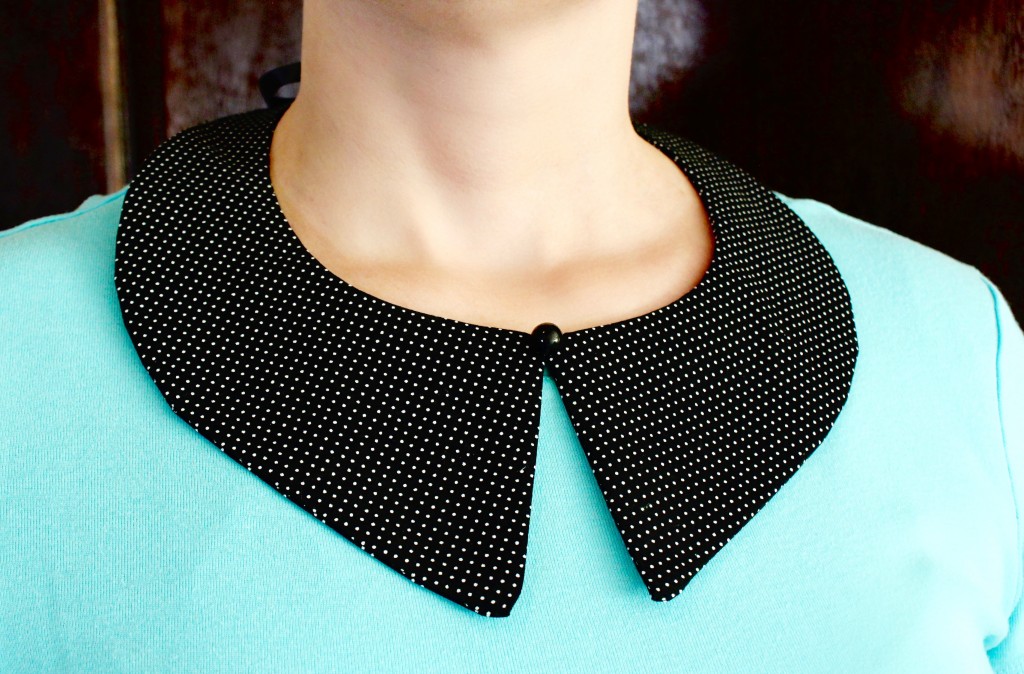
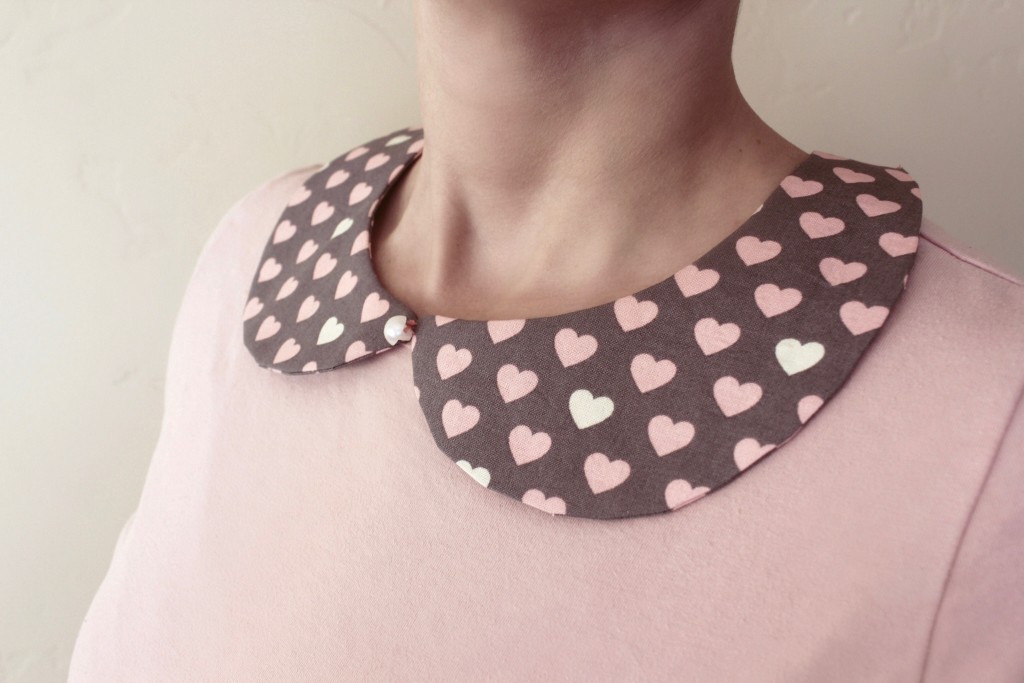
Begin by printing the free pattern (link is above the supply list). It includes a template for both a rounded collar and a pointed collar. These are sized for adults; you can play with with the scaling adjustment when printing if you’d like to make smaller ones. Cut out the pattern along the outer line.
2
Fold your fabric in half, then cut out a total of 4 pieces. (If your scissors are very good, you can fold the fabric in half again and cut out all 4 pieces at once.) Because your fabric was folded, you will have 2 sets that mirror each other.
3
Fold a piece of medium weight fusible interfacing in half, pin the pattern, and cut a total of 2 pieces. Iron the interfacing to the wrong side of two coordinating fabric pieces.
4
Lay two fabric pieces right sides together so the edges align (one piece will have interfacing, the other will not). Pin in place.
5
Sew around the edge with a ⅜ inch seam (that’s slightly bigger than a ¼ inch seam). Leave the narrow top portion open, as well as the upper part of the outward curve. We will use that opening to add our ribbon tie and to turn the collar right side out later.
6
Cut a segment of narrow ribbon or leather cording to about 18 inches. Sandwich the ribbon between the layers at the top opening. Push it all the way over so it’s touching the seam, and extend it slightly past the edge of the fabric. Pin in place, then tuck the rest of the ribbon inside the collar. Be sure to push it away from the edge where you’ll be sewing.
7
Sew across the narrow top opening, securing the ribbon. Backstitch for durability. Sew about a half inch down the opening on the side, leaving about a 3 inch gap for turning.
8
Clip and notch your seams. Being careful not to snip your stitches, clip off excess fabric at corners on a diagonal. On the outward curve, cut a series of notches. On the inner curve, make frequent clips. This will help your piece lay flat and curve nicely.
9
Turn right side out. This may take a bit of patience, as we are working with a small opening. Use the blunt end of a pen to poke out the seams. Place it in the opening and then run it along the edge to define your seams, paying careful attention to the corners.
10
Press the collar. Then, fold in the edges of the opening, making sure the edge aligns with the sewn portion. Press.
11
Sew the opening shut with stitches very close to the edge. If you’d like, you can continue to topstitch all the way around. (That’s optional, but I definitely recommend it for materials that can’t be ironed, like leather or felt.)
12
Once both pieces are sewn, place so the collar pieces meet at center. Attach with a small whipstitch. Consider adding a button in the middle.
13
Try on the collar, tying the ribbon in a bow. Trim the ribbon to the desired length, then seal the edges with a lighter to prevent fraying. (I shouldn’t need to say this, but, take off the collar before using the lighter!)
The steps for this project are the same for the rounded collar. If you decide to use a heavier material like leather or felt, you can skip the interfacing.
Made By Marzipan may have received product or payment for this post. Posts may contain affiliate links. Disclosed in accordance with the Federal Trade Commission's 16 CFR, Part 255.

 Finished?
Show it off!

Thank you for sharing the patterns. I will make a try. Regards from Paris.
555