1
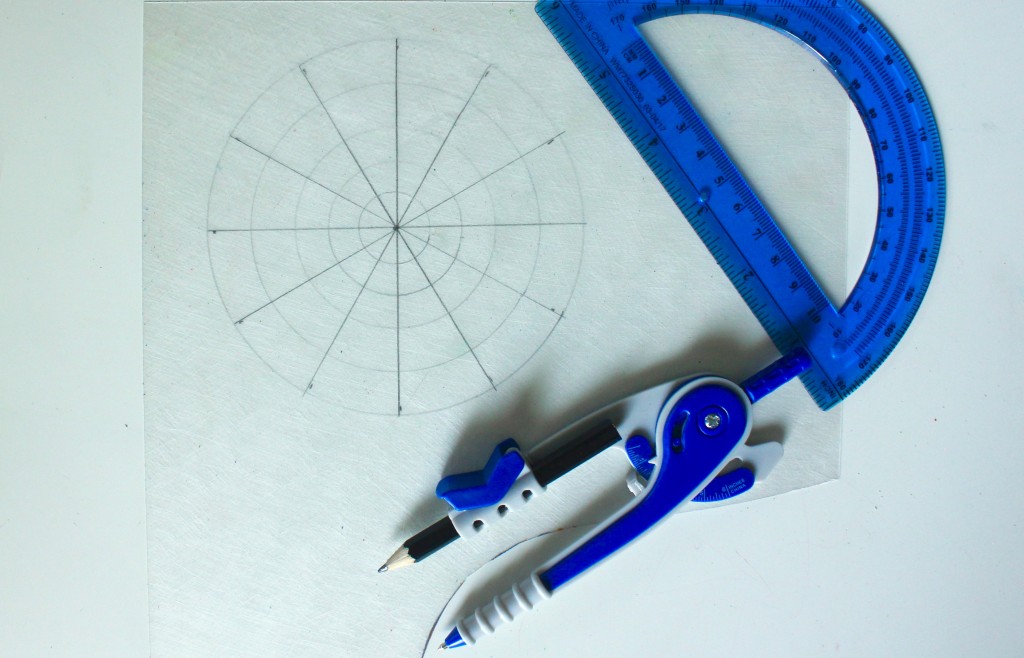
The easiest way to create a mandala is with a compass. To use a compass, make a dot where you’d like the center of your mandala to be. Then place the pointed end of the compass on the dot. Twist the handle at top to turn the pencil in a circle.
2
Extend the leg with the pencil out a bit further, keeping the pointed leg in the center of the first circle. Twist to make a second circle. (If you find the compass a bit tricky to use, you may find it easier to twist the shrink film rather than the compass.)
3
Continue adding circles until your design is four to five inches wide. (Remember, since I’m drawing on shrink film, the finished design will be about half this size.)
4
Now we need to divide our design into equal segments. It’s easiest to use a protractor for this. Place the center circle of the protractor over the dot in the middle of your design.
5
I’m going to divide my design into 12 segments. A circle is 360 degrees, so I’ll divide that by 12, giving me segments that are each 30 degrees. Make a mark every 30 degrees, turning the protractor as needed.
6
Use a ruler to connect the lines opposite each other. All lines should intersect the middle dot.
7
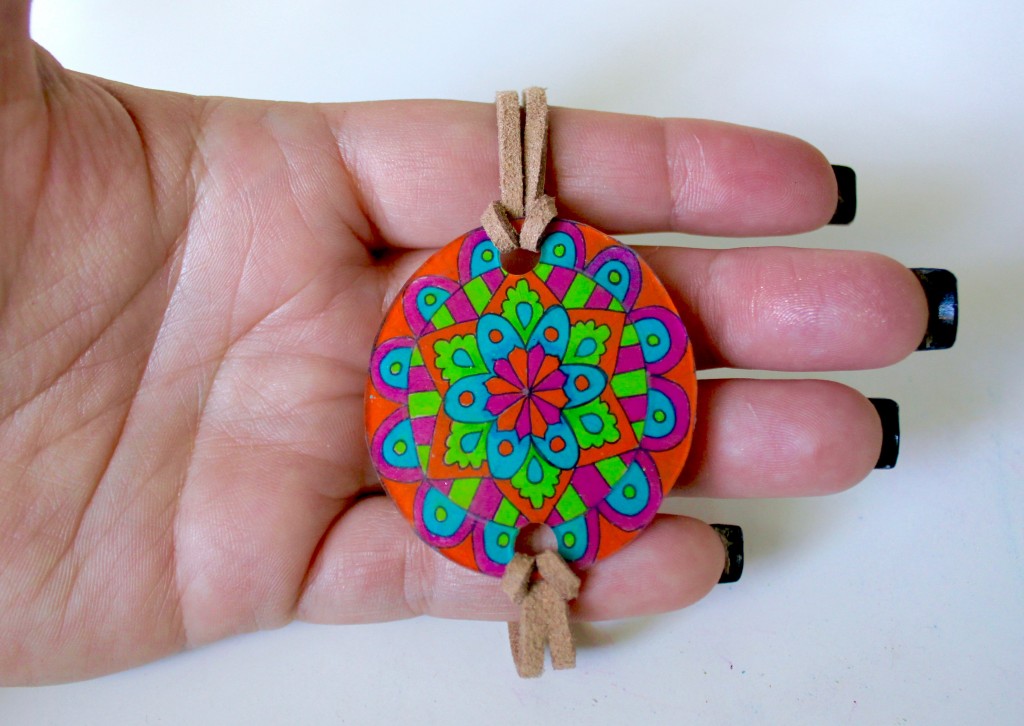
Next we can doodle the designs. I’ve tried several different pens for this, and an ultra fine Sharpie seems to work best. You want to be sure that the marker you use won’t smear when you use an eraser on it.
Use the pencil lines as guides to create repeating geometric patterns. You can fill the space between the lines, or you can use the lines as guidelines for the center of the shape you’re drawing. Experiment with different shapes… petals, arcs, raindrops, triangles. I like to wait to add fine detail until I’ve erased the pencil marks. I find it helpful to turn the shrink film often, to get a better angle for drawing.
8
Erase your pencil marks. Do a good job, because any remaining marks will darken as the film shrinks.
9
You can further embellish your mandala with dots, stripes, and scallops. Then it’s time to color! Personally, I like to use 4 colors, but you can use as many as you’d like.
10
Use scissors to cut along the outer edge of your design.
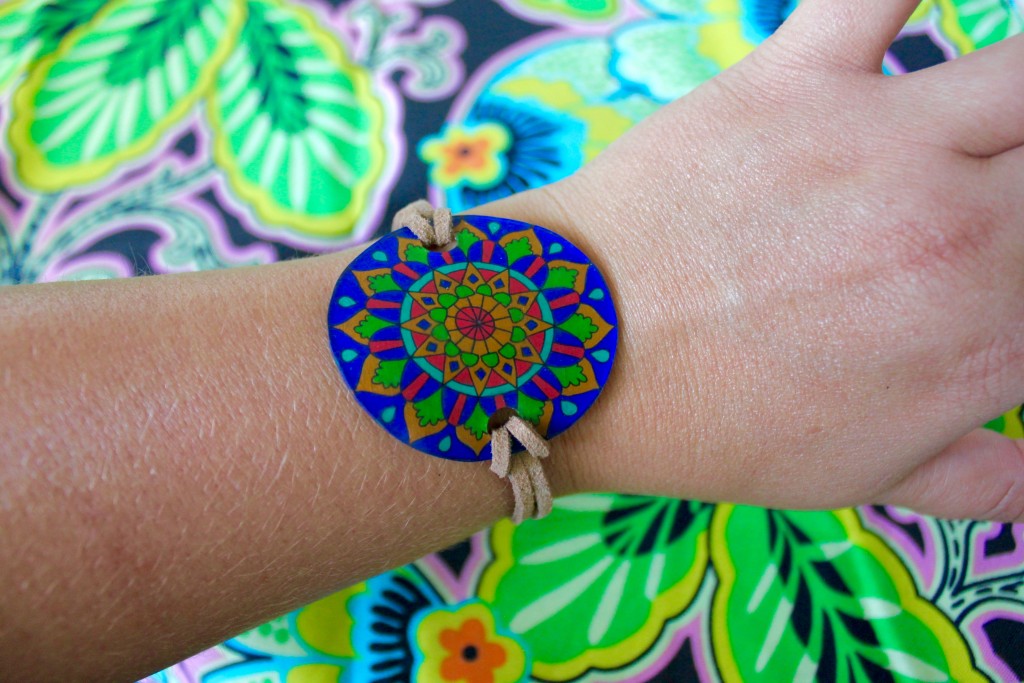
11
Once you’re finished, punch a hole on each side of the mandala so we can turn it into a bracelet. I’m using a ½ inch hole punch. (Remember that the holes will shrink significantly as well, so I’ll end up with holes that are about a ¼ inch.)
12
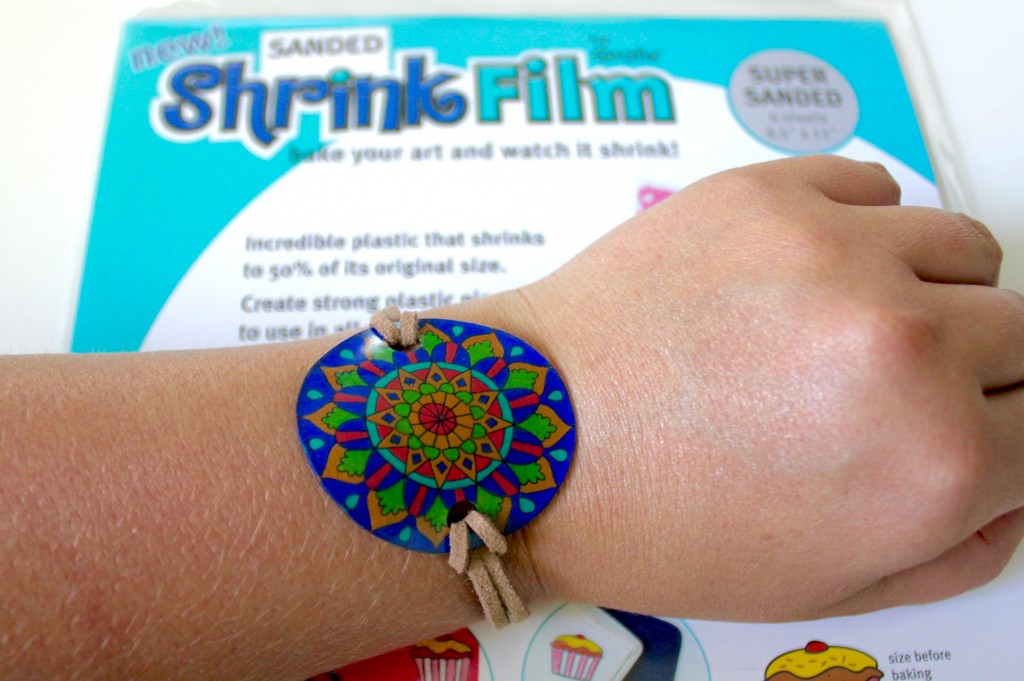
Place a piece of parchment paper on a cookie sheet, and add the shrink film designs on top. I’ve found that a piece of cardboard on top helps the design to maintain its shape while shrinking. I bake mine at 325 degrees for three minutes, but ovens can vary, so keep a close eye on yours. They’re finished baking once they’ve curled up, shrunk, and completely flattened once again.
13
If you’d like, you can immediately place the baked charm onto a glass so that it cools in a slightly curved shape. Use a potholder so you don’t burn yourself. I don’t have a strong preference for the flat versus curved charms, so do whatever you like best.
14
Finally, let’s turn this mandala charm into a bracelet. You’ll need cord crimps, spring ring sets, and jump rings. You’ll also need leather cord, a ruler, and small pliers.
Cut two pieces of cord to about 6 ½ inches. Fold a piece of leather cord in half, and push the folded loop up through the back of a hole. Feed the cut ends of the cord through the loop and pull to tighten. Repeat on the other side.
15
Add cord crimps to the leather cord, pinching shut with the pliers. Add a jump ring and spring ring to one end to finish.
I hope you enjoyed learning how to create these pretty mandala bracelets!


 Finished?