
In this tutorial, I’ll show you an easy way to paint realistic watercolor portraits, even if you aren’t an artist!
Prep Your Portrait Photo
First, you’ll need to select a portrait photo and change it to black and white. I don’t mean the grayscale of a typical black and white photograph. It must be reduced to only two shades: black and white.
This option may be found under “posterize” in photo editing programs, but I’ll quickly show you how to do it in Microsoft Word.
- Open a blank document.
- Click the Insert menu and then select Picture.
- Choose From File.
- Open the desired photo.
- Right click on the photo and select Format Picture.
- Choose Recolor, and select Black and White.
It may take some trial and error to find a photo that looks great when reduced to two colors. I found that head shots with side lighting seem to look best.
Trace The Photo
Once your picture is printed, you’ll need to trace it. Lay the watercolor paper down, then layer the graphite paper on top of it, face down. In other words, the darkest side of the graphite paper will be against the watercolor paper. Then lay your printed picture on top.
Lightly tape the layers together with masking tape or washi tape to prevent shifting.
Next trace the black areas of the picture. You can use a pen, but I prefer a fine mechanical pencil since it’s easier to see the areas you’ve traced. Press firmly to transfer the graphite to the watercolor paper.
Carefully peel back the graphite paper to peek at your work. Make sure you haven’t missed any areas before you untape the photo and graphite paper.
Paint The Picture
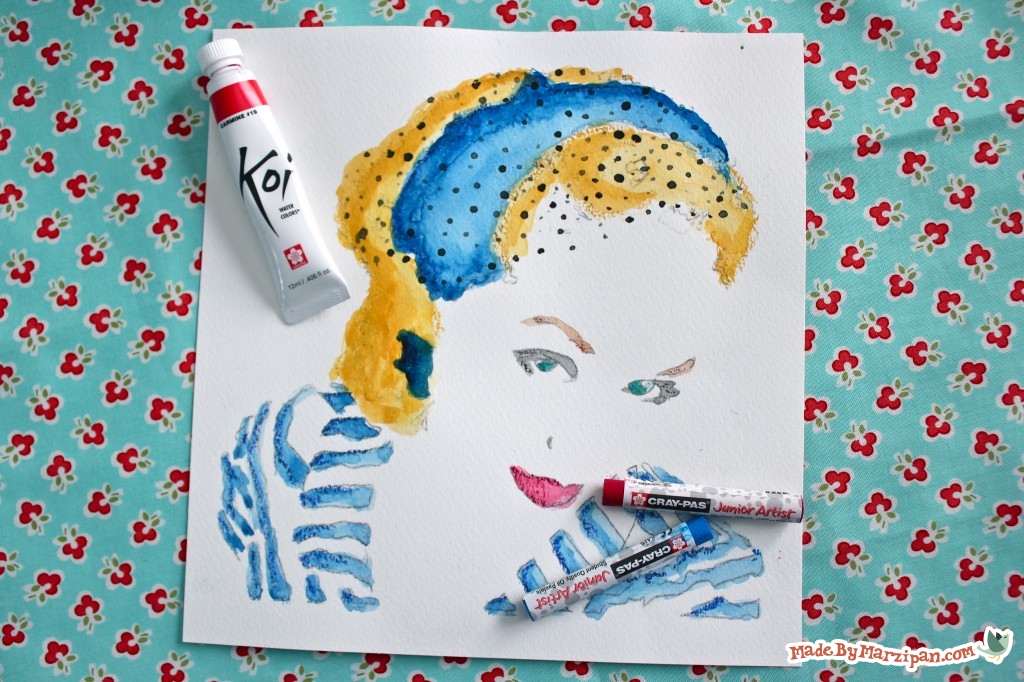
Now you should have a perfect outline of your photo, so making this portrait will be as easy as filling in a coloring page. I’ll be making a full-color version and a monochromatic version.
I’ve decided to add some accents to the full-color version using Sakura’s Cray-Pas® Junior Artist oil pastels.
Now it’s time to paint! When using the tube watercolors, a little goes a long way. Fill in all of the areas that were black on your printed photo. I like to make a partial outline with a dark shade, then water down the paint to fill in the rest of the shape.
After your paper is completely dry, you can go back and gently erase the graphite lines with a kneaded eraser. I happen to like the lines, so I’ll leave them alone.
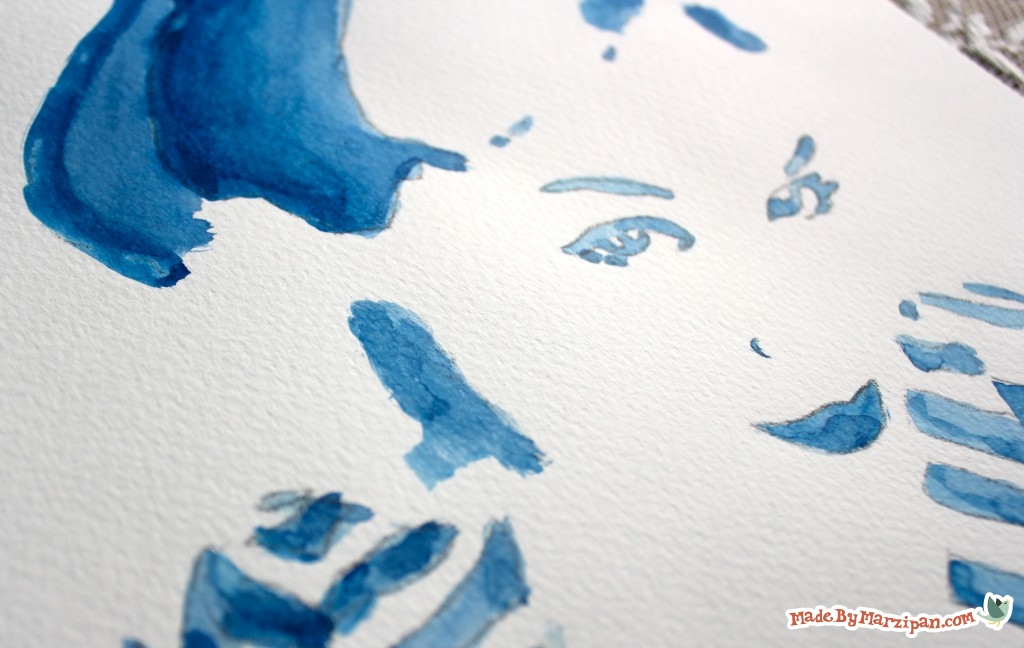
I also made a version using only blue. Monochromatic paintings are fun to do with tube watercolors, because it’s so easy to adjust the intensity of the paint. So even though it’s all one hue, the painting contains a variety of tones.
Make a portrait of newlyweds for a wedding present, or a portrait of the kids for grandma. They won’t believe you painted it yourself!

 Finished?
Show it off!

I loved this and want to try it for my art journal pages. I also linked to this post on my blog: http://nocreationwithoutchaos.wordpress.com/.
I´m definitely going to try that! Looks great :) Thanks for sharing. G.