Tips:
1
First, you’ll need watercolor paints. I prefer Sakura’s Koi tube watercolors. Tube watercolors are concentrated, giving you complete control over the intensity and consistency of your paint.
2
You’ll also need watercolor paper. This paper is slightly textured and thicker than printer paper, so it’s resistant to warping. You can find this in the art supply section of most large stores.
3
Next, you’ll need yarn, string, embroidery floss, or thread. Different materials provide different results. Natural threads like cotton work best. (Polyester, rayon, and beeswax-coated thread resist the paint and don’t create a smooth effect.)
How to:
made with
water
tissue paper
old sewing pattern (Optional)
1
Begin by mixing a dab of paint with water. A little paint goes a long way. You can blend several colors together to get the exact shade you want.
2
Experiment with your different materials. Place a piece of string or yarn in the paint, using a paintbrush to make sure it’s fully saturated. Drag the yarn across the paper.
3
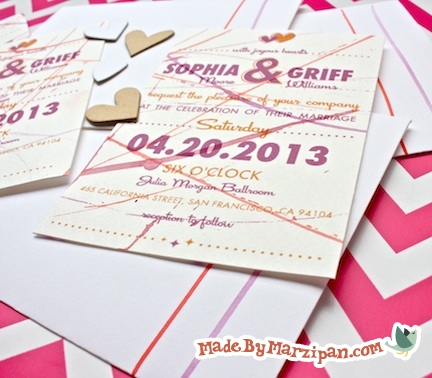
I used this dragging technique to create a background for these wedding invitations. Once the paint is dry, trim the paper to 8.5 x 11 inches and change your printer settings to heavyweight or photo paper. Trim the paper into cards, and you have unique handpainted invites on a small budget!
4
You can paint the envelopes to match.
Find Zee Studio’s free invitation template at TheWeddingChicks.com. You can customize it with your own wedding colors with their easy design tool.
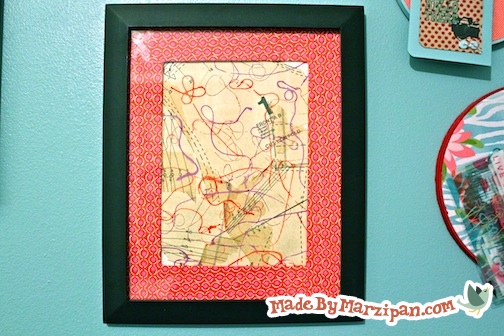
String Painted Collage
This next string painted project is a collage made of sewing pattern pieces. If you don’t want to use a pattern, you can try this project with colored tissue paper. Be aware that the dye in the tissue paper may run, which is actually a pretty cool effect.
1
We’ll start by adhering the pattern pieces to the watercolor paper. I’m using Mod Podge, but regular white school glue works as well. It’s important that you water the glue down to a milky consistency, because too much glue can act as a resist and the paper won’t absorb the paint.
2
Tear off a piece of tissue paper and dip it in the glue and water mixture. Allow the excess glue to drip off, then smooth it onto the paper.
3
Push the excess water outward from the center, being careful not to tear the tissue paper.
4
Since the paper is sheer, layering creates interesting contrast, especially when using different colors of paper. Let the paper dry completely before moving onto the next step, or the paint will run.
5
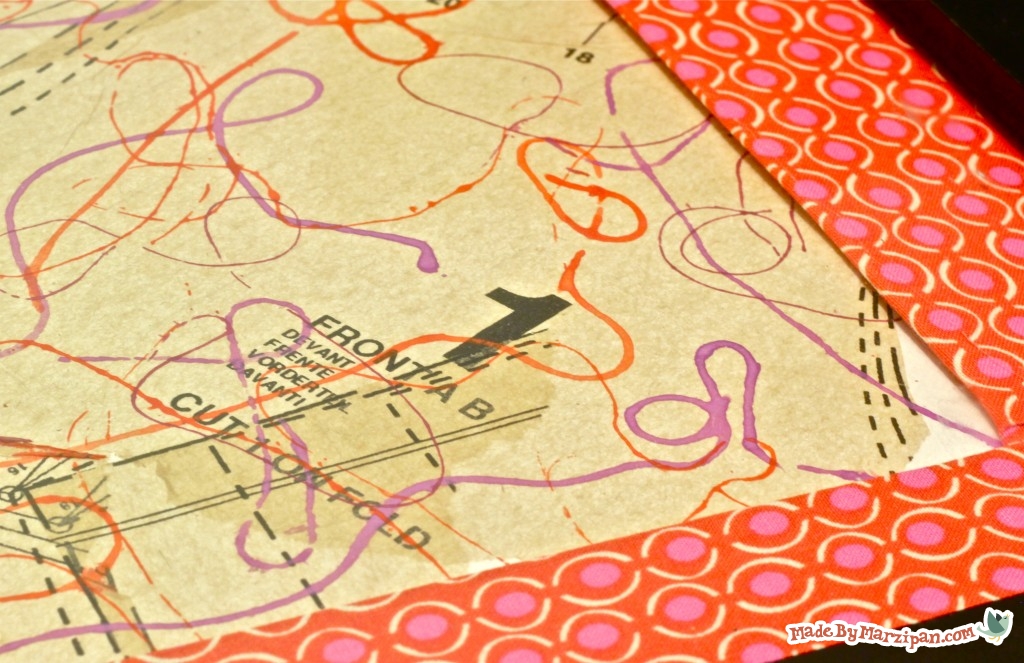
For this project, I want to maintain the organic shape of the thread’s silhouette. Get the thread very wet, then drop it on the page while holding one end. Don’t drag the thread.
6
Use the handle of your paintbrush to tap down any areas where the thread isn’t coming into contact with the paper. You don’t want the paint to bleed, so press lightly.
7
Remove the string, and you’ll have the coiled imprint of the thread.
Make Your Own Mat
I had a picture frame for this project, but no mat. It’s easy to make your own to compliment your string painting.
1
I used a piece of chipboard that was on the back of a pad of paper. Use a ruler to mark a two inch border all the way around, then cut out the center with an X-Acto knife.
2
I’m covering my mat with fabric scraps. Lay a 3-inch wide fabric strip face-down, and place the mat on top of it.
3
Use hot glue to wrap the fabric over the edges of the mat. You could either cut the fabric strip’s ends at a 45 degree angle to create mitered corners, or you can make a straight edge like mine.
4
Snip the inside corners of the fabric at an angle so they will wrap around smoothly.
5
Cover the other three sides of the mat as you did the first.
Made By Marzipan may have received product or payment for this post. Posts may contain affiliate links. Disclosed in accordance with the Federal Trade Commission's 16 CFR, Part 255.

 Finished?