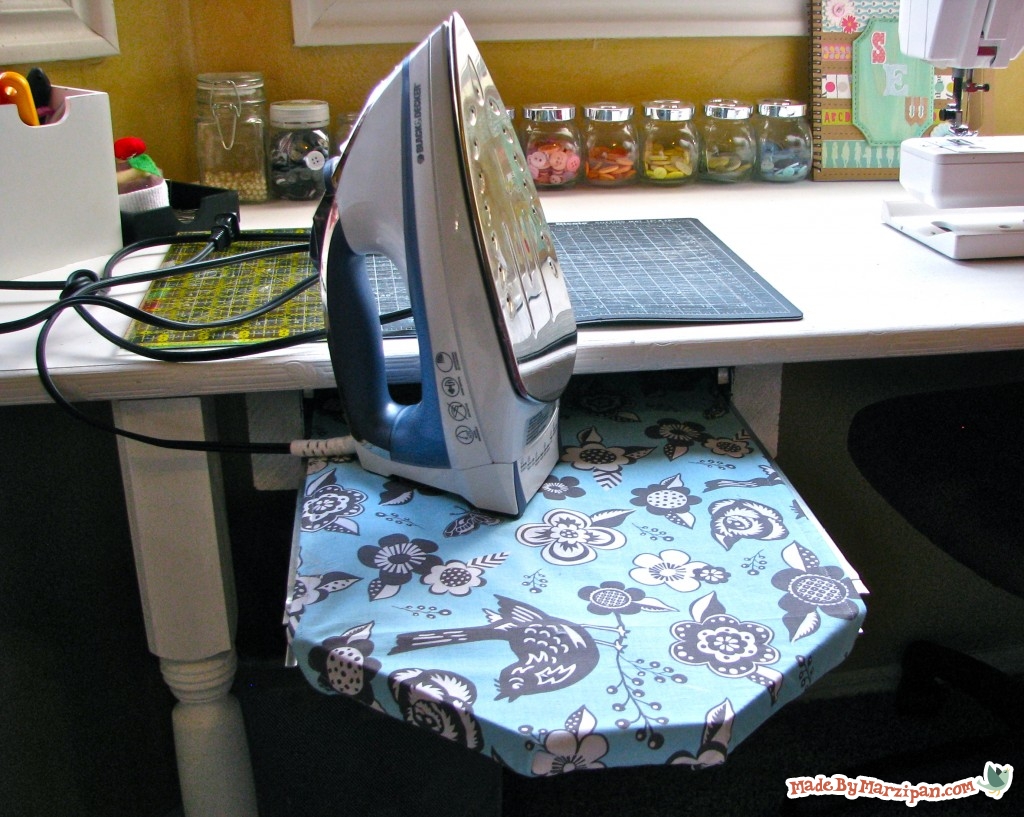
If you have limited space in your sewing area, you can make a slide-out ironing board that attaches to the underside of the table, taking up zero floor or table space. Also see my tutorial for sewing a Slide-Out Ironing Board Cover.
Tips:
1
You’ll need a piece of real wood that’s at least one inch thick. Don’t buy MDF, because that can swell and warp when you iron with steam. The length and width of this board is up to you, and is only limited by the size of the table you’re attaching it to, and the length of drawer slides you can purchase. My sewing table is only 20 inches deep, so my board can’t be any longer than that. If you’re buying the board new from a home improvement store, save yourself some time by asking them to cut it to the length you want. You’ll have to cut the angled corners yourself.
2
Also pick up a 2×4. You’ll want to cut two pieces that are the length of your drawer slides. The width should be okay, as long as it’s between 3-4 inches. Unless you have a built-in table that sits flush against the wall, you will also need to cut a piece to be the false back. This should be the width of the ironing board plus 4 inches (because it must screw into the back ends of the other two boards); it gives the drawer slides something to stop against. Again, most big home improvement stores will make these cuts for you if you ask.
3
You’ll also need a set of side-mounting drawer slides. These can be purchased at any home improvement store. Lowe’s carries them in lengths up to 30 inches. Choose slides that are about 4 inches shorter than the length of your ironing board. That allows you to angle the ends of the ironing board. Also pay attention to the load rating, I’d recommend choosing slides that have at least a 50 Lb. rating.
4
Finally, you’ll need screws that are long enough to go through the 2 x 4 and into the underside of the table– without poking through the top of the table.
How to:
made with
1
I’m using an electric compound miter saw to cut the angled ends on my ironing board. You could also use a handsaw and a miter box. I am making my cuts four inches down, at a 45 degree angle.
2
Next you need to decide whether you want a permanent or removable ironing board cover. If you want a permanent one, use a staple gun to attach your fabrics now, wrapping them tightly around the board and stapling on the underside. If you want a removable one, I’ll be making a tutorial later to show you how. Take the time to trace your ironing board on a sheet of wrapping paper to use as a pattern.
3
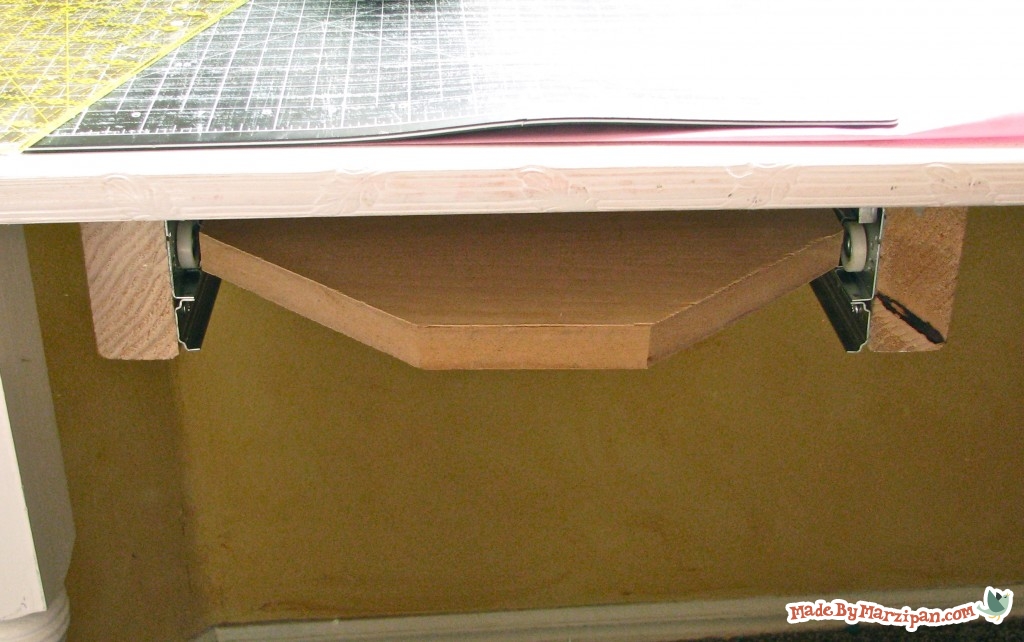
Now we’ll attach the drawer slides to the long segments of 2×4. You’ll be attaching the pieces with the drawer stop at top, the ones with the wiggly rectangle piece. Mark three of the holes with a pen, then pre-drill the marks with a drill bit. Replace the drawer slide and attach with the screws provided in the kit.
4
You need to decide if you want a permanent or removable cover for your board. If you’d like it to be permanent, staple the fabrics directly to the underside of the board using a staple gun. If you’d like a removable one, you can find a tutorial for it by clicking here.
5
Next we’ll attach the other two pieces to the sides of the ironing board. They need to sit against a straight edge, so attach below the angled cuts. Again, mark and drill, then attach the screws.
6
My table is built-in, so I don’t need to add a false back, but you probably will. Simply screw the last length of 2×4 to the back of the other two pieces. Remember, the piece with the wiggly rectangle should be at the front and top, so screw the back board onto the opposite end.
7
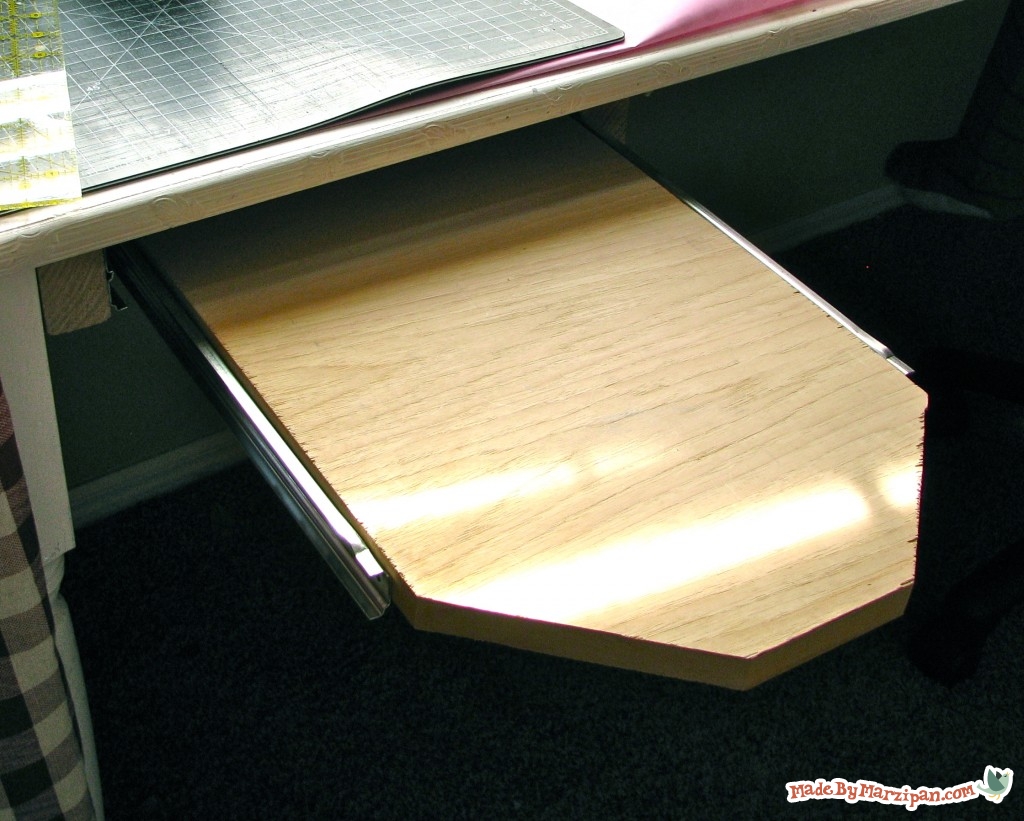
Now it’s a good idea to check your work now by testing the drawer slides. The metal bars should fit over the wheels, and your board should slide back and forth easily. Don’t worry if your front drawer stop doesn’t seem to be working, it needs to be upright for gravity to do the job.
8
Now I’m going to pre-drill holes to mount my 2 x 4’s to the underside of my table. You can get the tips of the screws started to make mounting easier.
9
If your table is free-standing, you might find it’s easiest to flip the table upside down. Otherwise, you can crawl underneath and screw upward into the table. Make sure that the edge of the ironing board doesn’t stick out when the board is pushed all the way in. Double-check to make sure your screws aren’t piercing the top of your table.
10
Insert your ironing board into the slots and you’re all done. Should you ever decide to remove your ironing board, simply unscrew the 2×4’s and the table top will have no visible marks.
To see my Slide-Out Ironing Board Cover tutorial, click here.
Made By Marzipan may have received product or payment for this post. Posts may contain affiliate links. Disclosed in accordance with the Federal Trade Commission's 16 CFR, Part 255.

 Finished?
I love your designs and tutorials. I the cheerful quilt and am studying the ironing board tutorial now. thanks so much! I will recommend you to my daughter who loves the crafty things too.
Thanks, Sandi :)
Thank you for this tutorial. I think this will work great for me.
I would like to see what to do to organize large amounts of quilting stuff in a 12×12 room with three quilt tables two sewing machines and no under table storage in case of flooding. I can post a photo if that would help. I am trying every month to do a little so I will still have time to sew. Thank you again. I love all of your projects! Chrissy B
Good question, Chrissy. I would recommend adding wall shelving to keep your supplies off the floor. “Track brackets” will allow you to adjust later if needed, and will cause a minimal amount of damage to your walls. You can buy wood boards and stain or paint them, or keep things simple by purchasing laminate boards. Have fun!