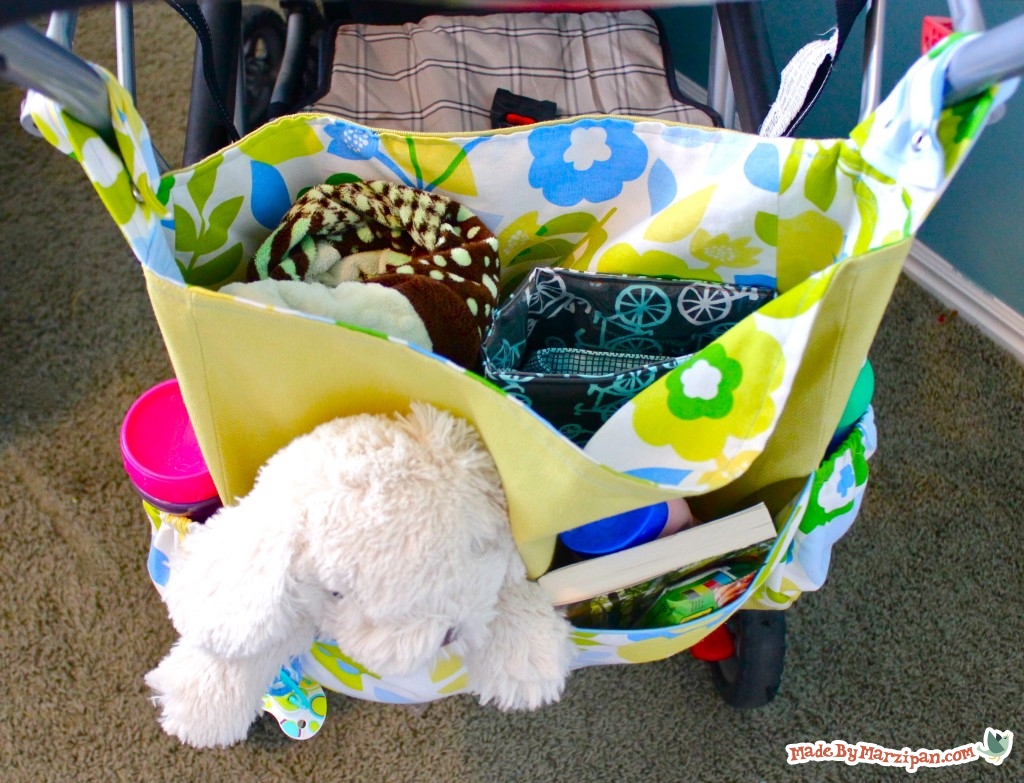
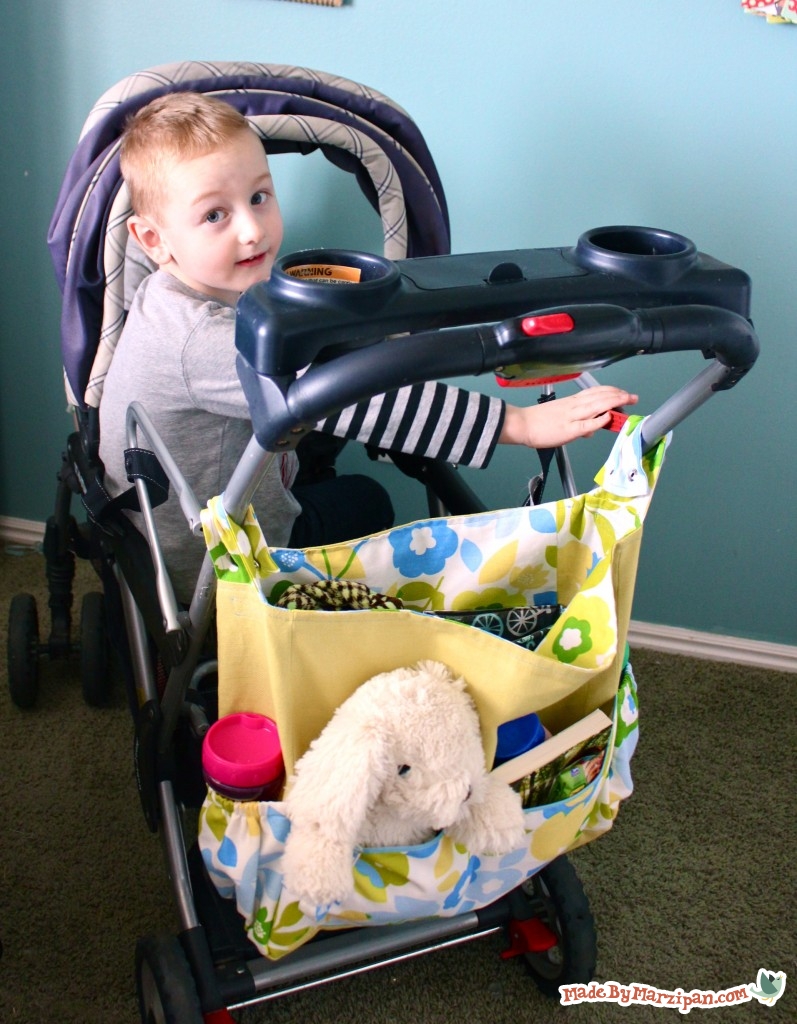
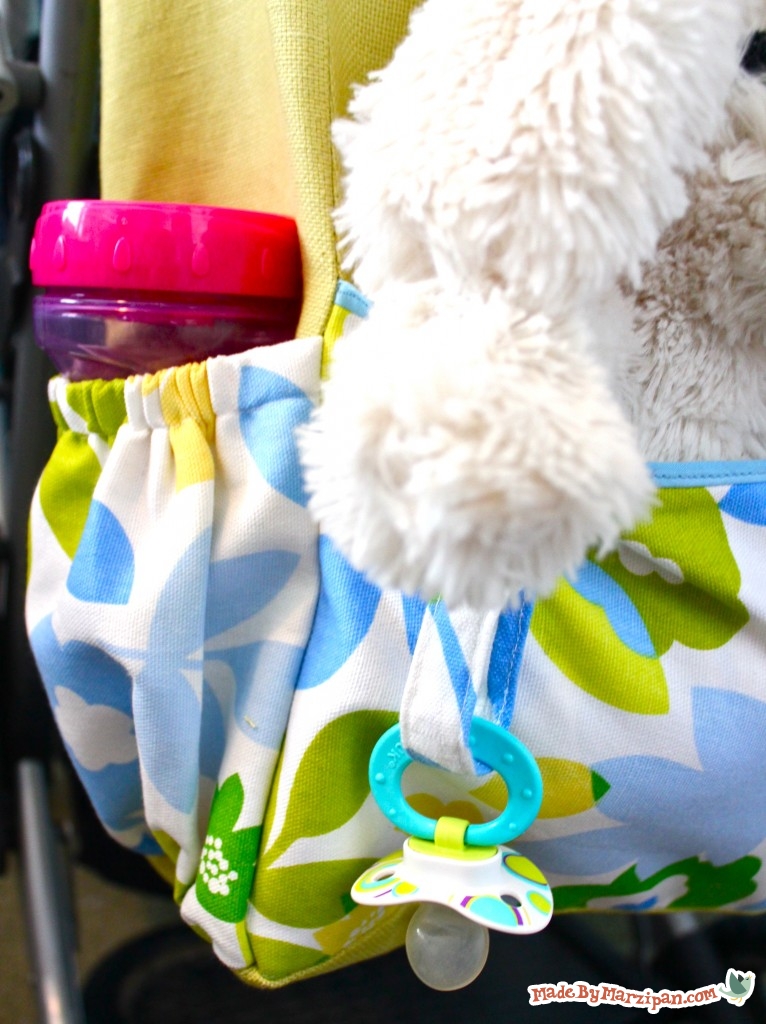
A Walk In The Park Stroller Bag snaps onto any stroller’s handles. It features two elasticized side pockets for bottles or sippy cups, a loop for your key ring or a pacifier, two front pockets for snacks and toys, and a large inner pocket for everything else!
Tips:
Measurements are for non-directional 45-inch fabric. Adjust accordingly.
How to:
made with
1.5 yd home decor weight fabric, patterned
1 yd home decor weight fabric, solid
Start by cutting your fabric. I’ve chosen a patterned fabric for my lining and pockets, and a solid for the outer bag.
Patterned Fabric:
- 18 x 15 in. (cut 3, lining front / lining back / big pocket)
- 6 x 15 (cut 2, lining sides)
- 18 x 6 (cut 1, lining bottom)
- 9 x 15 (cut 2, lining side pockets)
- 4 x 18 (cut 2, snap tabs)
- 2 x 8 (cut 1, key loop)
Solid Fabric:
- 18 x 15 in. (cut 2, outer front / outer back)
- 6 x 15 (cut 2, outer sides)
- 18 x 6 (cut 1, outer bottom)
Lining
1
We’ll begin with the bag lining. Sew the 6 x 15 inch side panels to the 18 x 6 inch bottom panel, sewing one to each short end with right sides together. Sew with a 5/8 inch seam. Press the seams open.
2
Now we’ll pin one of the large 18 x15 rectangles to the strip we sewed. Line up the short side of the large rectangle with one of the outer strip segments. Right sides should be together. Pin. When you reach your seam joining the strips together, it’s time to turn the strip and pin it along the long side of the main piece. Your corners should look like this. When you reach the next seam, turn again and pin the remaining side strip to the other short side of the main piece.
3
Sew the sides and bottom in place with a 5/8 inch seam. When you reach a corner, tug gently on the fabric diagonally; you want the corner to be free of pleats. Press open seams.
4
Finally, add the other main piece by pinning it to the rest of the bag, right sides together, matching up the edges. Sew with a 5/8 inch seam. Press the seams open. Snip off the excess fabric at the corners, being careful not to cut your stitches. Set aside.
Side Panels & Pockets
5
Find the two patterned side pocket pieces that measure 9 x 15 inches. Fold them in half so they measure 9 x 7.5 inches and press along the fold. The pattern should be on the outside. Now we’ll sew a seam a half-inch below the fold to create a casing for the elastic.
6
Change your machine to a basting stitch, or the longest stitch available. Sew along the bottom raw edge of the side pocket pieces with a 1/4 inch basting stitch. Do not backstitch. Gently pull on the bottom thread to ruffle the fabric. Adjust the fabric so that it fits the bottom of the side pocket panel. Pin in place, lining up the raw edges of both pieces.
7
Now we’ll need the elastic. Cut 6 inches of elastic for each pocket. Use a safety pin to thread it through the casing. Pin the sides of the pocket panel to the side panel. Pull the elastic taut so that the pocket panel fits the dimensions of the side panel. Pin the ends of the elastic to the sides of the pocket piece.
8
Sew the sides and bottom of the pocket to the side panel with a 1/4 inch stitch, leaving the top open. Do this for both sides.
Key Loop
9
Next we’ll make a key loop so you have a place to hang your keys, or maybe a pacifier. Fold the 2 x 8 patterned piece in half lengthwise so it is 1 inch wide. Sew along the raw edge with a 1/4 inch seam. Press the seam open.
10
Turn the tube right side out (you might find it helpful to use tweezers). Center the seam and press.
11
Tuck in the raw edges of one end 1/4 inch. Don’t worry about the other end, it won’t show. Topstitch shut with a 1/8 inch seam, and continue topstitching around the edge of the tube.
Front & Large Divided Pocket
12
Next we’ll work on the front piece and its large divided pocket. Take the remaining patterned rectangle that measures 18 x 15 in. and fold it half so that it measures 18 x 7.5 inches. The pattern should be on the outside. Press the fold. Cut a piece of bias tape to 18 inches, and press if needed.
13
Line up the raw edge of the key loop piece with the top of the pocket piece’s fold. Place it about 4 inches in from the left edge.
14
Open the bias tape and pin it along the folded edge of the pocket piece. Sew the bias tape in place, encasing the raw end of the key loop.
15
Now we can add the pocket to the main piece. Lay it on top of a solid 18 x 15 rectangle and sew along the sides and bottom, leaving the top open. Then, divide the pocket by sewing a seam directly up the center of the pocket.
Assembling Outer Bag
16
Assemble the outer bag as you did the lining. Pin the side pieces to the short ends of the bottom piece and sew with a 5/8 seam. Make sure that you are sewing along the bottom of the pockets. Press the seams open.
17
Pin the side & bottom strip piece to the front bag piece. Sew with a 5/8 in. seam. Then sew the remaining 15 x 18 inch rectangle to the bag. Press open the seams.
Snap Tabs
18
Fold the two patterned 4 x 18 rectangles in half, right sides together, so that they are 9 x 4 inches. Press. Sew around the edges with a 1/4 inch seam, leaving the unfolded short end open for turning. Turn right side out and press.
19
Pin the snap tabs to the top center of the outer side panels. Rather than lining the strap end up with the top of the bag, extend them about 1.5 inches past the bag. This will allow us to sew it more securely later.
Finishing the Bag
20
With the lining of the bag inside out, slide the outer bag inside of it. Right sides should be touching. Line up the side seams of the bag and pin all the way around. Sew with a 5/8 seam, leaving a 10-inch hole for turning.
21
Press open the seams. Turn right side out.
22
Press the top seam. Fold in the edges of the hole and press those as well.
23
Topstitch the hole shut with a 1/8 inch seam, and continue topstitching all the way around the bag. I also decided to topstitch around my snap tab pieces as well.
24
To strengthen the snap tabs, sew a rectangle with an X 1/4 inch away from the top seam.
25
Finally, attach two heavy-duty snaps to each of the tabs, and one to the key loop as well.
Click to check out Made By Marzipan’s other sewing projects for baby.
Made By Marzipan may have received product or payment for this post. Posts may contain affiliate links. Disclosed in accordance with the Federal Trade Commission's 16 CFR, Part 255.

- Eliza
- Beth
- Caroline
 Finished?
Show it off!
Excellent tutorial! I have made a couple and they work great for dirty cloth diapers, but also for dirty/wet cloths
I made this for my girlfriends baby shower and it turned out so great! Will you be selling the pattern for this on your Etsy site? Let me know :) Thanks!!
Thank you for such a WONDERFUL tutorial!! I am a novice sewer and I have made 6 of these bags for my friends and myself, I actually FEEL like a professional:) Really, really thank you!
Wow, six?! I would LOVE to see them! You can post a picture right here in the comments section :)
I need that bag now ! Thank you so much for sharing <3 I will sew two of this and 2 of the changing mats . One for me and one for my lovely Sister in Law who hopefully is getting pregnant soon after loosing her baby 8 month pregnany last year .
Not sure if you got my first messaage,, I would like to know where to purchase the heavy duty snap tool that you use in the stroller bag tutorial,, And I would like to thank you for all the great tutorials you have listed, I have made several of them, they are fun, easy and very creative,, thanks again
You are just awesome. thank you for these lovely lovely things. So cool yet so practical.
I think this tutorial is one of the best ever–clear instructions and nothing left out. I saw the ease with which you inserted the snaps and would be interested in knowing what tool you used. I struggle with the tool/hammer type. Thanks again for sharing such beautiful work.
hi, what a great tutorial, I’m thinking of making this for my mum’s wheelchair but I need to make sure it’s not too wide, do you know what the final dimensions of the bag are? thank you!
You could also add a long strap to make a purse!
im going to so make this
It look so easy I’m gonna try it out.
Hey there
Turned out a bit difficult because I had to count it all in cm (I’m Czech and we don’t use inches). I also had to change the dimensions so it would fit my stroller. But the outcome is awesome!
I changed the snap buttons for one long shoulder strap and it works nicely. I also added zipper to the top. I would also add something in between the bottom layer to straighten the bottom. Maybe next time :-)