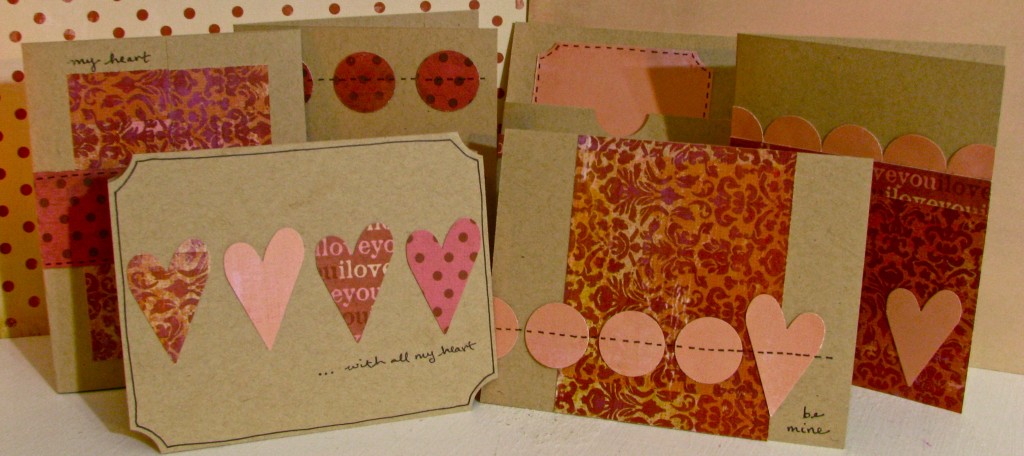

Nothing says “I love you” like a handmade card.
How to:
made with
1
We’ll use a few basic supplies for these cards: three sheets of 8 and a half by 11 craft cardstock, a heart punch, a 1 inch circle punch, 2 sheets of 12×12 double-sided patterned paper, a black pen, and adhesive. If you don’t own the punches, the shapes aren’t difficult to free hand.
2
Begin by cutting the three sheets of 8.5×11 cardstock in half. Now you should have six pieces of cardstock that measure 8.5x 5 and a half.
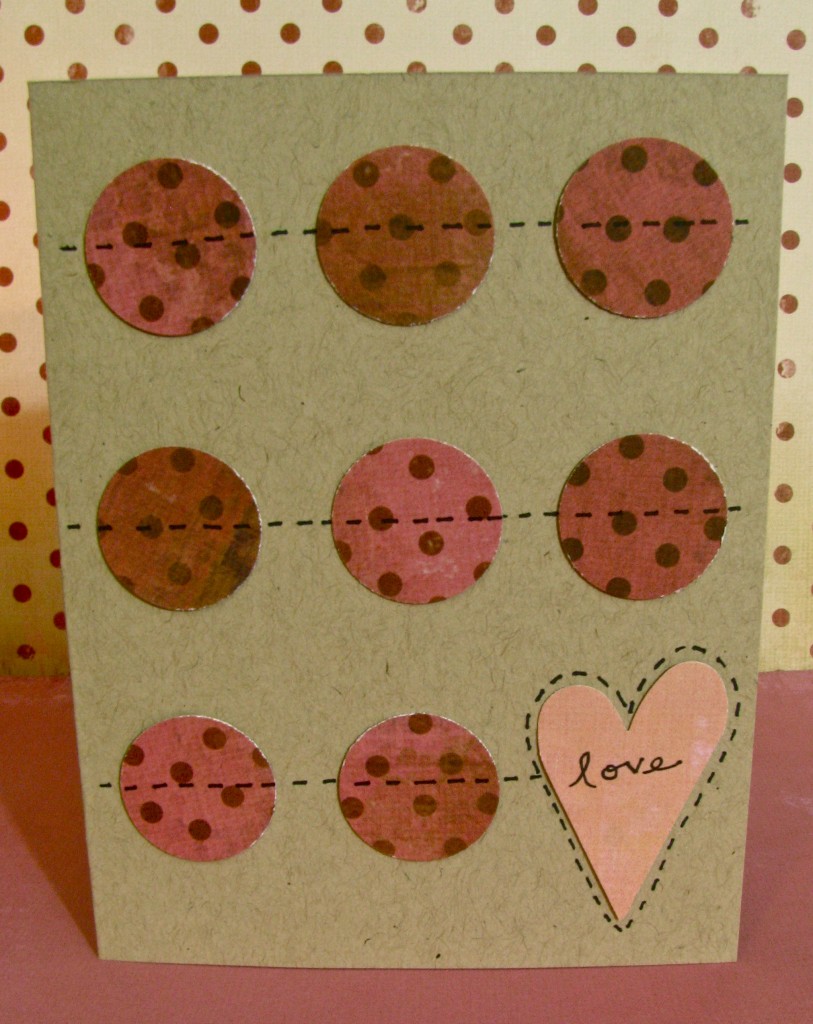
Card 1:
1
Fold the cardstock in half to create a vertical card. Punch a heart out of patterned paper. If you don’t own these punches, it isn’t difficult to freehand these shapes. Punch eight circles from another patterned paper.
2
Arrange the circles in evenly spaced rows. Add the heart in the bottom right corner. Adhere the shapes. Use your marker to add faux stitching across the rows of circles. Add a stitched border around the heart as well. Write the word LOVE on the heart.
Card 2:
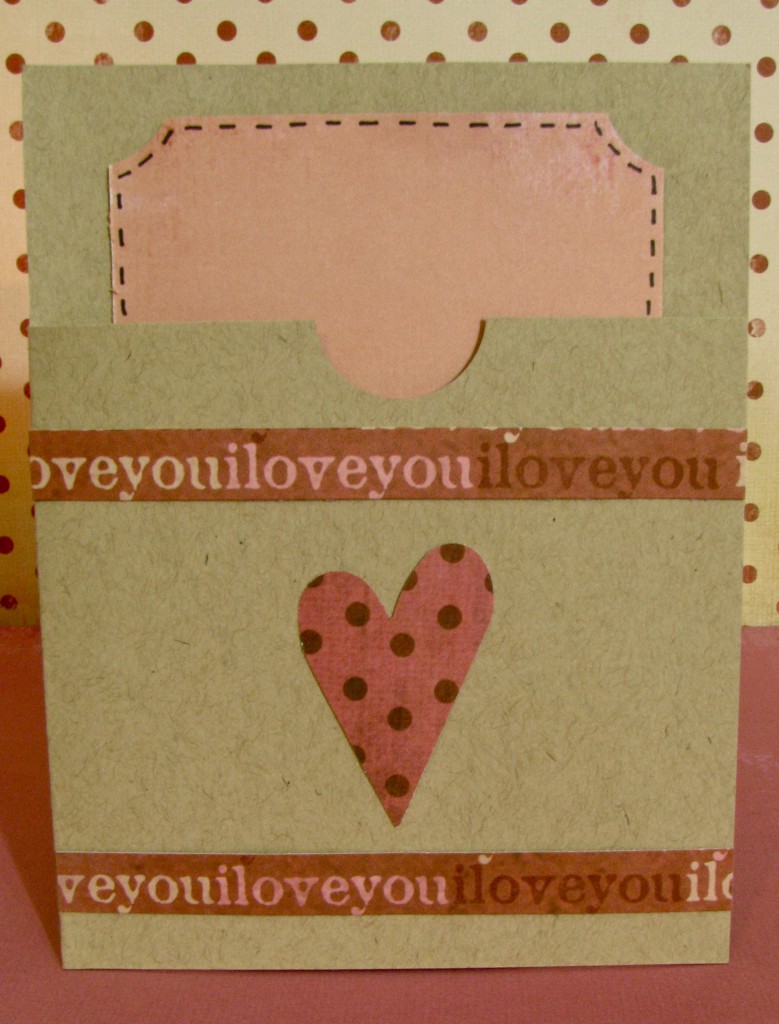
1
Fold the cardstock in half to create a vertical card. Open flat, then cut about two inches down from the top along the fold. Trim in the other direction to remove the top two inches from the front of the card.
2
Open the card and position the circle punch in the center of the flap. Insert the paper only halfway into the punch so that you cut a half circle. Apply adhesive to the open side and bottom of the flap. Close to adhere.
3
Cut a piece of patterned paper to 3 and a quarter inches wide. Then trim it to four and a quarter inches in length. Punch a heart out of a contrasting pattern. Select another pattern for your border. Trim to about 1/4 inch wide. Position border along the bottom of the card and adhere. Add a matching border at the top, and the heart to the center.
4
Now we’ll trim the corners of the tag we made for our pocket. Insert the top corner of the paper into the punch. Repeat on the other side. Draw a stitched border around the edges of the tag. Place the tag inside the pocket.
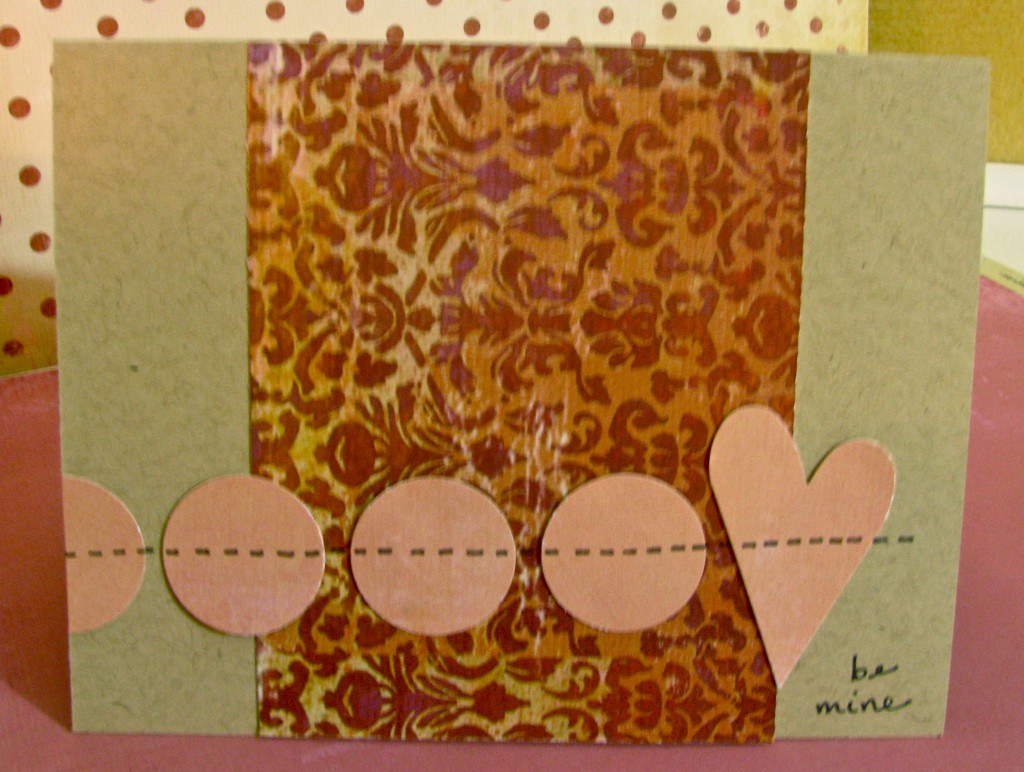
Card 3:
1
Fold the cardstock in half. This card will be horizontal. I’m using a scrap of patterned paper that’s already trimmed to 4 and a quarter inches wide. Adhere to the center of your card and trim to fit.
2
Punch a heart out of contrasting paper.
3
Punch four circles out of the same paper. Cut one of the circles in half.
4
Start by adhering the half circle on the left, then add the other circles and the heart.
5
Draw a stitched border across the middle of your shapes.
6
Write “be mine” in the bottom right corner.
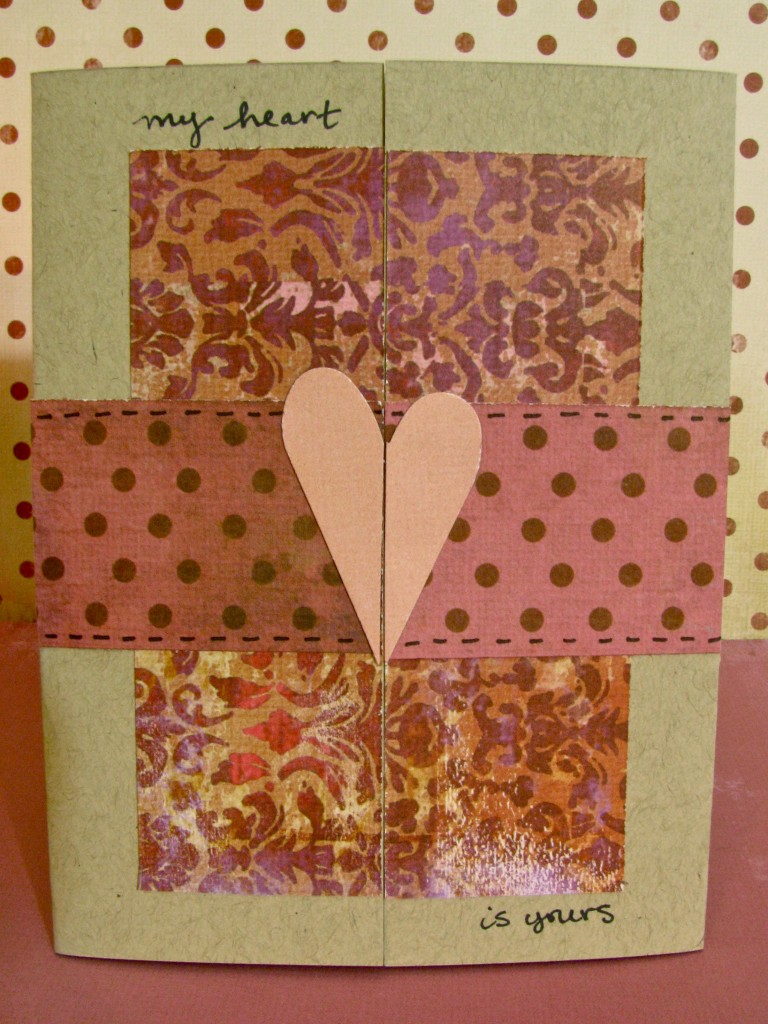
Card 4:
1
This will be a tri-fold card. Bring the two ends of the cardstock together to meet in the center.
2
Trim a patterned paper to 3 1/2 inches. Then trim the length to 4 1/2 inches, creating a rectangle. Cut the rectangle in half. Adhere one rectangle to each side of the card.
3
Use a contrasting paper to make a border that is 1 1/2 inches wide. Line up the border with the center opening, and trim to fit. Repeat on the other side.
4
Punch a heart from contrasting paper. Cut the heart in half. Adhere one half of the heart to each side of the center opening. Write the words “my heart’ at the top of the card, and “Is yours” at the bottom. Draw stitched lines along the center border.
Card 5:
1
Fold cardstock in half to create a vertical card.
2
Trim patterned paper to 4 1/4 inches wide. Add adhesive to the bottom 2/3 of the card. Lay the patterned paper on top, and trim to fit.
3
Punch 3 circles out of a contrasting paper. Cut the circles in half. Add a half-circle to the top center, along the edge of the patterned paper. Add half circles to both sides, trimming the end ones to fit. Punch a heart from the same paper as your circles.
4
Trim a contrasting paper to 4 1/4 inches long, and 1/4 inches wide. Add this below your half-circles to create a border.
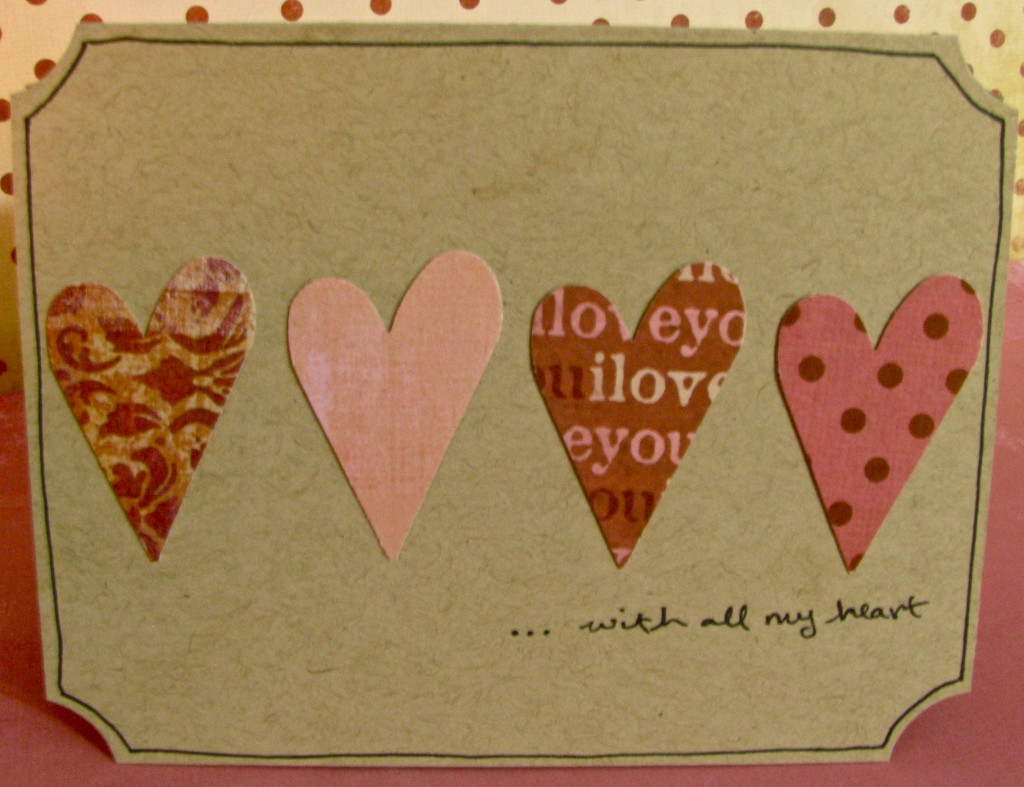
Card 6:
1
Fold cardstock in half. This will be a horizontal card.
2
Use the circle punch to trim the four corners.
3
Punch four hearts, using both sides of your patterned papers. Arrange hearts in a line in the middle of you card. Write “with all my heart” along the bottom.
4
Draw a border around the edges of the card.
Made By Marzipan may have received product or payment for this post. Posts may contain affiliate links. Disclosed in accordance with the Federal Trade Commission's 16 CFR, Part 255.

 Finished?
Show it off!

These are really sweet and I love the color palette you used!
Good to see a talnet at work. I can’t match that.