
Join me as I experiment with DIY ideas to make my new Filofax planner pretty and practical! The first in an ongoing planner-themed series.
Tips:
1
I opted for a personal-size, 6-ring Filofax. There are tons of different brands of planners, but most of the techniques I’ll be sharing in this series can be adapted to whatever type of planner you have.
2
This is Part 1 in my Planner Series. For Part II click here.
How to:
made with
DIY Washi Tape
- Masking tape
- Wax paper
- Sakura pens (Pentouch®, Souffle, and Gelly Roll®)
- Pencil, spool, or other item to roll tape onto
1
I’m going to start by experimenting with making my own washi tape. I’m using regular masking tape, and adding it to wax paper so I can draw on it. I tried out several types of pens from my stash. Doodle with your pens and allow to dry completely, then try smudging the ink with your finger. Pens that got the go-ahead were Pentouch®, Souffle, and Gelly Roll®. The Micron® and Permapaque® pens smudged slightly when rubbed.
2
Adhere strips of masking tape to the wax paper. For easier removal, leave a little tape tab extending past the end of the wax paper. Draw designs with your pens and markers. I’m drawing a pineapple design with gold and black Pentouch® markers.
3
Next I’m making an organic flower pattern with Gelly Roll® pens. The purple and blue are Gelly Roll® Classic™, and the pink is a Gelly Roll® Moonlight®. Little leaves will finish these flowers off.
4
Now I’m playing with my Pentouch® paint markers. These are probably my favorite to use on masking tape because they cover so well, and they do it quickly. When doing a pattern, I like to start with the lightest color, because the dark colors layer very nicely over the light ones. I’m doing a simple two-colored stripe.
5
Finally, I’m making a heart pattern with Souffle® pens. These dry to a lighter finish, that’s a little shiny and puffy.
6
Because masking tape has a pretty non-porous surface, you will need to wait a while for the ink to dry completely. Until then, be careful, because it will smear easily.
7
So how to store your new washi tape? You could just roll up the wax paper and secure it with a piece of tape, then remove what you need as you need it. However, I like my supplies to be a little more visible. You could roll it onto a pencil or an empty thread spool. Since I have a lot of these wooden people left over from a previous project, I think I’ll store it on these guys. Lift gently at the tab. If you remove the tape slowly it will come off easily.
How To Make Calendar Icon Rub-Onz
- Rub-Onz transfer sheets
- Scissors
- Printer
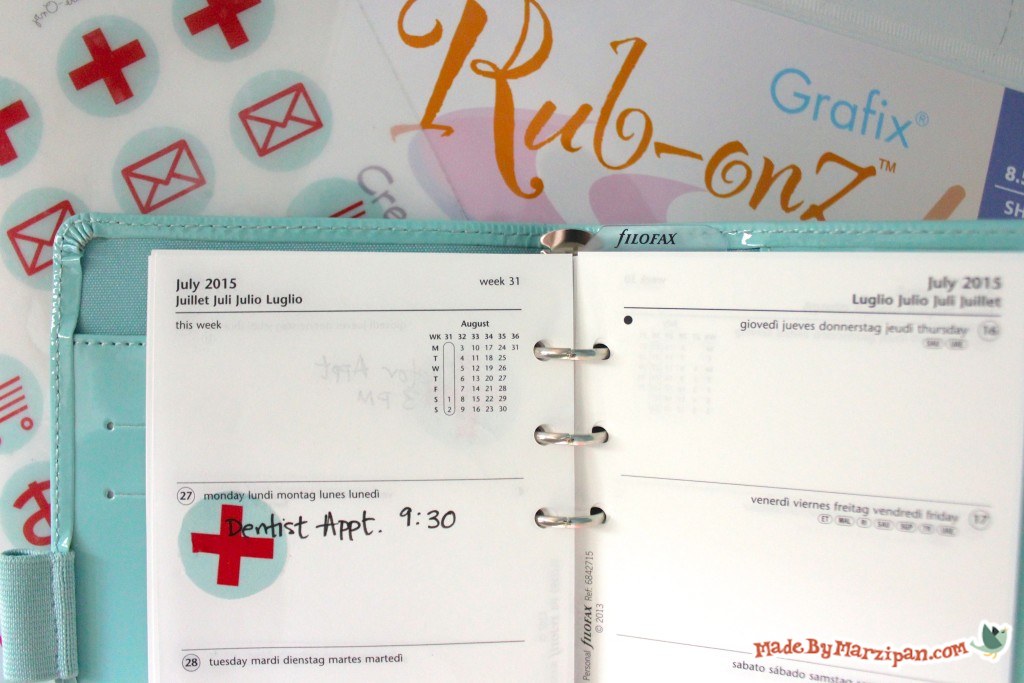
1
I thought it would be fun to make some rub-on Icons for my calendar pages, using Grafix Rub-Onz sheets. I made some simple icons and turned them into a printable PDF, so you can use them too.
2
These come with two different types of sheets: a white sheet you print on, and an adhesive sheet with a plastic covering. You’ll notice that one side of the white sheet is more matte and less shiny. That’s the side you want to print on. Be sure that if you’re printing text, you remember to print using the reverse or mirror image setting. My PDF is already reversed for you, so it’s ready to print.
3
Carefully separate the white liner sheet from the plastic adhesive sheet. The adhesive should be face-up on the table. Slowly lay the printed sheet on top of it, so the inked side is against the adhesive. A stick is included to burnish the back of the film.
4
Cut out the shape you want. Now the trick is to remove the clear plastic covering to expose the adhesive. Sometimes the white film will want to come off instead, but it’s the clear plastic that you need to remove. Adhere to the paper and smooth with your fingertip.
Vellum Pockets
- Vellum
- Scissors
- Hole punch
- Washi tape
1
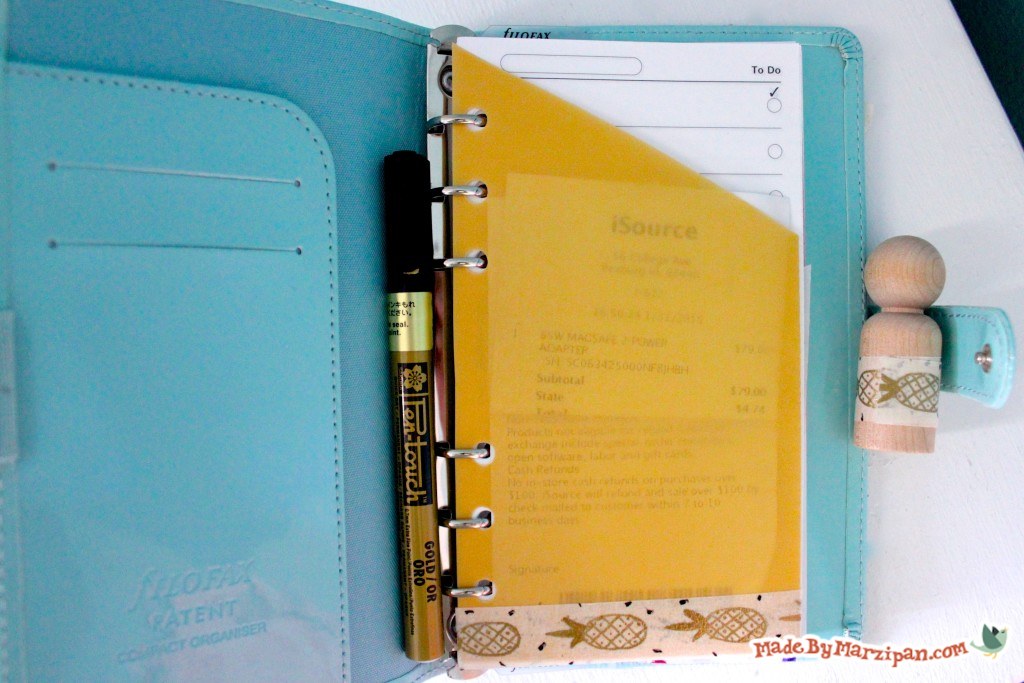
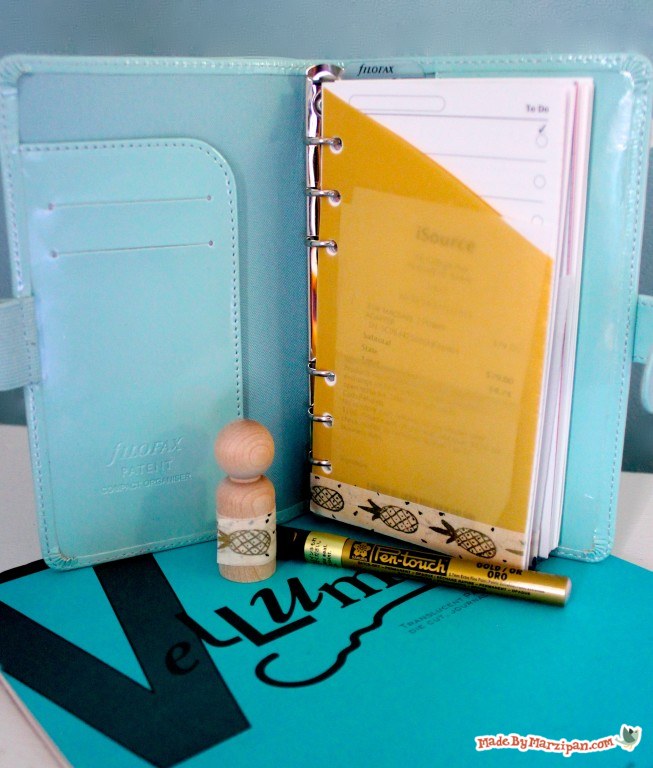
For my last project, I wanted to make some pockets to organize things like receipts and tickets. I thought Vellum would be perfect for this since I can see what’s in it at a glance. Grafix makes a variety of Vellum sheets, including this super cool gold finish.
2
For my size of planner, I can get get two pockets out of one sheet of Vellum. I’m folding it in half lengthwise, then using a calendar page as a template to trim off the excess on the long edge.
3
Cut across the width of the Vellum diagonally.
4
Layer the pockets together with the open edges to the right, then use your calendar page as a template to punch holes.
5
Seal the open bottom edge by adding a washi tape border that extends slightly past the bottom edge of the Vellum. Trim the excess tape from the edge.
This is Part 1 in my Planner Series. For Part II click here.
Made By Marzipan may have received product or payment for this post. Posts may contain affiliate links. Disclosed in accordance with the Federal Trade Commission's 16 CFR, Part 255.

 Finished?
Show it off!

You are so cute.