
You can use paint chips to create inexpensive greeting cards. Here are six designs to get you started.
Tips:
1
I’m keeping these cards simple by using kraft-colored cardstock as the background.
2
Cut sheets of 8.5 x 11 cardstock in half to make standard sized cards. Fold the cut cardstock in half.
How to:
made with
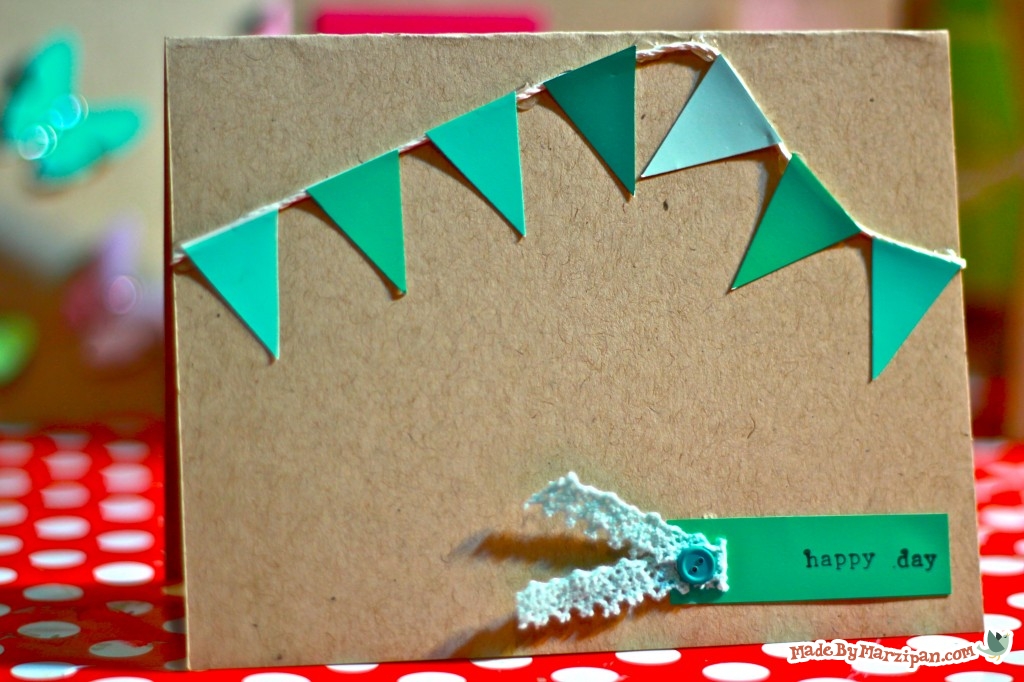
Birthday Bunting
1
Let’s start with a cheerful bunting card. Begin by gluing a piece of twine or ribbon to the background of your card. Trim it to fit. Then cut triangles from a stack of paint chips. Adhere the triangles to the twine.
2
Cut a paint chip rectangle and adhere to the bottom right corner. Stamp or write a sentiment on the chip.
3
Punch a hole on the left side of the rectangle. Add a scrap of ribbon or lace, attaching with a brad.
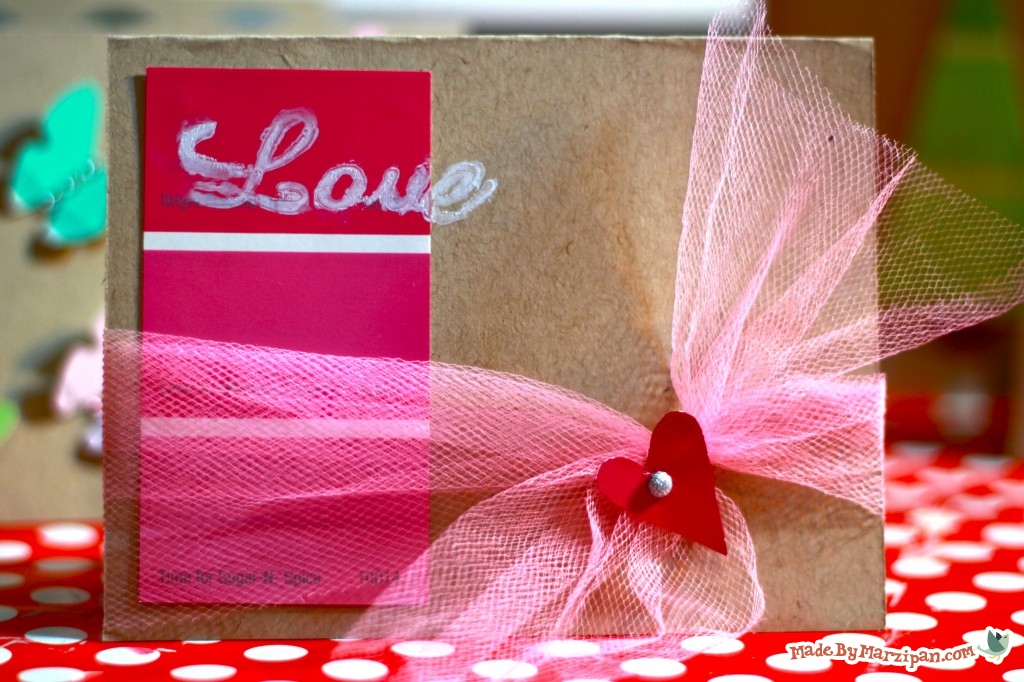
Colorblocked Love Card
1
This next card uses a paint strip as a colorblocked background. Trim a paint strip to fit your card, and adhere to the left side of your card.
2
Tie some tulle or ribbon around the bottom portion of the card.
3
Cut a heart out of a paint chip, and attach to the tulle with a brad or small safety pin.
4
Finally, stamp or write a sentiment across the top left of the card.
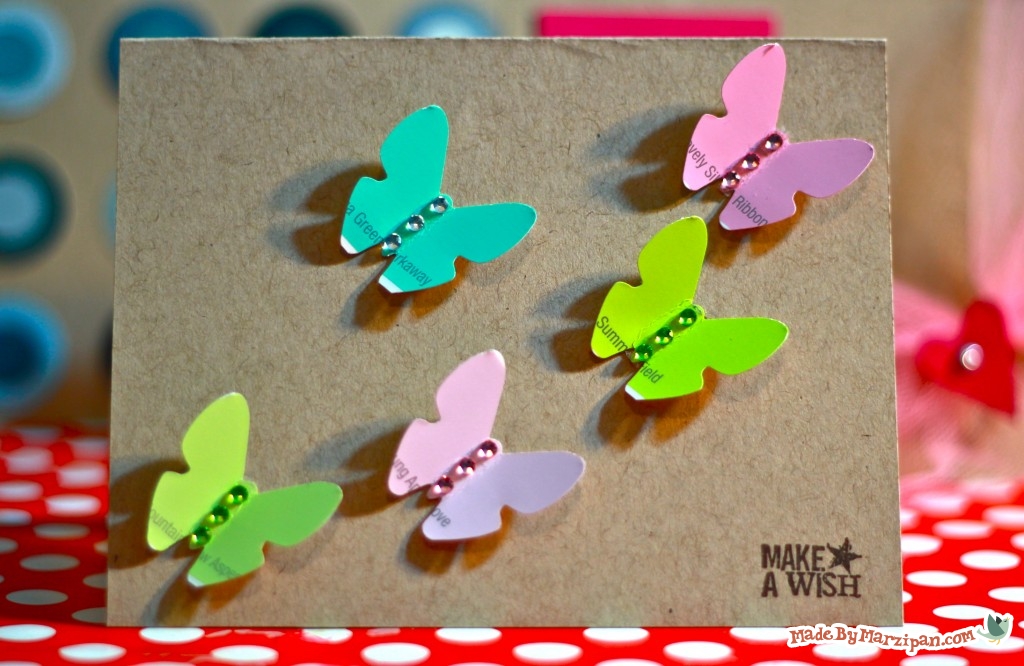
Butterfly Wishes
1
For this card, I’m using a butterfly punch. If you don’t own a butterfly punch, you can print off butterfly clipart and trace it on the back of your paint chips, then cut out. You only need five butterflies so it shouldn’t take long.
2
Add rhinestones to the center of the butterflies, and bend the wings upward.
3
Stamp or write a sentiment in the bottom right corner.
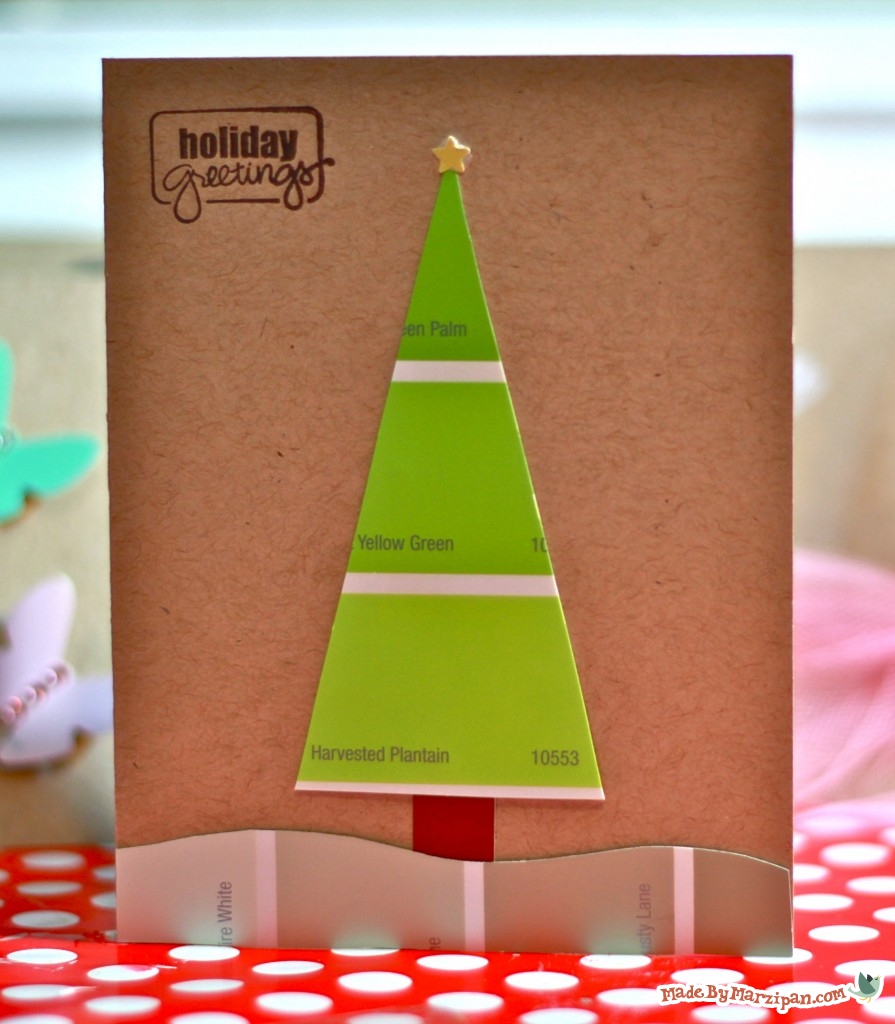
Colorful Christmas Tree
1
This design is super simple. Cut a triangle from a green paint strip and add a brown trunk.
2
Use another paint strip to make snow at the bottom of the card.
3
Add a sentiment in the upper left.
4
If you’d like, you can cut a star for your tree.
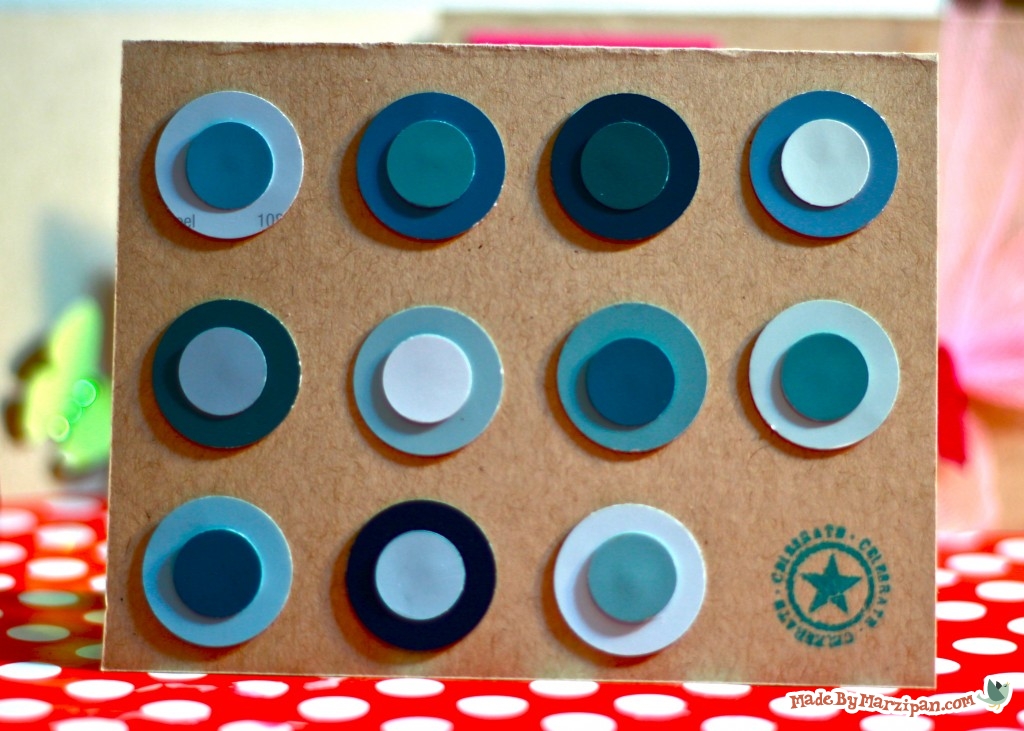
Seeing Spots
1
Punch or trace eleven 1-inch circles.
2
Arrange in a grid on your card, leaving a space on the bottom right to stamp your sentiment.
3
Add 1/2 inch circles to the center of each circle.
Modern Monochromatic Card
1
This last card is a little more complex, but very eye-catching. Begin by cutting a 3-inch circle out of a scrap of paper. Trace this lightly on the center of your card.
2
Next, cut your scrap circle in half. Then cut one of those pieces in half so you have two quarters.
3
Add a glue dot to the curved side of one of these pieces. Then layer the other quarter piece on top of the first. One piece should have its corner pointing upward and the other piece should have the corner pointing downward. Line up the pieces so that together they form a square.
4
Now trim the piece, using the curved lines as a cutting guide. When you’re finished you should have a leaf-shaped piece. This will be your template.
5
Trace your template on the back of paint strips. I chose to keep mine monochromatic, but rainbow colors would be fun too.
6
I used 16 leaf pieces all together. Position four of them along the inside edge of the circle you drew on your card. Then add the other pieces in the same pattern. Trim off the excess.
Click here to find more handmade card inspiration!
Made By Marzipan may have received product or payment for this post. Posts may contain affiliate links. Disclosed in accordance with the Federal Trade Commission's 16 CFR, Part 255.

 Finished?
Show it off!

ya know my paint store has now started putting out less paint color samples so they are not “crafted” and the store supporting our “nasty crafty habits”.