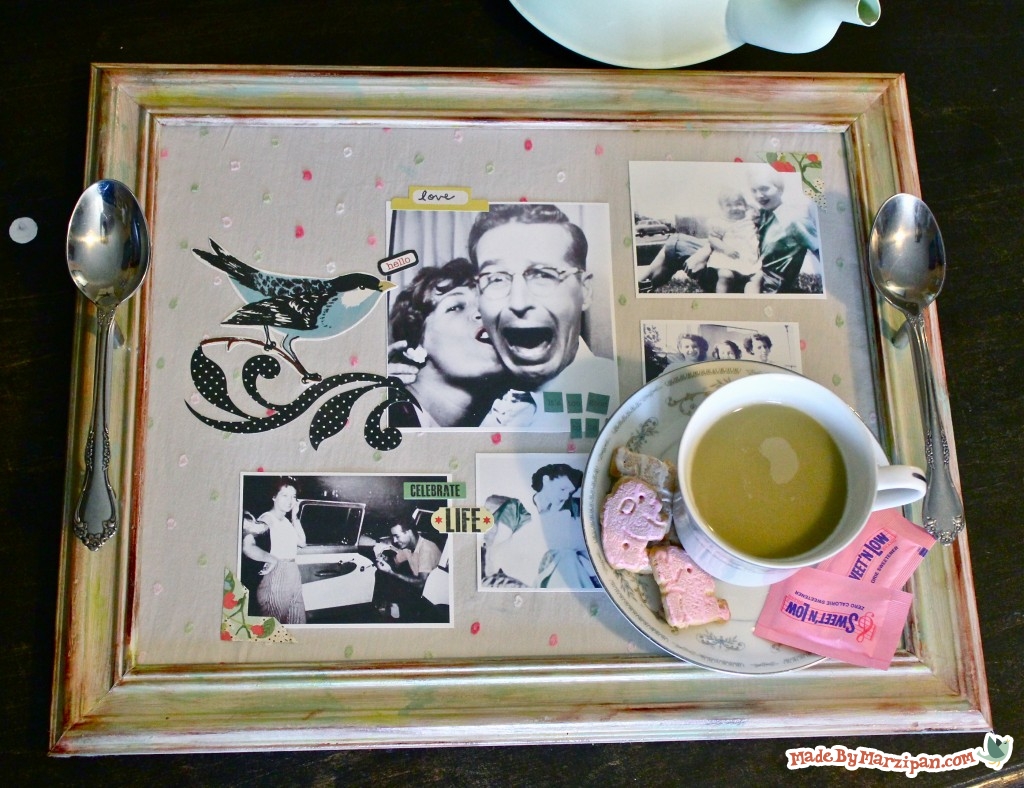
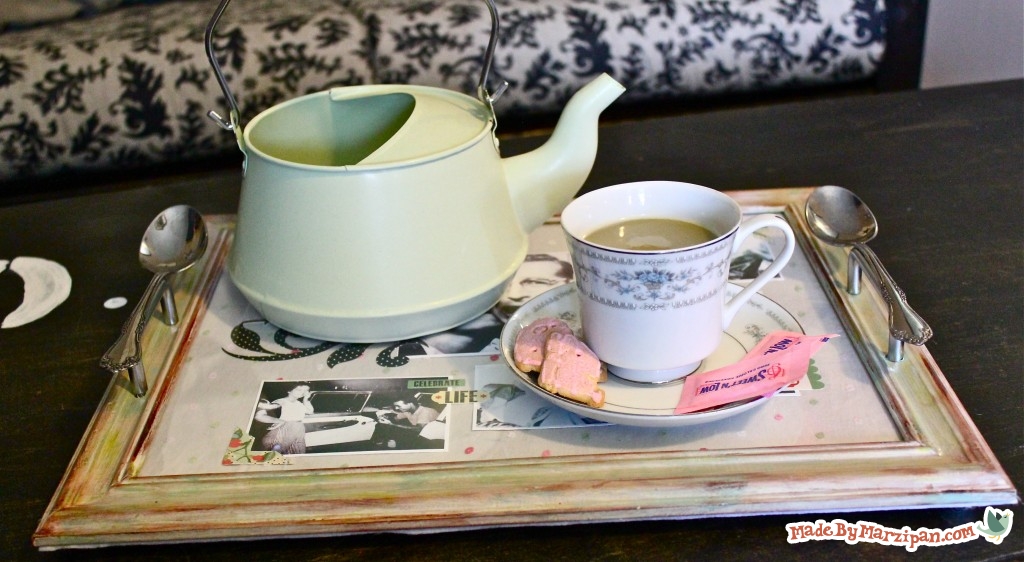
A shabby chic Heirloom Tea Tray is both beautiful and functional, and when it’s created with old family photos, it makes a wonderful conversation piece.
How to:
made with
picture frame
cotton fat quarter
photos
drawer pulls
old spoons (2)
1
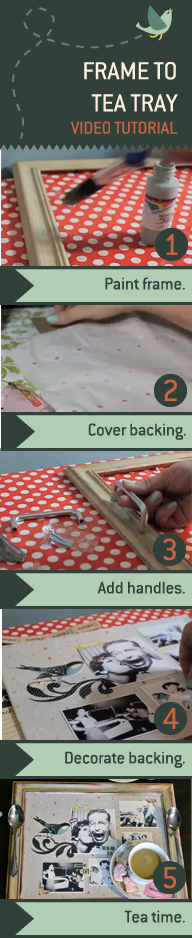
You’ll need a large picture frame. I got this one at Walmart for $5. If you’re looking for one at a secondhand shop, select a frame that has both the glass and the backing. Choose a wood frame rather than plastic. Make sure the frame has a border that’s wide and flat enough to screw on the handles.
2
Begin by removing the glass and backing. Dry-brush the frame with a coat of acrylic paint. Don’t worry about doing it perfectly, leaving a few areas of bare wood will make the frame look antique.
3
While that dries, we can work on the backing. I’m using fabric from a dress my daughter outgrew; I love the raised flocking on the fabric. You can use any fabric you’d like. Lay the fabric over the back piece, then flip it over. Fold the edges up and hot glue in place. Be sure to pull the fabric taut. Don’t worry if it looks messy, it will be covered up later.
4
Now we’ll add another color or two on our frame. When adding these accent colors, paint very sparingly and focus on the raised areas of the frame. This will make it appear as though the accent colors are actually older layers of paint peeking through the first coat.
5
You can age your frame further by lightly rubbing an ink pad over the raised areas of the frame. Use an ink pad that’s black or brown.
6
Finally, we’ll seal the paint with a coat of Mod Podge.
7
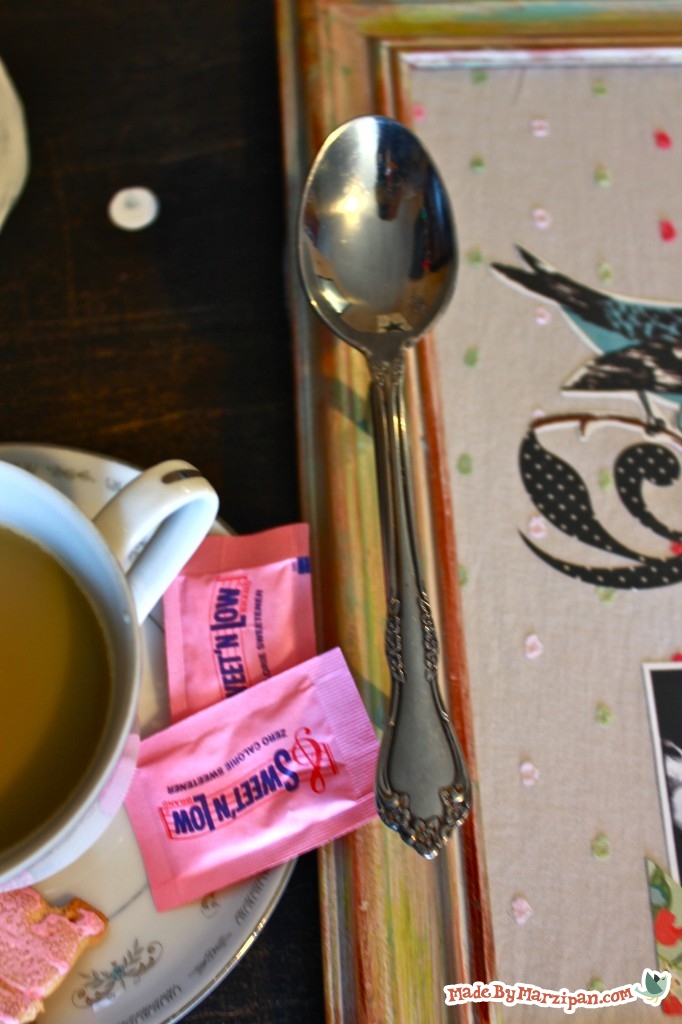
Next we can add the handles. I selected narrow silver handles. Dab the ends of a handle with paint, and press onto the frame. This will leave marks so you can see where to drill. Drill the holes and add the handles. I purchased machine screws that were shorter than the screws that came with my handles, since my frame isn’t very thick.
8
Now we can decorate the backing. Be aware that the frame will cover the edges of your backing, so leave a border of blank space while working. Decorate the backing as you would a scrapbook page, adhering the photos with glue dots and embellishing with stickers and journaling. I chose Echo Park’s “For the Record” line for this project.
9
Add the glass and backing to the frame. Cut a square of felt to cover the back. This looks tidy and will prevent any scratching on the table surface. Seal the backing to the wood with hot glue, then glue the felt to the back of the frame. Flip the frame over and trim off any excess felt.
10
If you’d like, you can add rubber feet in each of the corners; this will raise the tray off the table a bit and keep it level because the screws on the back might make your tray slightly unbalanced.
11
Finally, I’m adding a couple of ornate spoons to my handles. Use an adhesive that can bond metals, such as Gorilla Glue.
Made By Marzipan may have received product or payment for this post. Posts may contain affiliate links. Disclosed in accordance with the Federal Trade Commission's 16 CFR, Part 255.

 Finished?
Show it off!

I love this project, thank you for the tutorial. I am moving away and plan to make some to give as gifts.