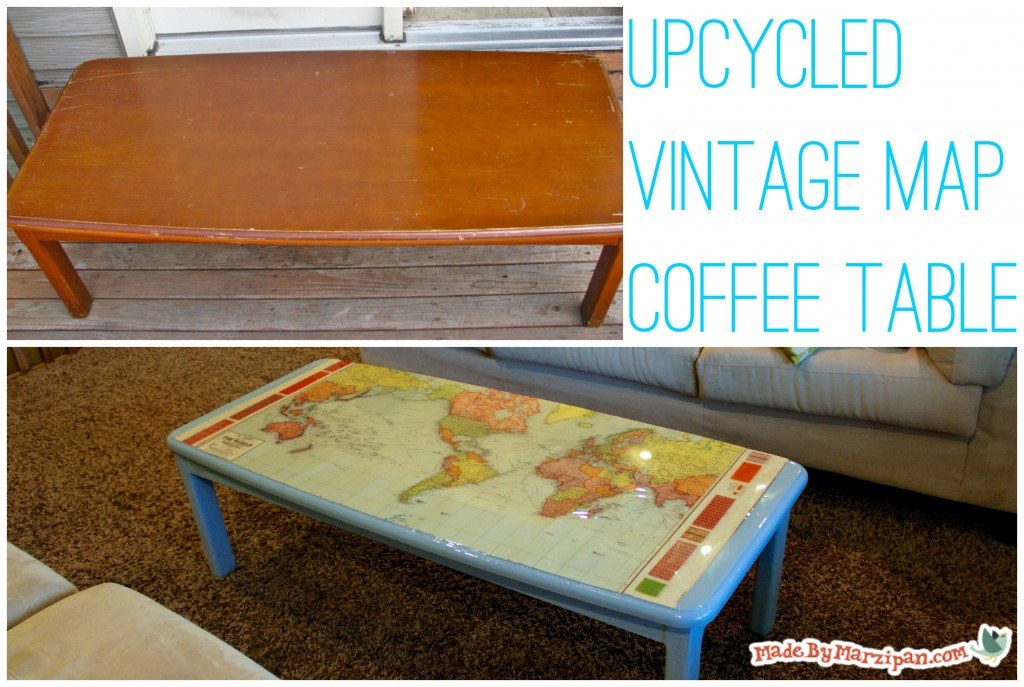
A little chalk paint and a vintage map will give this coffee table a whole new look.
How to:
made with
1
I started by painting the visible areas of the coffee table with chalk paint. There’s no need to sand or prime first when using chalk paint. If you like the finish of your coffee table, you can skip this step.
2
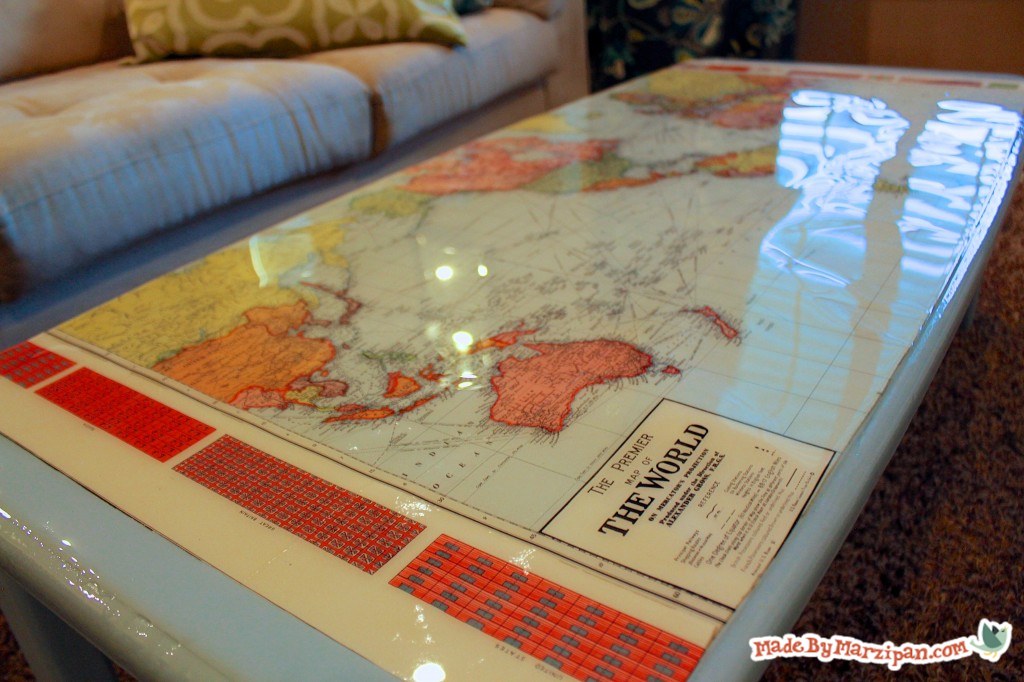
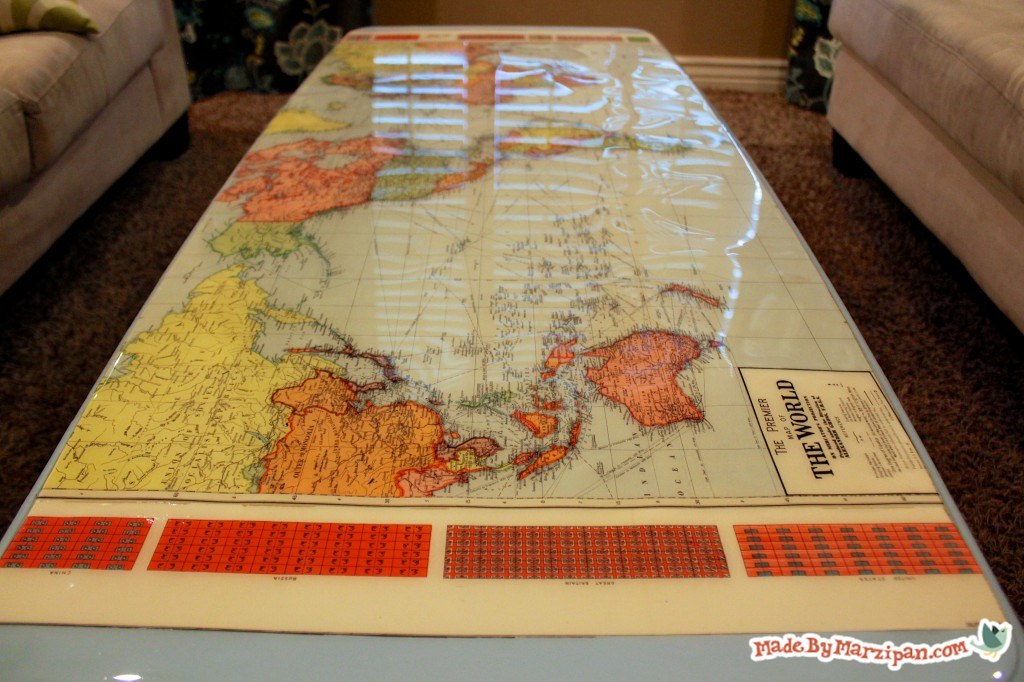
This is the vintage World War II map I’ll be using. If your map is creased from being folded, place a pillowcase on top and iron without steam.
3
Since this map is double-sided, it had to be laminated to prevent the image on back from showing through once the epoxy gets it wet. This can be done at any copy shop. If you’re using a poster or other document without printing on the back, you can skip the lamination, although be aware the epoxy will darken the image somewhat as it becomes wet.
4
Since this table has a beveled edge, we made a template by placing a piece of wrapping paper on top and rubbing around the edge with a crayon. We then traced the template onto the map and trimmed the map to fit the tabletop.
5
We used Scotch double-stick tape to secure the map to the table. However, if I were to do it again, I think I’d try Mod Podge, as I think that would give us more uniform adhesion and minimize any potential wrinkles.
Epoxy
6
We’re coating the table with Envirotex Lite epoxy, which will give it a glossy, glass-like finish. It’s important that you read all the instructions in the box before you begin; this tutorial is not a substitute for their written instructions.But essentially, you mix equal parts of both bottles in a plastic pitcher. (We got ours from the $1 store.) Use a paint stick to stir it very well, scraping the bottom and the sides. As you whip the mixture, it will become slightly opaque, and bubbles will form. You need to mix thoroughly for a few minutes.
7
Set your table up outside or in the garage. Cover the ground with a plastic tablecloth or newspapers, as the epoxy will drip.
8
Flood the surface of the table with the epoxy. The epoxy will level out, but you can help it along by using the paint stick to spread it out towards the edges. Sit at eye level and check to make sure that the whole surface is covered.
9
Use a foam brush to coat the edges of the table and to wipe up any drips.
10
Small bubbles will form as the epoxy settles. If you’re working with a small area, you can blow on these using a straw to pop them. However, I prefer to use a barbecue lighter. Wave it over the surface, without touching the epoxy, to pop the bubbles.
11
After about 30 minutes, new bubbles should subside and most of the dripping should stop. You’ll need to leave the table untouched for at least 8 hours as the epoxy cures.
Click here to see a tutorial on how I used Envirotex Lite to transform my bathroom counters.
Made By Marzipan may have received product or payment for this post. Posts may contain affiliate links. Disclosed in accordance with the Federal Trade Commission's 16 CFR, Part 255.

- Debra McCrimon
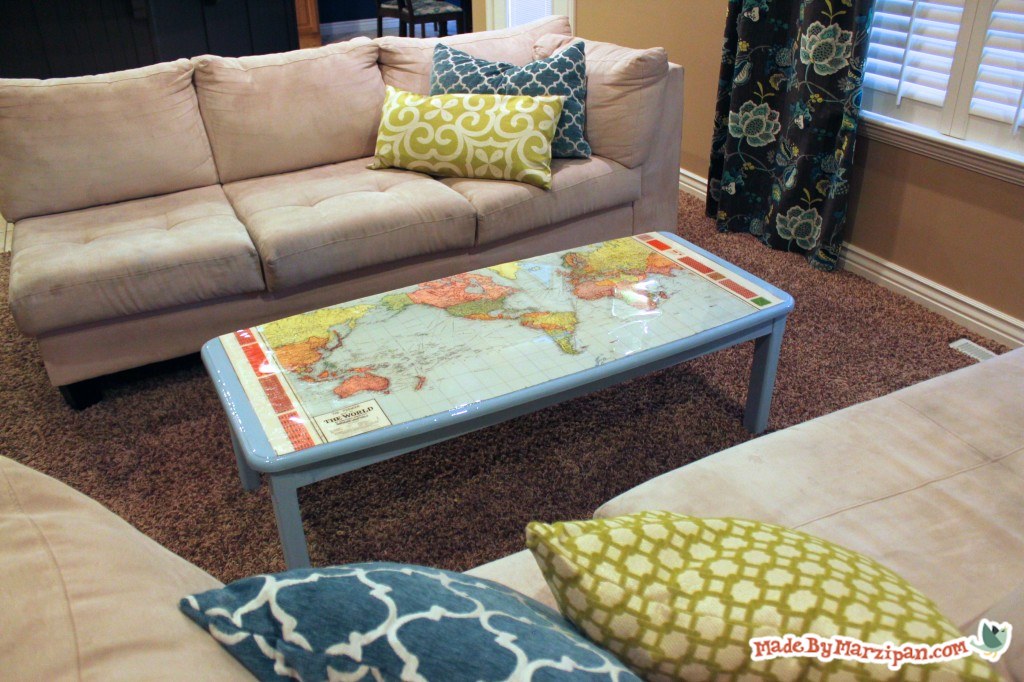
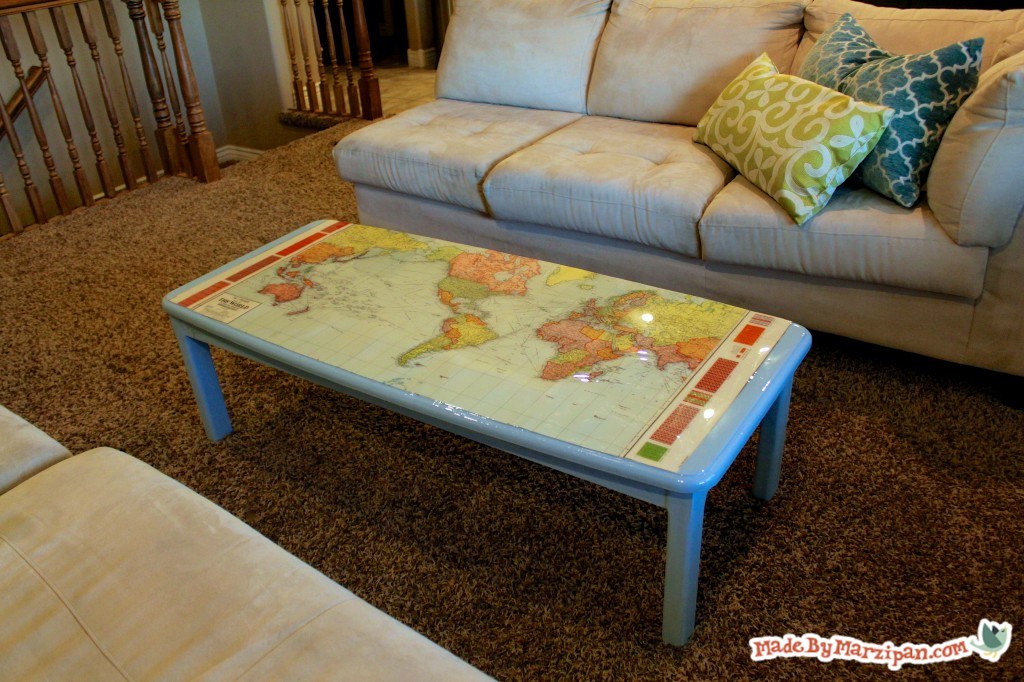
 Finished?
Show it off!

HI!!! I love what you do. A question, I was wondering if it is possible to epoxy a sink or even a bathtub. Have you ever tried this?