1
I tried several different synthetic fabrics, including netting, nylons, and chiffon. The netting and nylons left a noticeable weave pattern. The chiffon made the edges fuzzy. I got the crispest results and most detail when I used organza fabric. (We don’t have a lot of fabric stores around here, so the only organza I found had occasional glitter specks. I had to carefully remove the glitter from the areas that were within my design before inking.)
2
I tried stapling the fabric to old picture frames. That worked, but removing the fabric later was a hassle, and distorted my screen. I found that it was easier and more economical to use an embroidery hoop. Place your fabric in the hoop and tighten, pulling the fabric taut.
3
To transfer the image, I printed my images and then took them to be Xerox copied. The trick here is that you need to use toner ink rather than laser jet. Most home printers are laser jet. Cut out the image and place face down inside the hoop. Put on gloves and use a Q-tip dipped in acetone to firmly rub the back of the paper, transferring the ink to the fabric. This needs to be a strong acetone, which you can find by the house paints in a store that sells home improvement items. Standard nail polish remover will NOT work. (Be sure to cover your work surface, as acetone will remove the finish on most furniture.)
Alternately, you can trace the image through the fabric with a permanent marker or pencil, but I’ve found that marker tends to bleed so you don’t have crisp lines to work with. Pencil can snag in the fabric holes and thus distort your image. So I prefer using this transfer method.
4
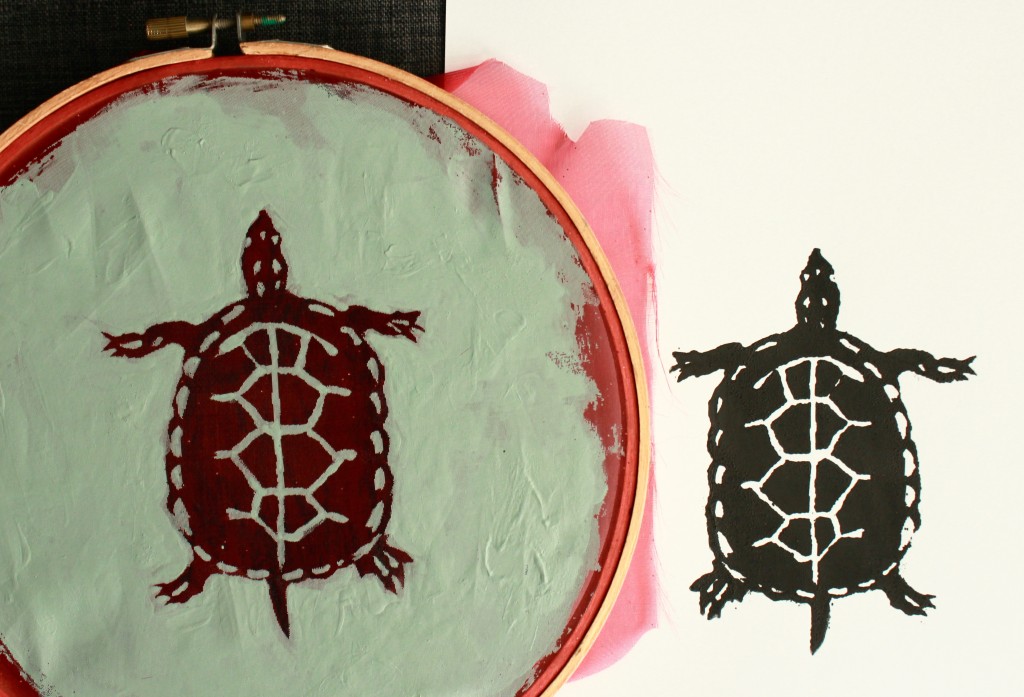
Now we need to block out the negative areas of the screen. I tried several different mediums as a screen filler. The medium I preferred most was latex house paint. Any brand or color will do. I’m using some leftover paint and carefully painting all the areas without ink. In other words, leave all the black areas. The ink will see through any parts that aren’t painted, creating your image. So it’s important to cover it well. Nevertheless, you can expect that the first print you make will have a few small pinholes that you missed. I recommend letting the paint cure overnight, since you’ll be rinsing it with water.
Another popular medium is ModPodge, but it presented some problems. First, it goes on slightly white and dries clear, making it very difficult to see exactly which areas you’ve covered. Secondly, when you rinse out your screen for repeated use, the ModPodge tends to soften and get a little gummy. If you only want to rinse and reuse your design a few times, it will be okay… more than that, and your image begins to disintegrate.
6
I tried a few different inks. First I tried Speedball screen printing ink. This is the ink you’ll want to use if you’re printing onto a fabric surface, because it’s washable. Put a few stripes of ink at the top of your screen. Use an old credit card or a piece of flexible plastic to pull the ink down over your design. You want the excess ink scraped off of the image.
7
You can see a few pinholes that need to be fixed. Use a sink sprayer or a water bottle to clean the ink from your screen. Then touch up the pinholes with more latex paint and allow to dry.
8
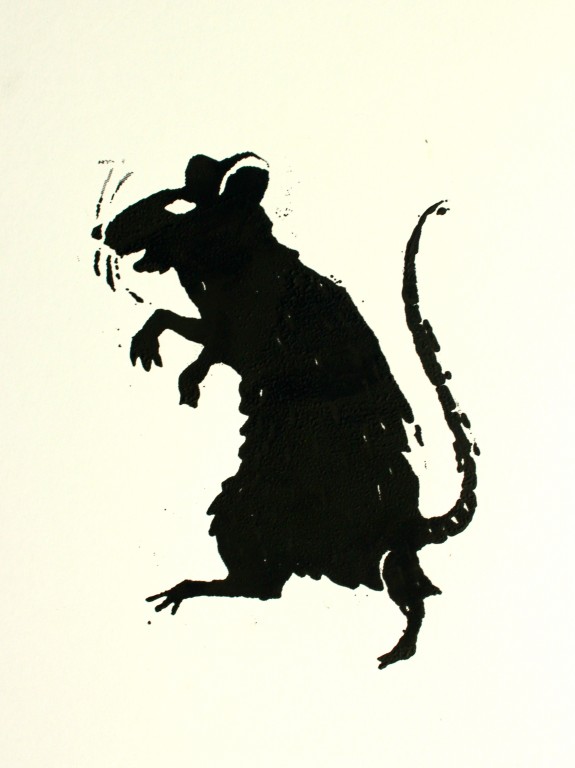
This print looks pretty good, but I also tried Speedball block printing ink and Liquitex Heavy Body acrylic to see what results I’d get. The block printing ink is thinner and gave me fuzzier edges. The thick Heavy Body Acrylic provided the crispest results, and it’s what I’d recommend for prints on paper. A good rule of thumb is, the more detail your design has, the thicker you want your paint to be.
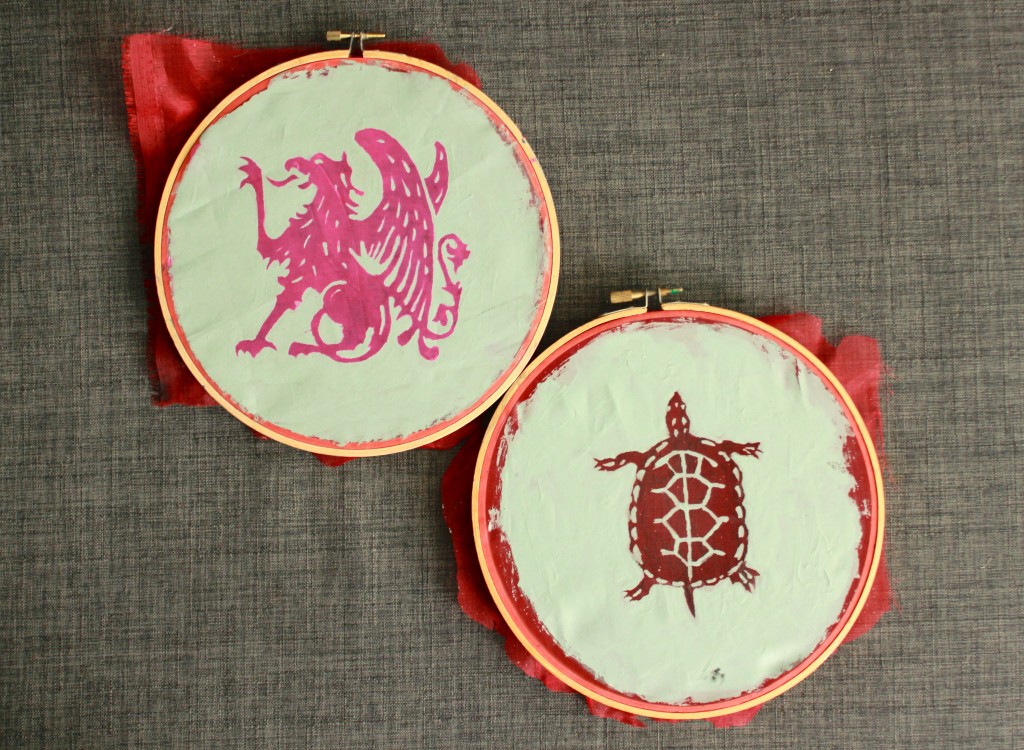
9
These screens can be rinsed and reused repeatedly. You can remove your screen and store it in a file folder, then reuse the hoop for new designs. For more fun, try offsetting and layering different colors to create shadows.
I hope my screen printing experiments have helped you get started in DIY screen printing!


 Finished?
this looks great!!! what are your thoughts on stamping an image with dye or solvent ink? i ask mainly because i’m trying to use items i have already and although acetone and photocopies are not hugely expensive im trying to use up supplies in my stash.
thanks for the tutorial. i love your ideas:)
My only concern would be whether the ink color transfers when applying the paint or ink to the screen. I think it would work, I would probably rinse the screen before the first use just to be sure.