These cards are full of dimension, texture, and sparkle, and look as though they took hours to make. No one has to know they only took minutes!
How to:
made with
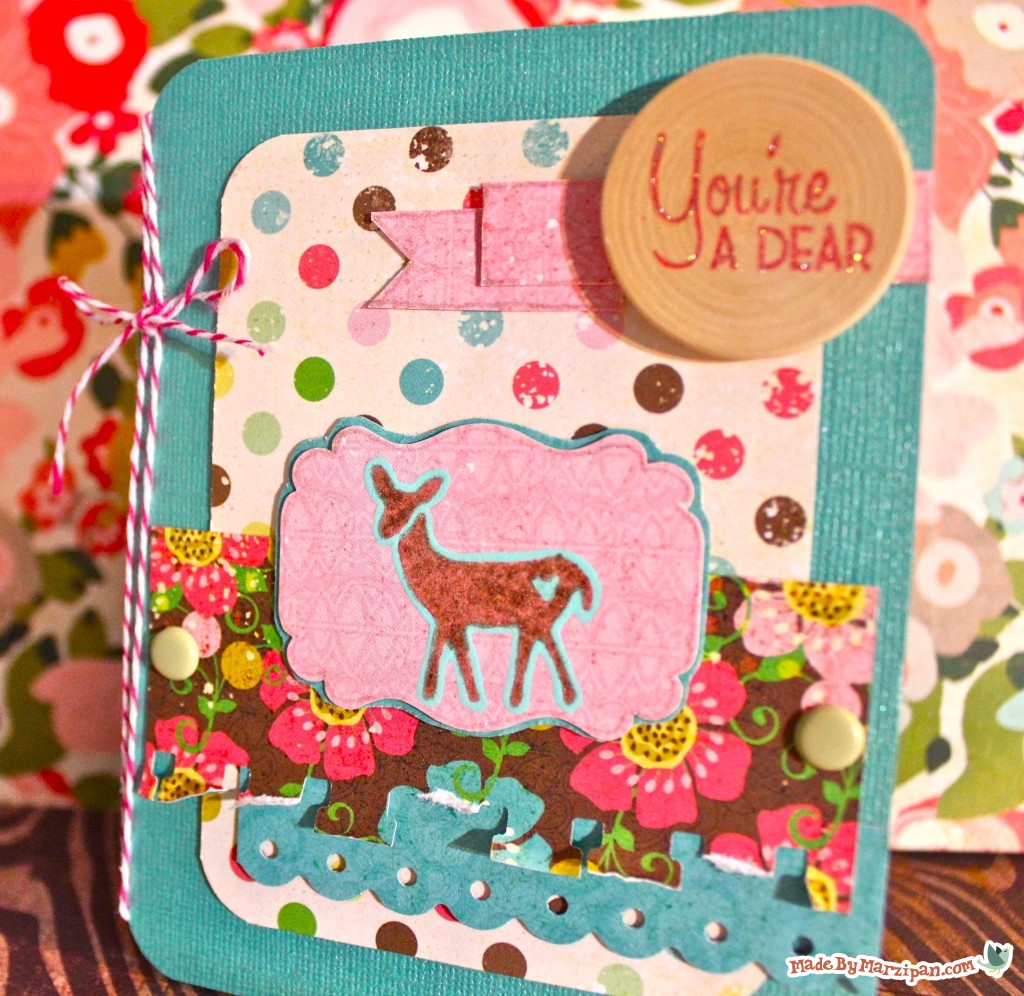
You’re A Dear Card
1
Start by cutting a piece of 8.5 x 11 cardstock in half, then folding it in half to make it standard card size.
2
Round the edges with a corner rounder punch.
3
Cut a piece of patterned paper for the background. Round the corners with your corner punch and adhere to the center front with double-sided adhesive.
4
Cut a 1.5-inch wide strip from coordinating paper. Use a border punch on one edge if desired. Adhere to the bottom third of card.
5
Add brads to each end of the border strip.
6
Stamp an image on solid colored paper. Cut out the image using a paper punch.
7
Now we can add some texture to our stamped image. Instead of using messy embossing powders and a heat gun, try tracing your stamped image with a Sakura Souffle® pen. The ink rises slightly as it dries, producing an effect similar to embossing.
8
This deer would be adorable with fuzzy flocking. But, if you’re using a traditional glue stamp pad, you would only be able to add flocking to the raised outline of the image, when we want the negative portion of the image flocked.
So instead of using a glue pad, try filling in the stamped image with Sakura’s Quickie® Glue Pen. Unlike my glue pad, Sakura’s adhesive goes on blue and dries clear, so you can see precisely where the glue is. It doesn’t run, and it takes only a couple minutes to dry.
9
Shake flocking powder on the image. Pour the excess powder back into the bottle, and blow on the paper to remove any loose powder. Adhere the image to the card.
10
Now stamp a sentiment, on a paper circle or a wooden disk.
11
This card could use a little sparkle, but there’s an easier way to do it than with glitter. Sakura’s Stardust® pens add just the right amount of shimmer, with no caking or flaking. Trace the sentiment using a matching Stardust pen. (Finely stamped text like this is often difficult to read after it’s been treated with regular glitter, but you won’t have that problem with the Stardust® pen.)
12
I’m also going to add a bit of shine to my punched paper by outlining the edge with the clear Stardus®t pen.
13
Cut a small strip of solid paper, and cut it into two. Trim the end of one piece into a V, . then layer the papers to create a banner. You can outline the banner with the Clear Stardust pen. Add it to the upper right corner of the card, then place the stamped sentiment disc on top of it.
14
Tie a piece of baker’s twine or ribbon around the spine of the card. Add a short scalloped border below the first border.
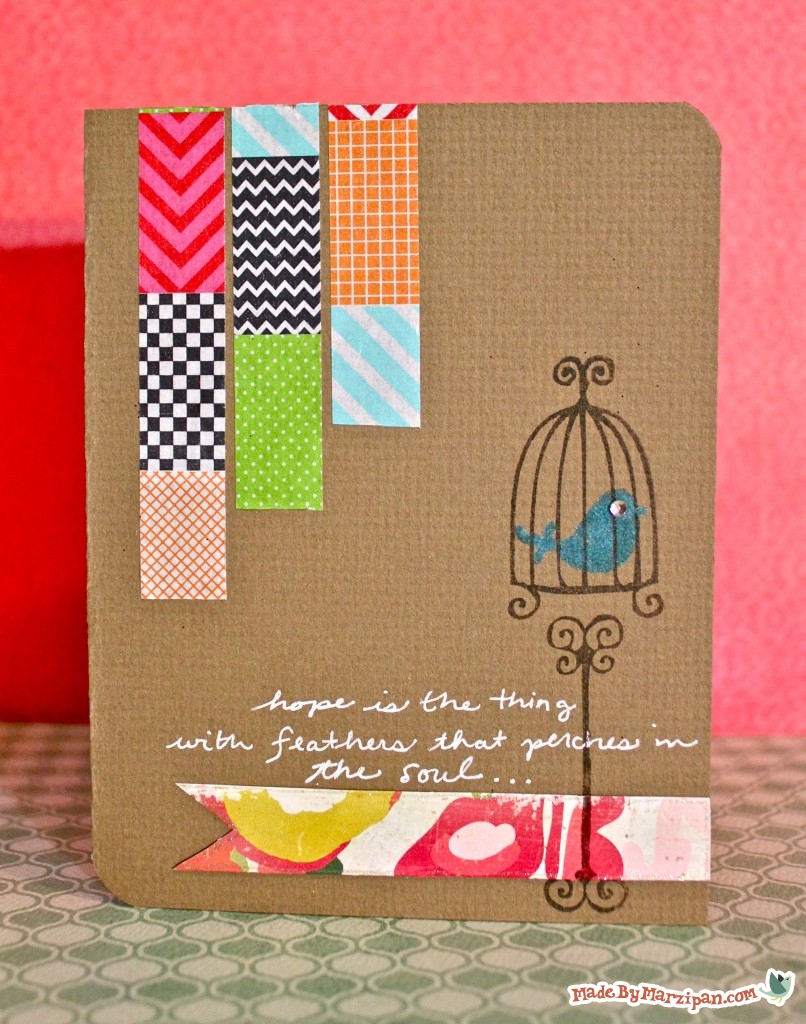
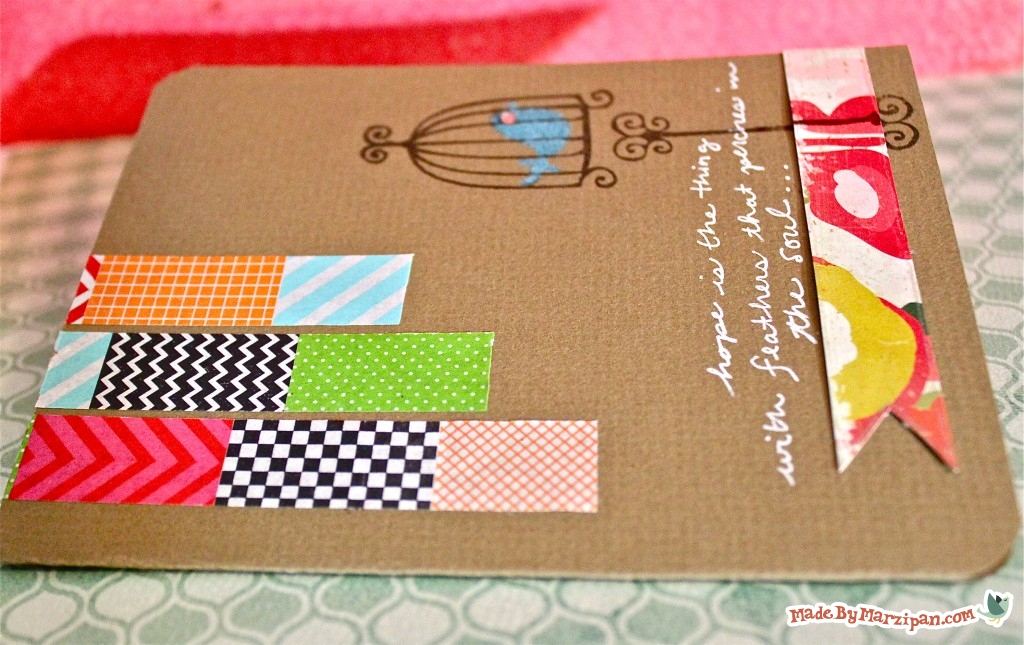
Hope Card
1
Begin by cutting a piece of cardstock to standard card size.
2
Cut a V-notch in the end of a 1-inch wide patterned paper strip, and adhere it near the bottom of the card.
3
Stamp an image on the right side of your card. I bought this bird stamp set for only $1.
4
Stamp a bird over the previous stamp, with a light distress ink, so the bars of the bird cage are still visible.
5
I’d like this bird to be fuzzy, but I don’t want the bars covered. This would be impossible to do with a standard glue pad, but it’s easy with the Quickie® Glue Pen. I just color over my bird, avoiding the stamped bars. A sprinkle of flocking, and it looks like my bird is still behind the cage.
6
Balance the card by staggering strips of colorful tape on the upper left.
7
Write words of a poem as a sentiment, using a white Gelly Roll® pen.
8
Give the bird a rhinestone eye.
9
If desired, round opposing corners of the card for interest.
10
Outline the patterned paper strip with the shimmery clear Stardust® pen.
Made By Marzipan may have received product or payment for this post. Posts may contain affiliate links. Disclosed in accordance with the Federal Trade Commission's 16 CFR, Part 255.

 Finished?
Show it off!
