Making the Patio
I used rectangle concrete pavers from Wal-Mart, $1.29 each. The sand can also be purchased there.
1
First, find a location that isn’t too close to buildings or trees.
2
Use spray paint to mark the outline of the patio area.
3
Dig up the sod. Water the area well first for easier removal. I recommend making your patio level with the surrounding grass, so you can mow over it.
4
Tamp the dirt well. Use a level.
5
Pour a layer of sand over the dirt, about an inch deep. This helps when leveling the pavers, and aids in drainage. Rake the sand so it lies evenly.
6
Lay the pavers. I chose to alternate between vertical and horizontal rows.
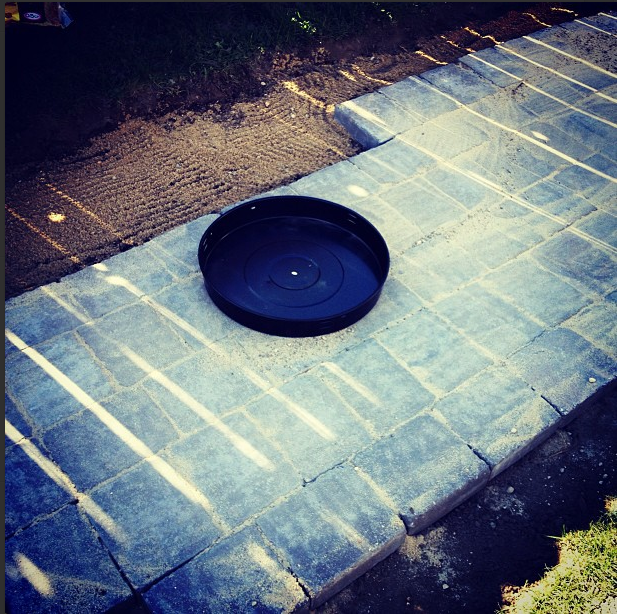
This was the pan I originally planned to use. Too small & shallow!
Making the Bench
I used Oldcastle Natural Impressions retaining wall blocks from Home Depot. They were on sale for $1.99 each, normally $2.68.

- Oldcastle Natural Impressions retaining wall block
1
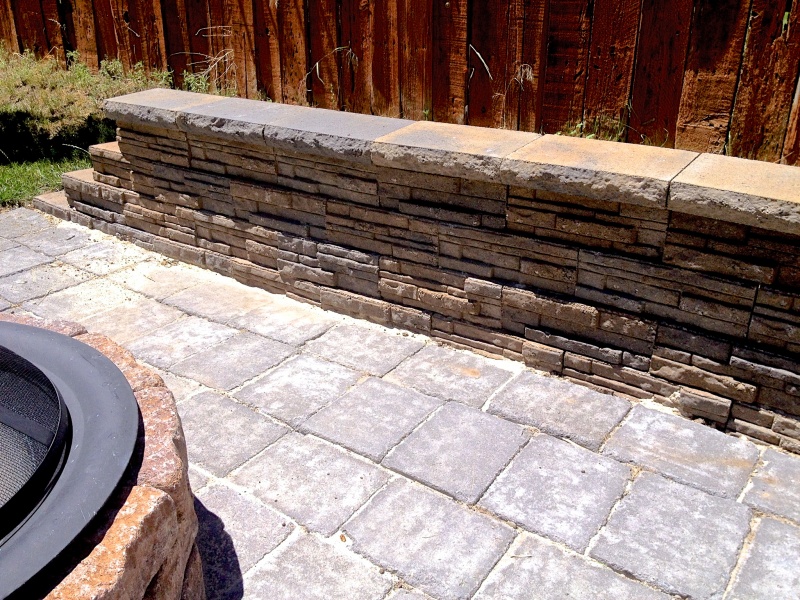
I placed this wall bench at the edge of the patio. You will need to dig a few inches down to set the first row of stones. Again, tamp the dirt and check that it’s level, then add a layer of sand.
2
Retaining wall blocks need to be staggered. You can cut some of the blocks in half if you want a straight edge, or you can place them like I did, with a staircase edge. (I tried cutting these blocks with a chisel and hammer and wasn’t making much progress. So if you want them cut, you’ll need to use a power saw with a masonry blade, or a concrete cutter.)

- A view from the back of the wall. The back isn’t too pretty, so I placed my wall along a fence.
3
Retaining wall blocks have a lip on the back to secure them. If you’re only stacking the blocks 3 or 4 high, there is no need for adhesive between the blocks. You will notice that as you stack, the lip causes the wall to lean backwards slightly. This is intentional and desired and actually makes the wall more stable.

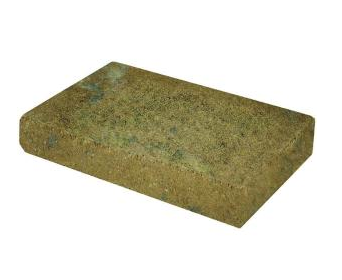
Retaining wall cap block.
4
Finish the wall by adding retaining wall cap slabs. I used Home Depot’s
Concrete Victorian Blend Garden Wall Blocks. You will need to use
adhesive (and a caulking gun) to secure these.

5
The wall will be stronger if you can build up dirt behind it. My wall was on a slight hill, so I added some dirt to even out the slope.
Building the Fire Pit
1
First, you need a fire pan that will withstand high temperatures. I started by thinking creatively… what could I use? In my research I found that galvanized metal gives off dangerous fumes when heated, so my original idea of using a big wash tub wasn’t a good one.
Next I found a fire bowl that was part of a small grill. But hubby vetoed it because he thought it was too small and shallow.
Then I found a large fire pit bowl at Lowe’s for only $30, and decided that was a pretty good deal. I liked that I wouldn’t have to worry about dangerous fumes from a homemade pan, plus it came with a nice cover. I decided to build a stone wall instead of using the base that was included.
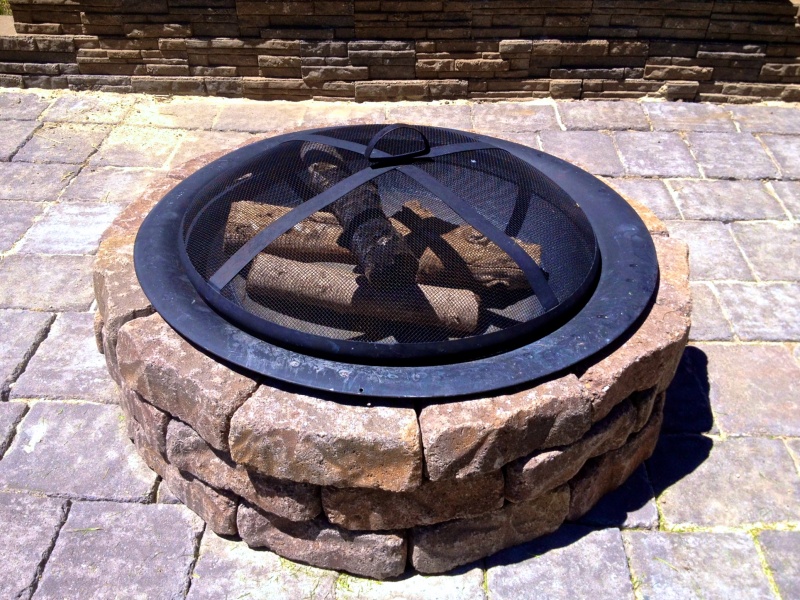
2
To build the stone wall, you’ll need pavers that are cut in a trapezoid shape. This allows you to make a circle without gaps. The smaller the stones, the easier it is to get a circle that fits your fire bowl precisely. I used
these 9 x 6 blocks from Home Depot. They were on sale for $1.33 each (normally $2.
54
.

- Use small, trapezoid-shaped stones to create a gap-free ring.
3
Begin by laying the first circle of stones. Set the fire bowl in the center and adjust the stones so that the pan’s lip overlaps the edge of the stones. These blocks should also be staggered, so start the next row by centering a stone between the two stones beneath it.
4
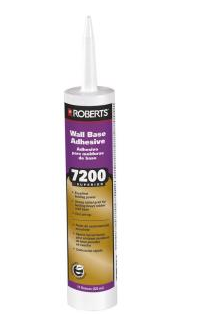
Use adhesive to secure the blocks. I wanted to be able to easily disassemble the fire ring in the future, so I was careful about adhesive placement, and only adhered the blocks in groups of two. Put the adhesive towards the back of the stones so it isn’t visible from the outside of the fire ring. (See the goop that looks like peanut butter in the picture? That’s the adhesive.)

5
Stack the stones 3 high. Add the fire bowl to the center.
6
Finally, sweep the whole patio with sand to fill in any small gaps between the stones.

I did this project entirely by myself in a week of afternoons. The total cost for all supplies was $300.

 Finished?
Hey I love the new layout on your web site! Everything is organized so I can find whatever I’m looking for much easier. I’m planning on making a fire ring on our little farm here in KY and will be using your instructions. Thank you Marzi!
Hi am about to do my patio &more &delighted to find this …..on my own here so all advice &help is brilliant …..thankyou soooo much keep up this !
God Bless U & all Urs ♥
Yay! Post pics when you’re done :)
So pleased I have found your website. I started off my looking to make childrens clothes and eneded up looking at how to build your fire pit. What a clever girl you are. I will soon be following you on Twitter etc
Kind Regards Anna Lupton
Carr House Farm
Ampleforth, York
England