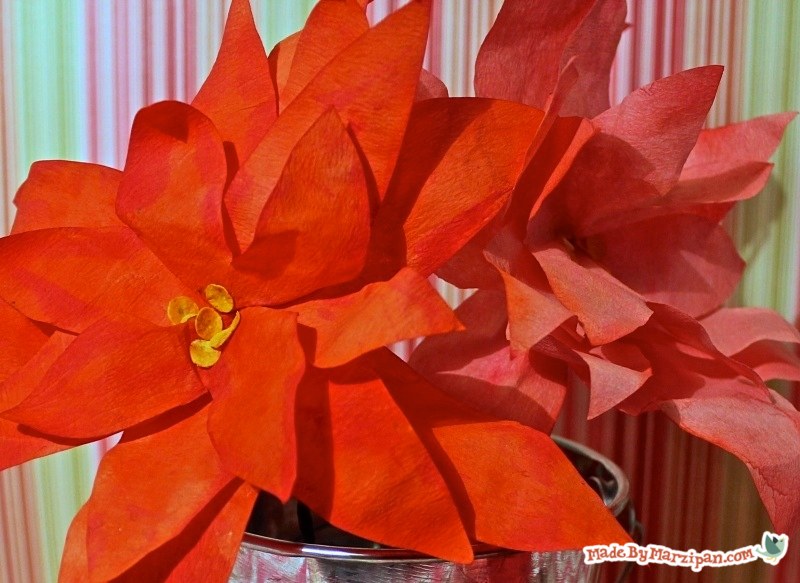

Use coffee filters to make realistic, long-lasting poinsettias. Free template!
How to:
1
Begin by printing out the free two-page Coffee Filter Poinsettia template (click here).
2
Note how the cone coffee filters fit over the template. Be sure the crimped edge of the filter matches up with the dashed lines.
3
I made the lines extra bold so that you’ll be able to trace them. Make sure you have good lighting, then use a pencil to trace the petals onto three coffee filters. (You may find it helpful to label the petals along the bottom edge.)
4
Cut out all of the pieces. You don’t need to punch out the small circles yet, just be sure to save that portion of the coffee filter for later. Note how you have one A piece, 3 B pieces, and 3 C pieces.
5
Begin by unfolding the A piece. Poke a piece of floral wire up through the center of the A piece.
6
Extend the wire upward about 2.5 inches, then bend that portion of the wire in half. Poke the end of the curved wire downward into the center of the A piece, creating a new hole close to the first. Gently pull downward so the wire is flush with the center of the A piece. This small loop will keep the flower from sliding down the wire stem.
7
Twist the remainder of the bent wire piece tightly around the longer piece of wire.
8
Cut a piece of floral tape to about 5 inches. Pinch and gather the underside of the A piece, then wrap the floral tape around the base of the A piece. Wrap tightly, stretching the tape while working down the wire stem.
9
Next we’ll add the B petals. Spread a petal apart, and poke the wire stem down through the center. The hole will need to widen as you reach the tape and twisted wire, so be gentle. Position the petal so that it lies between two of the petals on the A piece.
10
Add the second and third B petals as you did the first. Turn the petals as needed to space them evenly between the petals of the A piece.
11
Pinch and wrap the base of the B pieces as you did the A piece.
12
Finally, add the large C petals as you did the B petals. Again, position them to fill the empty spaces between the previous petals. Wrap the wire stem once more.
Painting the Poinsettias
Now that our poinsettia is assembled, we need to paint it. Painting changes the texture of the filters, making them thicker and easier to shape. So even if you want your flowers to be white, you’ll still need to paint them using white paint.
1
I’m using my favorite watercolors, Koi® Tube Watercolors by Sakura. This kit comes with 18 colors for blending. Add a little water to a bowl, then add the watercolor paint. Stir with a paintbrush.
2
Hold the flower by the wire stem and dip it into the paint. The coffee filters will quickly absorb the color. Wipe the flower gently against the side of the bowl to remove excess paint.
3
Place on a paper towel for a couple of minutes, then hang upside down to dry. You can dry these overnight, or you can use a blowdryer if you’re impatient.
4
Remember those dots on the template? Paint both the front and back of that coffee filter scrap yellow, then allow to dry completely. Use a single hole punch to make the center dots.
5
Once your poinsettia is dry, you can shape the petals. You can wrap the point of a petal around a pencil to give the petals form. The flower will hold the shape you give it.
6
Finally, add the yellow dots to the center of the poinsettia. My favorite adhesive for this is Sakura’s Quickie Glue™ Pen, because you can draw a bit of glue precisely where you want it, and it won’t spread anywhere else.
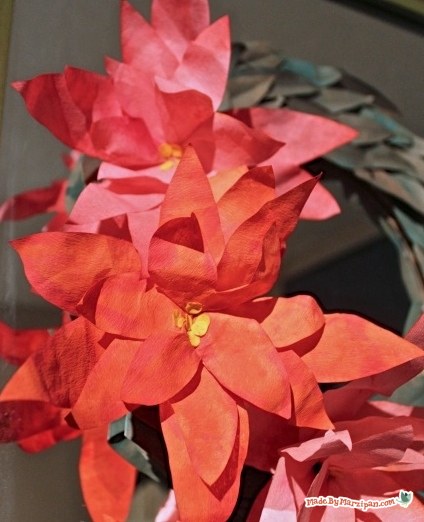
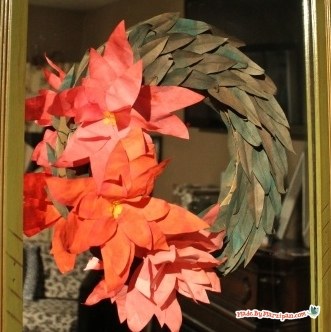
Add these poinsettias to an indoor wreath! Click here to learn how to make the Paper Bag Leaf Wreath shown in the above photos.
Made By Marzipan may have received product or payment for this post. Posts may contain affiliate links. Disclosed in accordance with the Federal Trade Commission's 16 CFR, Part 255.

 Finished?
Show it off!
